Configuring Windchill with SQL Server Database to Use JDBC over SSL
|
|
Attention: This topic refers to the Windchill Server Host as the “client” and the SQL Server Database Host on which the SQL Server is running is referred to as the “server”. In the context of database interactions, the Windchill server acts as a client to the database server.
|
The high-level steps for configuring Microsoft SQL Server 2016 for encrypted communication with its client (the Windchill server) using Microsoft JDBC Driver for SQL Server is as follows:
1. Create a self-signed certificate using IIS Manager
2. Configure SQL Server 2016 using SQL Server Configuration Manager
3. Export Certificate
4. Import Certificate to the Windchill server
5. Configure Windchill for JDBC over SSL
The subsequent sections describe the procedure for each of these steps.
Windchill 11.1 F000 release and later support this feature. For more information on SSL Support for Microsoft SQL Server 2016, see
https://docs.microsoft.com/en-us/sql/connect/jdbc/understanding-ssl-support.
Creating a Self-Signed Certificate
Perform the following steps to create a self-signed certificate using IIS Manager. This certificate can be used as the SSL certificate for encryption.
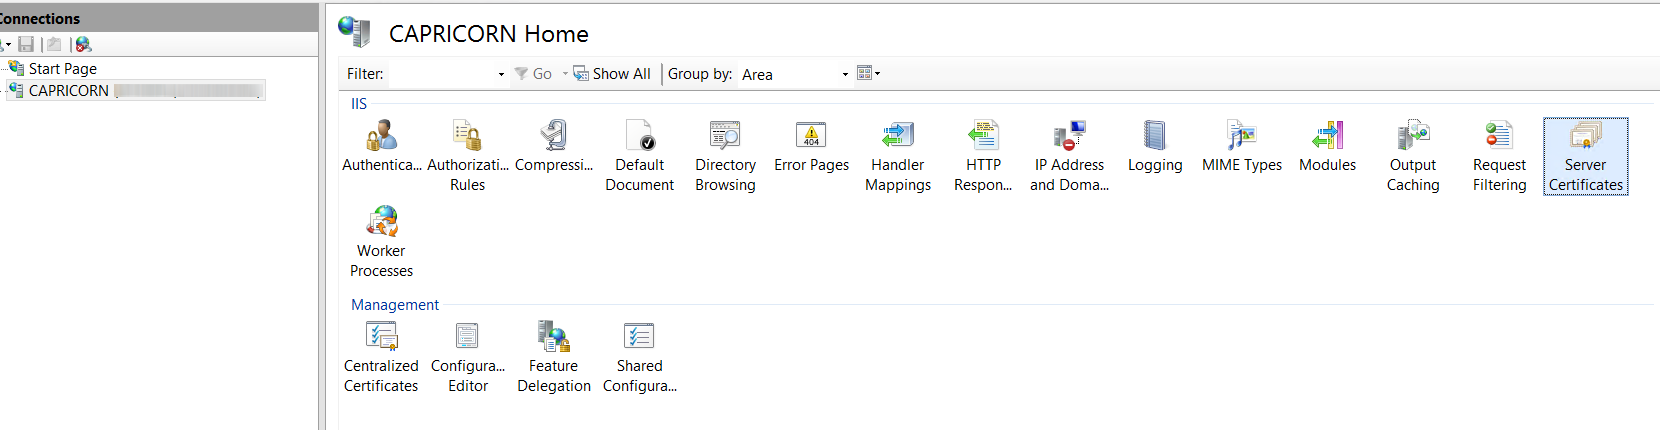
1. Open the IIS Manager.
2. In Connections view, click your instance name. In this example, the instance name is CAPRICORN.
3. In the features view, double-click Server Certificates.
4. In the Actions pane, click Create Self-Signed Certificate.
5. On the Create Self-Signed Certificate page, type a name for the certificate in the Specify a friendly name for the certificate box, and then click OK.
The new self-signed certificate is displayed in the Server Certificates view.
Configuring SQL Server 2016 using SQL Server Configuration Manager
Perform the following steps to configure SQL Server 2016:
1. Open SQL Server Configuration Manager, this utility comes with SQL Server 2016 installation .
2. Navigate to SQL Server Network Configuration, and click Protocols for <YOUR_INSTANCE_NAME>. Ensure that TCP/IP is enabled.
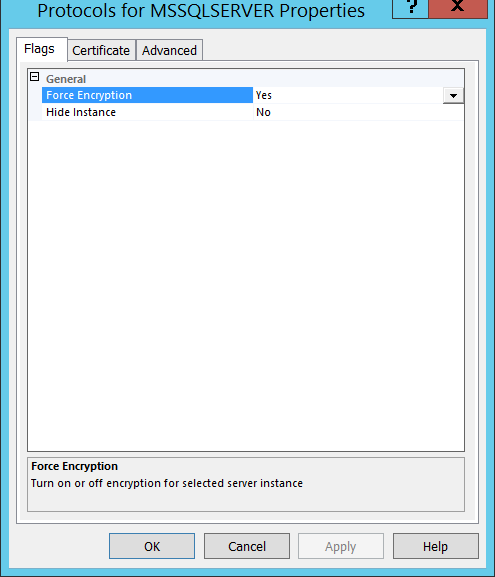
3. Right-click “Protocols for <YOUR_INSTANCE_NAME>” and click Properties.
4. On the Flags tab, set Force Encryption value to Yes.
If the SQL Server instance is configured to force SSL encryption, the driver automatically enables SSL encryption when running on Java Virtual Machine. Otherwise, the connection terminates and the driver raises an error. There will always be only one port on SQL Server to serve the traffic.
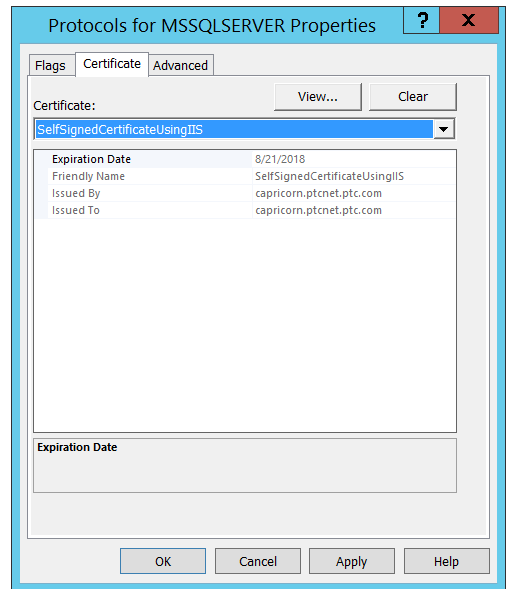
5. On the Certificate tab, select the desired certificate from the drop-down list, and then click OK.
6. Restart the SQL Server service.
To verify that the certificate loaded properly, review the ERRORLOG file located in the log directory of SQL Server instance that is running.
For location of the log directory, perform the following steps:
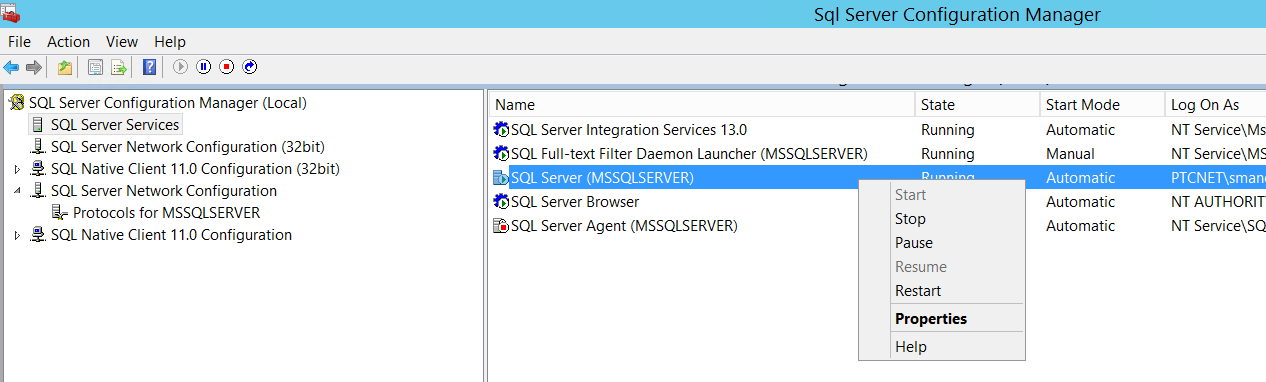
1. Launch SQL Server Configuration Manageron the host which is running SQL Server 2016.
2. Click SQL Server Services.
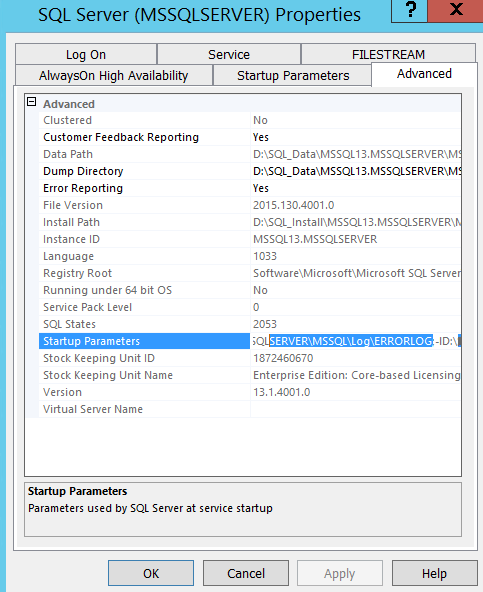
3. In the right pane, right-click SQL Server <your_instance_name> and select Properties.
4. On the SQL Server Properties dialog box, on the Advanced tab, verify that the Startup Parameters value displays the ERRORLOG file path.
Exporting the Self-Signed Certificate on the SQL Server System
Perform the following steps to export the certificate:
1. On the Start menu, click Run,
2. In the Open box, type MMC and click OK.
3. In the MMC console, on the File menu, click Add/Remove Snap-in.
4. In the Add/Remove Snap-in dialog box, click Add.
5. In the Add Standalone Snap-in dialog box, click Certificates, and click Add.
6. In the Certificates snap-in dialog box, click Computer account, and click Finish.
7. In the Add Standalone Snap-indialog box, click Close.
8. In the Add/Remove Snap-indialog box, click OK.
9. In the Certificates snap-in, on the left pane, navigate to > . The certificate that was created using IIS is displayed.
10. Right-click the certificate, go to > and export the certificate without private key and click Next.
11. Select the appropriate format type, and click Next.
12. Specify the name of the file in which you want to export the certificate, and click Next.
13. Review the settings and click Finish. The Export was successful dialog box appears.
Importing the Self-Signed Certificate in the DB Client (the Windchill server)
Perform the following steps to import the self-signed certificate into Java Keystore using the keytool utility from Java:
1. Browse to the exported file on Client Machine and save it to a local disk. Ensure that the location has Read permission.
2. On client machine, open the Command Prompt and navigate to {wt.jdk}/jre/lib/security. The wt.jdk value is available in the wt.properties file located at WT_HOME/codebase.
3. Run the following command to import source keystore:keytool -importcert -file d:\Users\jsmith\Documents\02PTC\Certs\SelfSignedCertFromIISForDemo.pfx.cer -keystore cacerts -alias "SELF-SIGNED-IIS-DEMO-CERT"
Where,
• SelfSignedCertFromIISForDemo.pfx.cer: Specifies the certificate file that was exported from SQL Server.
• cacerts: Specifies the file path of the default keystore which is located at {wt.jdk}/jre/lib/security.
• alias: Specifies an alias. This is optional. Alias is required when you want to delete the certificate from the keystore.
After completing this procedure, your client machine is ready with the server exported certificate with its keystore.
Configuring Windchill to use JDBC over SSL
Perform the following steps to configure the Windchill server to use JDBC over SSL with SQL Server,
1. Open the db.properties file located at WT_HOME/db.
2. Configure the following properties as follows:
wt.pom.dbConnectionPropertiesNameList=encrypt,javax.net.ssl.trustStore,
wt.pom.dbConnectionPropertiesValueList=true,{wt.jdk}/jre/lib/security \\cacerts
3. Restart Windchill.
This configuration enables communication between Windchill and SQL Server database using JDBC over SSL.
For more information on configuring a client connection, see the following documentation from Microsoft: