Manage Design Directory
The Windchill Workgroup Manager for ECAD previously introduced the concept of the Workspace Local Directory (WLD) which defined a physical location of the workspace. TheManage Design Directory is additional functionality to compliment the WLD.
The Manage Design Directory action gives you the ability to map the design object to point at the design directory of your choosing to populate the workspace. The Design Directory can also be set during the initial checkin activity using the ECAD Check In action. The WLD can continue to be used, but the Manage Design Directory provides additional functionality.
|
|
The following characters must not be used in the Manage Design Directory name.
• !~@#$^%&()
|
The three most common design workflows that deliver a method to set the Design Directory are:
• New design — This design has never been checked into Windchill.
The new design workflow delivers content for the first time to Windchill by way of an initial check in using the ECAD Check In action
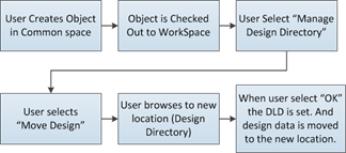
• Legacy design or already existing designs—This design is in Windchill and the designer would like to check out and set the Design Local Directory.
The Legacy design workflow utilizes the Manage Design Directory action. When a design is checked out, the content is placed in the workspace local directory. The data stays there until the user initiates the Manage Design Directory action which in turn moves the data to a design directory specified by the user.
• Modified design — The design is in Windchill and has been modified.
The design has been modified and an ECAD Check In action has been started. The browse button is present if you want to use design data from a different location and then set that as the new design directory.
Menus
Access to Manage Design Directory can be achieved by one of two methods.
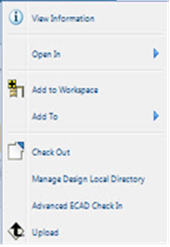
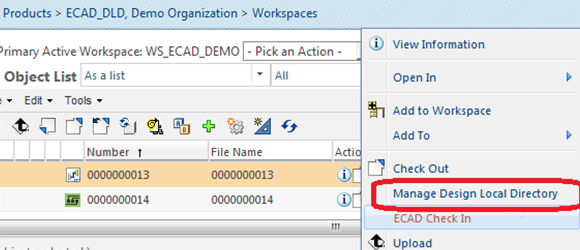
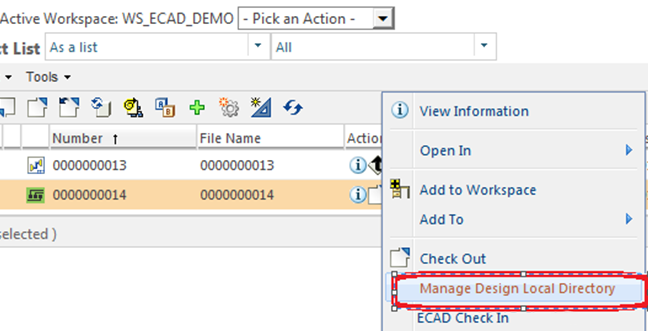
• Right mouse button of an applicable ECAD object in the workspace. The right mouse button delivers a drop down menu that displays Manage Design Directory.
• Detail information page of the ECAD Object. From the workspace listing, select the item information icon, and then select Manage Design Directory.
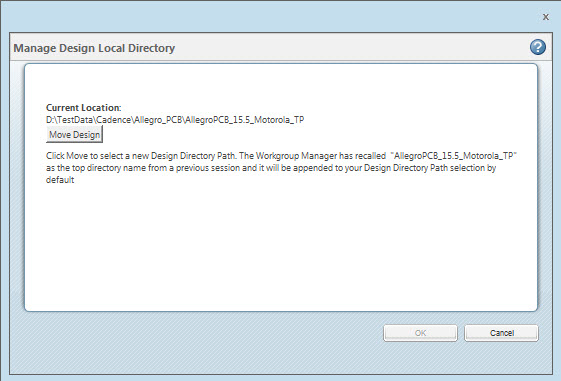
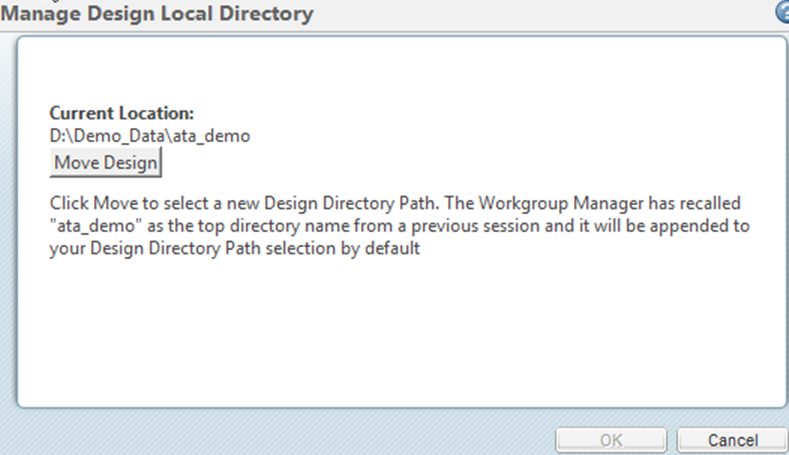
The Manage Design Directory screen displays the Current Location of the design. Newly checked out data added to the workspace resides in the Workspace Local Directory, if the design has been moved at a previous time the Current Location displays what was set for that design.
This path can be change by selecting the Move Design option and entering the new location. The user is presented with a browse wizard to navigate to the new design directory.
| Local & Network drives are supported. Some examples are shown below: • C:\SPB_Data\small demo\small_demo\ECAD\work\small_demo\physical • D:\Mentor_Data\DxProjects\Project1 • Z:\Altium\Altium_Designer_09 (Z(\\hq-ncfs7\cad) Examples of machine locations NOT supported • \\computer1l\Shared\ECAD_Designs\Zuken_cr5000 • \\system2\cad\Libretto\software\CAD_CDs\_CAD_Data_\ECAD | To support these types of configurations, map the above to a drive letter that can be used as the DLD location. |
|
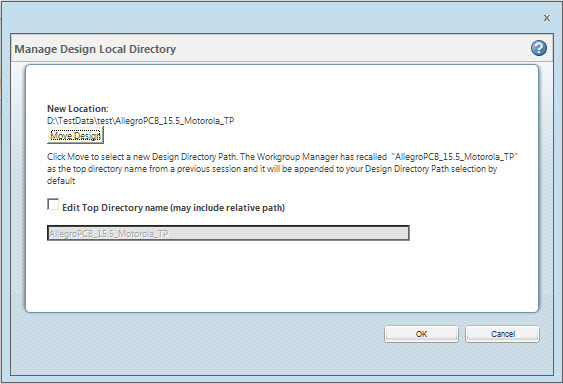
Under three conditions a relative path can be appended to the new location. This can remain the same or the user can change it by selecting the Edit Top Directory name (may include relative path) option.
| When any of the following three tool suites listed below are used, the relative path of the nested structure is stored and presented to the user when “Manage Design Directory” is invoked. • Cadence Allegro Design Entry HDL/ Cadence Allegro Editor • Mentor Graphics DX Designer/ Mentor Graphics Expedition PCB • Mentor Graphics Design Capture/ Mentor Graphics Expedition PCB |
When OK is selected the design is moved to the new location and the Design Directory is set with the new path and is used for all actions that require to know the design data location this includes the ECAD Check In action.
| When you remove a design from the Workspace, the DLD mapping is deleted. If the design is added again to the workspace, Manage Design Directory must be used in order to map it to a local directory. |
Supported Use Models
The following use cases are supported by the new Manage Design Directory action.
One Design Object with one Design Directory
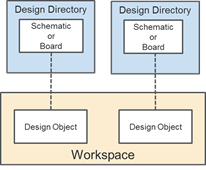
Two Design Objects in the same workspace each with different Design Directories
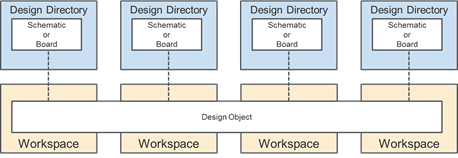
Multiple Workspaces with the same Design Object, each with different Design Directories
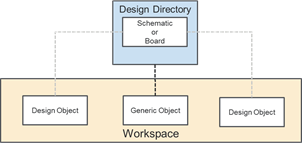
Non-Separable Design Objects with the same Design Directory
Non Supported Use Models
The following use cases are not supported by the new Manage Design Directory action.
One Design Object with multiple Design Directories
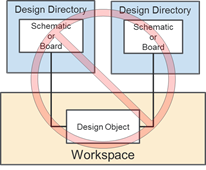
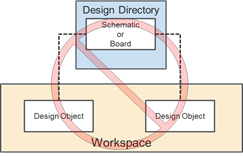
Two Design Objects with the same Design Directory
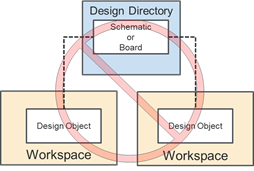
Two Design Objects in two different Workspaces with the same Design Directory
How to Use the Manage Design Directory
This section provides examples of the Manage Design Directory usage.
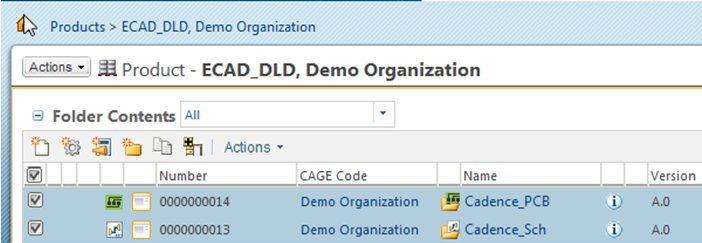
Create a new combined Board-Schematic design.
1. New combined Brd-Sch design is created in the common space.
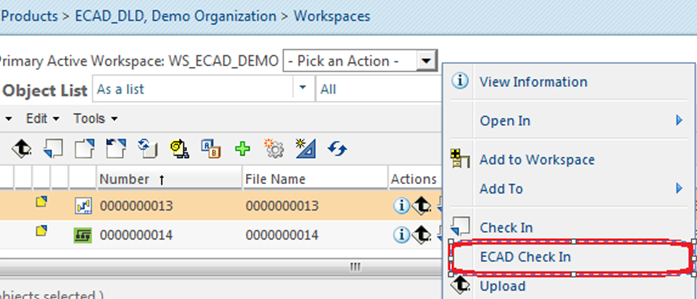
2. Checkout the designs and add to the workspace.
3. Use the ECAD Check In action on the schematic design.
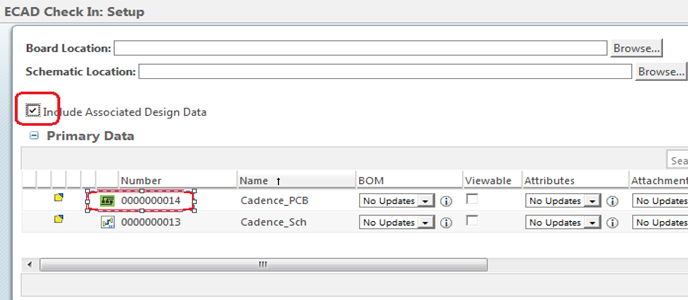
4. The ECAD Check In screen for the Schematic displays.
5. The related board can be collected by selecting the Include Associated Design Data option.
6. Browse to browse the design location for the respective Board-Schematic local design location.
| The location set above is for the design location. Check in the design to make the above location the design directory. |
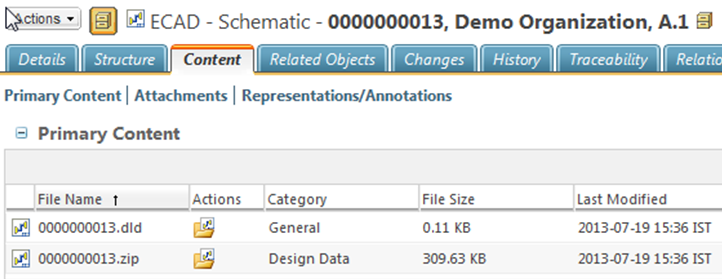
7. After design check in, you will see the design.zip file and design.dld file in primary content.
8. After initial check in you can see the Manage Design Directory option available.
| • The design must have valid content for the Manage Design Directory option to be available. • The Manage Design Directory option is available for both checked in and checked out designs. • The Manage Design Directory option is only available for designs located in the workspace. |
9. When the Manage Design Directory option is chosen, the directory path is shown and an option to move the directory location.
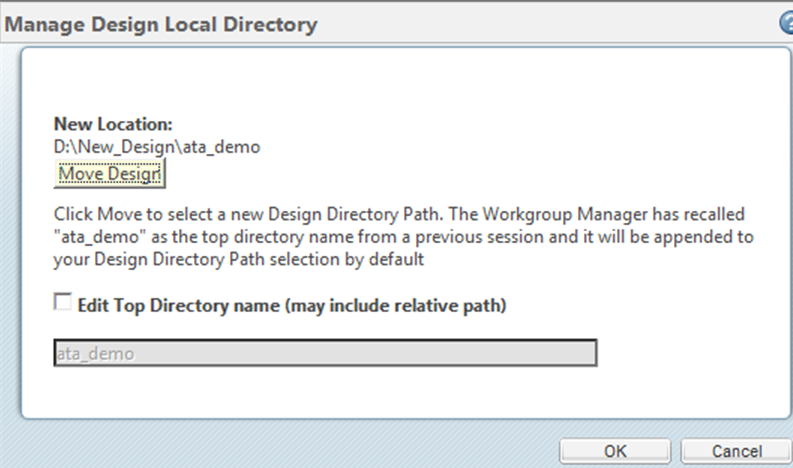
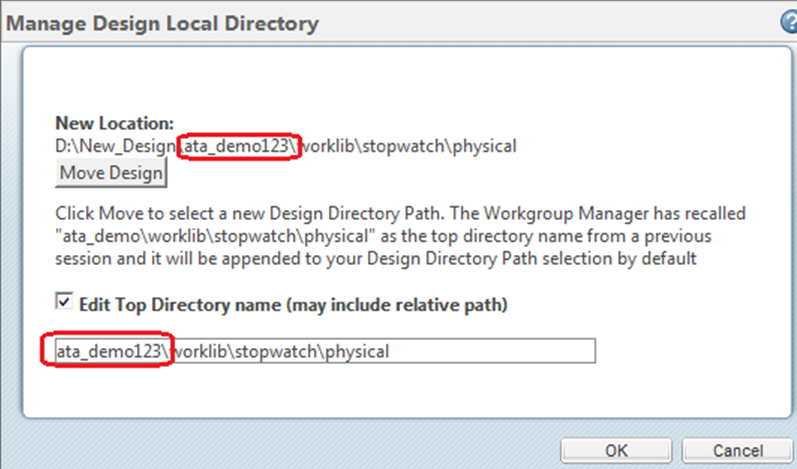
10. Click on Move Design and browse to the new directory location. Note the new path under New Location field, it also creates the top directory name under the selected new location.
11. The design name is always saved as the top directory name and can be edited. Click OK and the design is moved to the new directory. The top directory is created if it does not already exist.
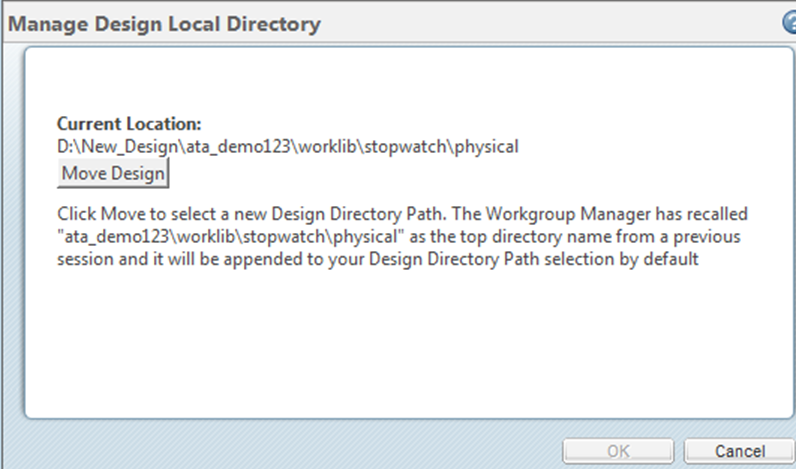
12. The new location of the schematic design.
13. The board design can also be moved to the new location. Highlight the board and select Manage Design Directory.
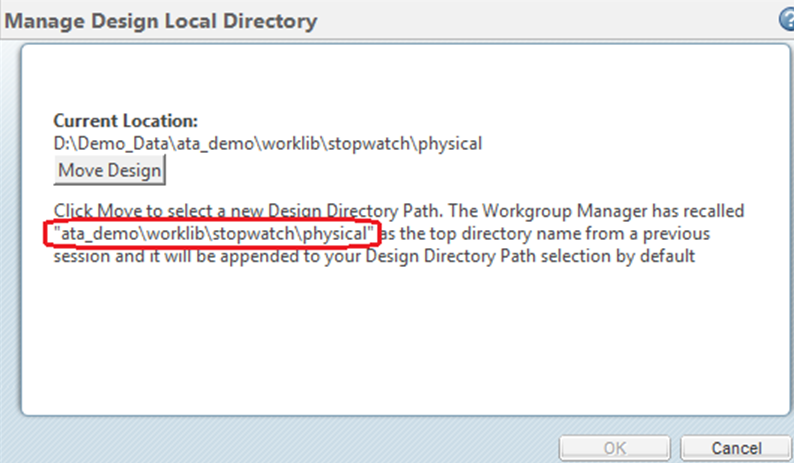
14. The current location is shown. The board design shows the relative path to the schematic design.
15. Move the board design to its new design directory the same as previously done for the related schematic.
| The path set as top directory, is automatically appended to the new design location. |
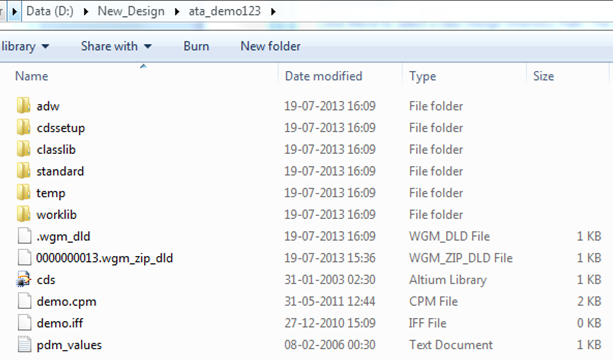
16. We previously changed the top directory for the schematic design from ata_demo to ata_demo123. This is also done the same for the board so that it resides under the same schematic directory.
| Any change made in the top directory path is automatically appended to your new location. |
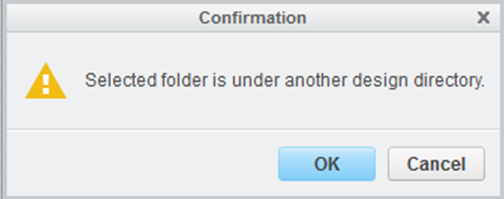
17. Click OK. The confirmation screen displays to confirm the board move to a new design directory.
18. Click OK. The new design location for the board is displayed.
| 1. The Windchill ECAD design points to this local design directory as long as the design resides in the workspace. If you remove the design from the workspace, the link from the design to the above design location is lost. This does not remove or modify the local design contents. 2. If in the future you add this design to the workspace again, the path will show as the Workspace Local Directory and you have the option to move it. |
Messages for the Design Directory
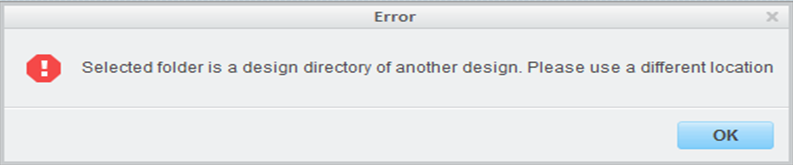
1. Each design can have a unique Design Directory, no two Designs can share the same Design Directory.
You set the Design Directory of one design to another Windchill ECAD Design, you will get the following error. Flat ECAD Designs where the Board and Schematic both reside in same directory cannot be used due to this restriction.
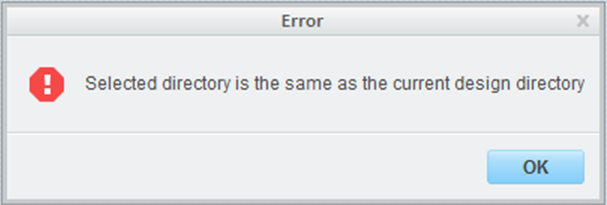
2. You get an error message when you try to set New Design Directory which is the same as the current Design Directory.
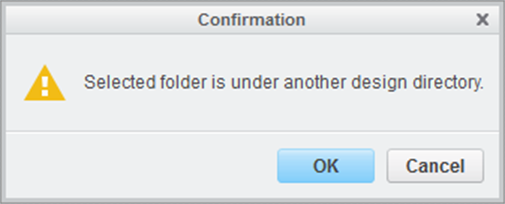
3. You get a confirmation message when trying to select folder as Design Directory which resides under the Design Directory of another design.
4. You get a confirmation message when trying to set a Design Directory to a folder which already has content.
Best Practices for the Manage Design Directory
1. When working with a combined Board/Schematic design and the Board resides under Schematic or the Schematic resides under Board, the sequence of moving the Design directory of these combined designs is important so that there is no data loss due to overwriting of the files.
a. For a combined Board/Schematic design, where Board resides under Schematic, you need to set the Design Directory of the Schematic design first and then the Board Design using the Manage Design Directory user interface.
b. For a combined Board/Schematic design, where Schematic resides under Board, you need to set the Design Directory of the Board design first and then the Schematic Design using the Manage Design Directory user interface.
2. When removing a design from the Workspace, the link for the ECAD Windchill design with the Design Directory is lost, however the contents of the design directory are intact.
This Design Directory can now be used by another Windchill ECAD Design or you can again add the same Windchill ECAD Design to workspace and set the same Design Directory using the Manage Design Directory user interface.
3. After performing a clean cache on a system, the current location field of the ECAD Design in the Manage Design Directory user interface will be shown as the Workspace Local Directory location. You can use the Move design option in the Manage Design Directory user interface and set a new local design directory.
4. When the design directory is set to the Workspace local directory using the Manage Design Directory action, if data is removed from the workspace then it could be lost. Ensure that data in the workspace is backed up.