Creating and Editing Hook Definitions
In order to use a hook, you must first create a hook definition. The hook definition specifies the type of hook to be used, the external executable file to call, and whether the external executable augments or replaces the built-in action. The procedure consists of two major parts: creating the Hook Definition Document, and then editing it to reflect the functionality that you want.
To create a hook definition, do the following:
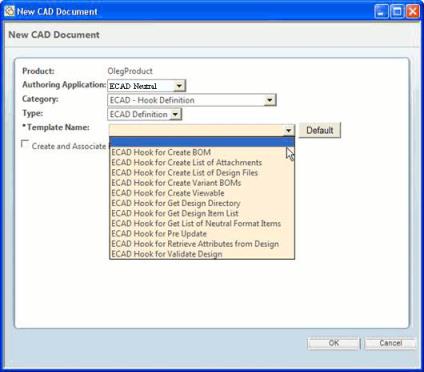
1. Create a Hook Definition Document.
a. From the workspace, select > .
b. Under Category, select ECAD - Hook Definition.
c. Under Type, be sure that ECAD Definition is showing.
d. Under Template Name, select the specific hook that you want to use.
e. Click OK. The document for the hook definition is created.
2. Check out the Hook Definition Document.
3. Open the Hook Definition Document’s info page.
4. Select > to open the Edit Hook Definition window.
5. If you want your executable to replace Windchill’s default action, select the checkbox marked Skip Built-In Function.
| If you do not select this checkbox, the built-in function runs before your custom executable file. |
6. In the Command Line field, type the full path name of your executable.
| The path that you type in this step must point to a valid executable file, with the permissions set appropriately. |
7. Click OK.
8. Check in the Hook Definition Document. It is now ready for use.