ECAD Check In
The ECAD Check In action for the Windchill Workgroup Manager for ECAD lets you Check In the design and select any of the deliverables you have defined for the design, while presented with a progress screen that displays a detailed summary report. The Progress screen monitors the check in by use of multi color status lights that display messages and information as well as providing a detailed summary report. A BOM Report is presented to you for BOM evaluation before committing to BOM generation. The BOM Manager Form lets you assign or ensure the correct ASM (assembly) part is assigned to the BOM, with the option to add Schematic and/or Board parts that will be included in the BOM.
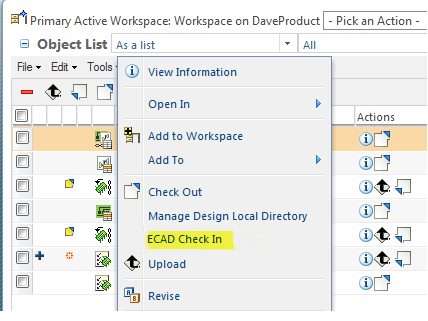
1. From the workspace, navigate to the design you would like to check in. Right mouse click on the design object or select the information icon. From the Actions menu, select ECAD Check In.
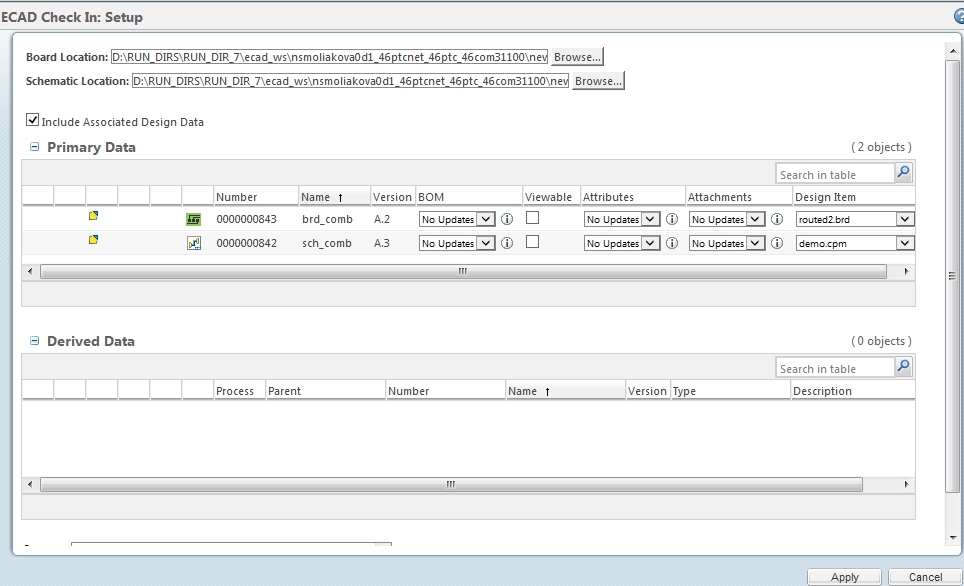
2. The ECAD Check In screen appears.
◦ Schematic or Board Location — This is the location where the design data is located. You can use the browse button to locate the design location. If this is a first time check in of a new design, this location field will be blank. In the case that the design has previously been checked in and then added to workspace (Revise action) then the content will be added to the Workspace Local Directory and that path will appear in the location field. The browse button is present if you want to use design data from a different location.
| For an ECAD Design (Board or Schematic) linked with a definition document such as content definition, BOM attribute map, hook definition etc., • The definition document must be already checked in, or • You must check in the ECAD Design (Board or Schematic) simultaneously with the definition document. |
◦ Include Associated Design Data — This check box will include an associated design object for combined and Non-Separable Design Types. When the design type is standalone this feature will be disabled. The location field is set as a separate action.
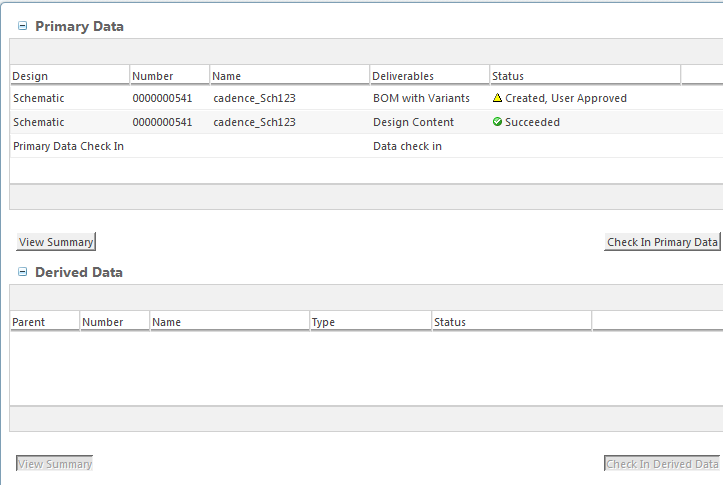
◦ Primary Data — This section of the form displays the design objects that have been selected for check in. Deliverable actions are also available to the user.
The locations you select will be used to set the Design Directory for the design and will be used in future check ins. For more information, refer to the
Manage Design Directory section.
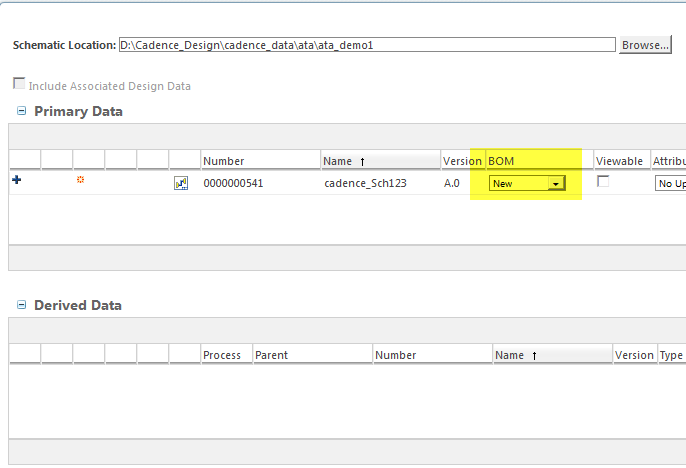
▪ BOM – Combo Box [New, No-Update, Remove] Default = No-Update
"New" will create a new BOM replacing the existing one.
"No-Update" will not create a new BOM leaving any existing BOM unchanged.
"Remove" will remove the existing BOM and not create a new BOM.
▪ Viewable - Check Box, Default = Unchecked
"Checked Box" will generate a Viewable.
▪ Attributes - Combo Box [New, No-Update] Default = No-Update
"New" will extract new attributes replacing the existing ones.
"No-Update" will not extract new attributes leaving any existing ones alone.
▪ Attachments- Combo Box [New, No-Update, Remove] Default = No-Update
"New" will collect new attachments replacing the existing ones.
"No-Update" will not collect any new attachments leaving any existing ones unchanged.
"Remove" will remove the old attachments and not collect any new attachments.
A selection pull down to select the design item for cases when there are more than one to choose from.
▪ Design Item - Pull Down List, Default = Blank
◦ Derived Data — This section displays the derived data associated with the design objects that have been selected for check in. A Process action for each derived data set is available to the user.
◦ Comment — Enter any comments you want to associate to the design check in.
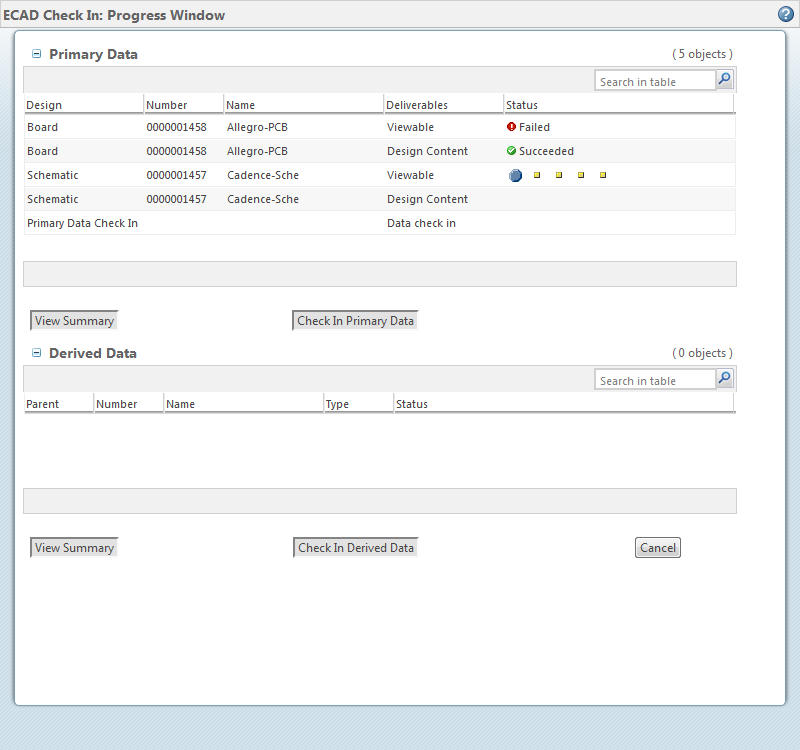
3. When you have entered all your data, Click Apply. A progress screen will display with information on each of the selected deliverables. If there is a failure, it will be noted in red with a message on the error.
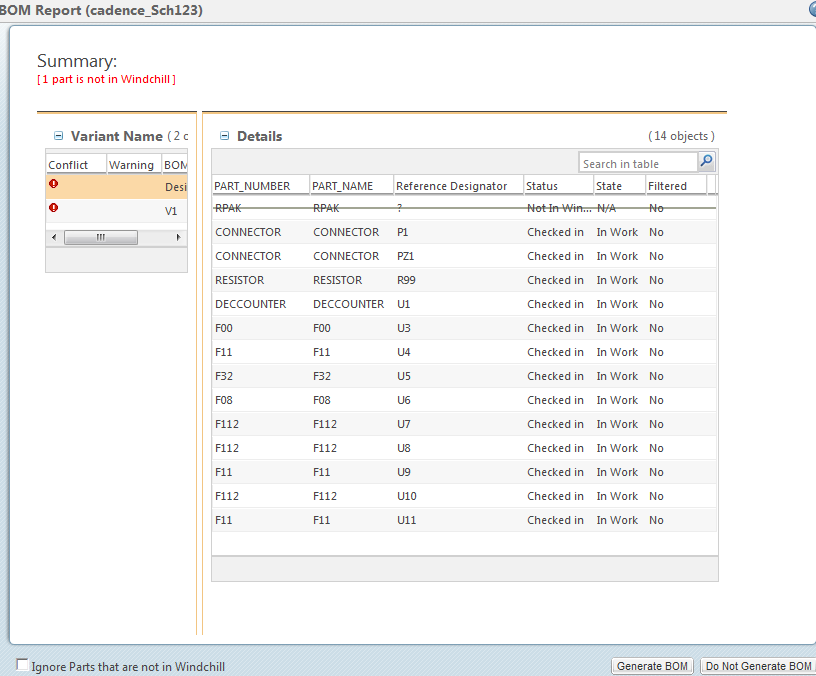
| The following additional screens will appear if a BOM generation is included in the check in. For more information on BOMs you can reference the BOM sections under the ECAD specific actions topic. |
Select to have a BOM included for the check in.
The BOM process reporting screen will open. Select to Generate BOM.
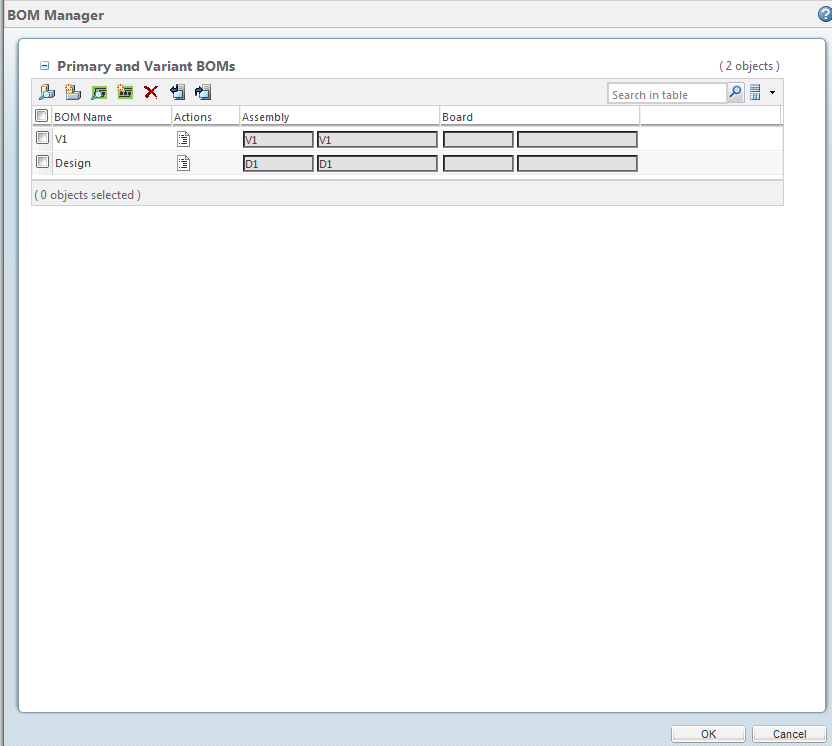
The BOM Manager screen will open.
The status screen will open. This will indicate if the BOM was successful.
4. If all data is entered and correct, click the Check In Primary Data button.
If you would like a summary of the information click on the View Summary button. You can also click the cancel button to stop the check in at any time.
Progress Screen
The progress screen displays action status as they are being processed. The information will also vary depending on settings.
• Display only the list of deliverable actions that have been selected on the check in setup form with the action of “New” and “Remove”.
• Display an in-progress indicator, to show the user what step is being processed and or collected.
• Display a status at the completion of each of the deliverable steps.
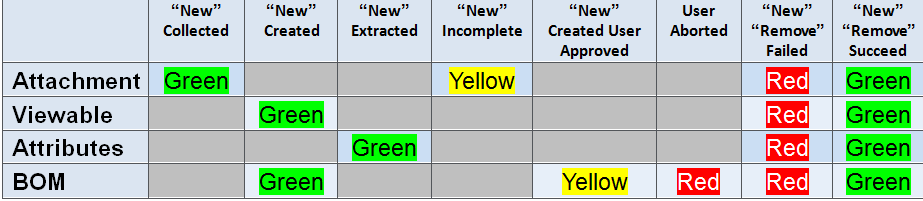
• Display a corresponding color coded (Green, Yellow, Red) icon that represents the status.
Status Conditions
• BOM
◦ Created — The BOM has been created.
◦ Failed — The BOM failed to create.
◦ Created User Approved — The user selected to generate a BOM even when warnings have been identified (if this button can be turned on).
◦ User Aborted — The user selected do not generate in the BOM report page.
• Attachments
◦ Collected — The attachments listed for the selected CAD object have been identified and will be included during check in.
◦ Failed — The attachments listed for the selected CAD object have not been identified and will not be included during check in.
◦ Incomplete — Part of the attachment list was not found (If you have more than one attachment and only one is found).
• Attributes
◦ Extracted — The attributes or hook associated to the selected CAD object that collects properties or attributes was successful and will be included during check in.
◦ Failed — The attributes or hook to collect properties or attributes has failed and will not be included during check in.
• Viewable
◦ Created — A viewable has been generated and will be included during check in.
◦ Failed — A viewable generation has failed and will not be included during check in.