Open from Windchill
Open from Windchill accesses the workspace on the registered Windchill server and lets you open a CAD document that is stored in Windchill. This action first looks within the active workspace on the primary server, and also lets you navigate to the commonspace of other registered Windchill servers. You can also customize the view within the Open from Windchill window.
Opening a CAD Document
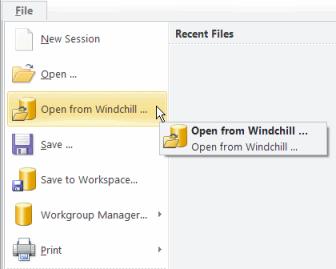
To open a CAD document that is stored in Windchill:
1. In a Creo Elements/Direct Modeling session, select > .
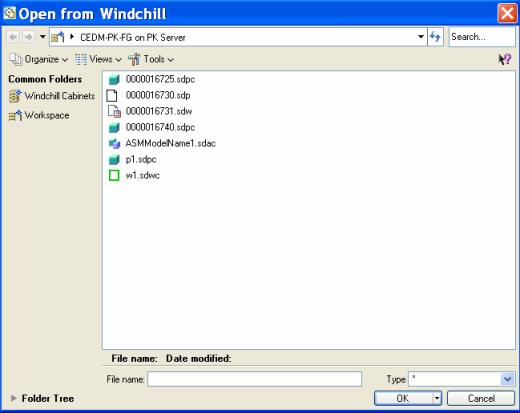
The Open from Windchill window opens as shown in the following figure.
2. In the Open from Windchill window, browse for the file that you want to open in Creo Elements/Direct Modeling.
Notice that the
Common Folders pane displays
 Windchill Cabinets
 (the commonspace locations on your primary server) and your primary active
 Workspace
.
| You can load multiple CAD documents using a single Open from Windchill operation. |
| You can selectFolder Tree at the bottom of the panel to toggle the display in the Common Folders pane to show a hierarchical view of your server and workspace folders. |
3. Select the file, or enter the name of the file that you want to open in the File name: text box. You can also use the Search field at the top of the window to locate CAD documents by partial name or wildcard (*).
| You can also preview the file (if it has a viewable representation (thumbnail) generated within the system) by selecting Thumbnails from the Views menu. |
4. Click OK to open the file within Creo Elements/Direct Modeling.
| Alternatively, you can right-click the object in the Windchill workspace, then click > on the context menu. |
Customizing the View of the Open from Windchill Window
To customize the view of the Open from Windchill window:
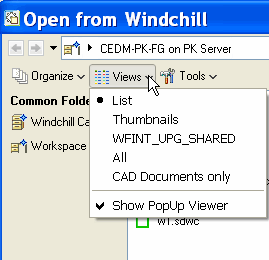
1. Select Views from the Open from Windchill toolbar, then choose a custom window view from the menu as shown in the following figure.
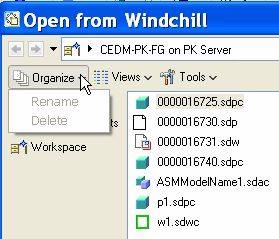
2. Select Organize to display menu options that let you rename a directory in your workspace local directory, or delete an object from the workspace as shown in the following figure.
| The > option works only when the Windchill server goes offline. This option removes an object from the workspace. To delete an object from the workspace local directory, exit Creo Elements/Direct Modeling, then from Windchill Workgroup Manager, clear the cache by using > > > . |
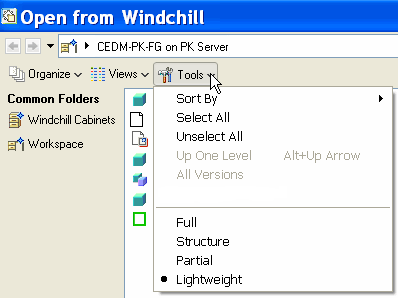
3. Select Tools to display a menu that lets you determine whether you want to show the instance next to all objects and define the sort order (model name or markup/instance name). You can also specify the load type by choosing Full, Structure, Partial, or Lightweight as shown in the following figure.
◦ Full: Loads the full model and its associated information. A full load needs the most memory space.
◦ Structure: Loads only the assembly structure. The model is not loaded. You can modify the assembly structure.
◦ Partial: Only the selected objects are loaded; the associated assembly or model is not loaded. The loaded objects are locked.
◦ Lightweight: Only the partial representation of the model is loaded for viewing. You cannot make any changes to a lightweight model.
| You can change the load type of an object which is already loaded in Creo Elements/Direct Modeling. You cannot load inseparable assemblies as partial or lightweight models. Stock/Finish relations are not supported in Windchill Workgroup Manager. |