Custom Check In
Checking a file into the Windchill commonspace removes the checkout lock and makes the file available to other users. Windchill Workgroup Manager provides two ways to check in an object, the Auto Check In action and the Custom Check In action. This section describes the Custom Check In action, which is available from both an active Creo Elements/Direct Modeling session and from the workspace.
Custom Check In allows you to set certain options for the checkin by using the Windchill Check In page. The options are described in the online help available from the Windchill Check In page.
To perform a Custom Check In action:
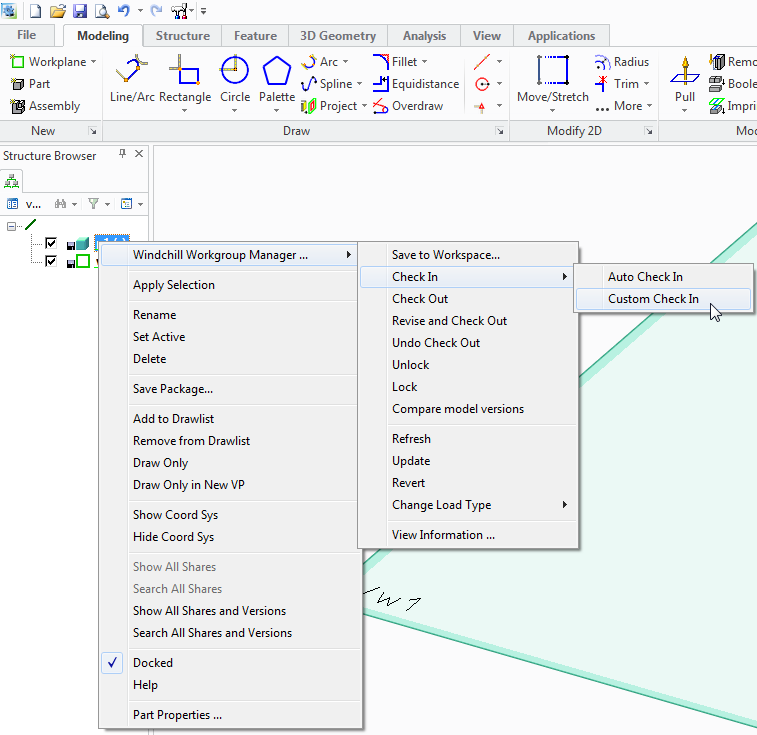
1. In a Creo Elements/Direct Modeling session, right-click on an object in the Structure Browser and choose > > from the menu as shown in the following figure.
The Save to Workspace window opens.
2. Click the arrow next to Tools and then click one of the following: Models and Viewables, Models Only, Viewables Only.
3. Click OK.
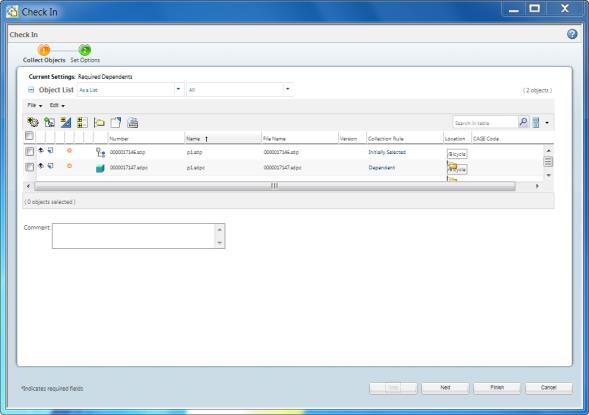
The system saves the object to the workspace and opens the Windchill Workgroup ManagerCheck In window as shown in the following figure.
4. Select the desired check in options, and click Next. The Set Options page opens.
Specify the following options, as per requirement:
◦ Create Baseline
◦ Auto associate parts to CAD documents
◦ New Promotion Request After Check In
◦ Undo Check Out Unmodified Objects
◦ Remove from Workspace
◦ Auto resolve incomplete objects
▪ Update with object on server, then ignore
▪ Always ignore
5. Click Finish.
The system checks the object into the Windchill commonspace using the specified options.