Creating and Enabling Server-side Watermarks
When you want users to be able to access common watermarks (such as a company logo) across the enterprise, you can create server-side watermarks for your Windchill solution.
Watermarks can be viewed along with objects in Creo View.
The following sections provide the details on how to create and enable server-side watermarks.
Creating Server-side Watermarks
To set up a server-side watermark, follow these steps:
1. Open the Creo View Watermark Editor to create the watermark(s) you need for the various types of objects, such as 3D models, 2D drawings, documents, and images.
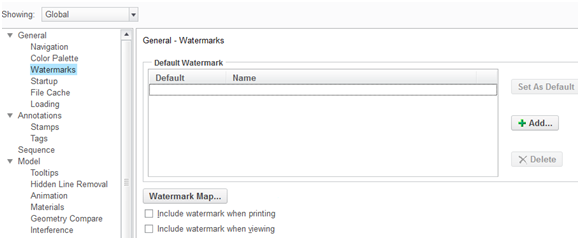
2. Launch the Creo View client in standalone mode, navigate to > , and click on the Watermarks option in the General Section.
3. Click Add, enter the name, and click OK to upload the created .ini file.
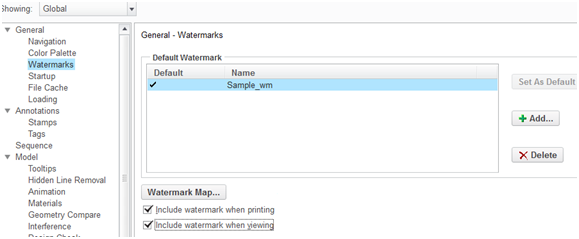
4. Click Set As Default and enable Include watermark when printing and Include watermark when viewing. Click OK.
5. Navigate to%appdata%\PTC\ProductView. The user_prefs.xml and wmk000.ini files must be present.
6. Extract the watermark definition information from the user_prefs.xml file and create a file called server_prefs.xml with that information in it.
7. Select the server_prefs.xml and wmk000.ini files and zip up into a single file.
Enabling Server-side Watermarks on the Server
To enable server-side watermarks on a Windchill server, follow these steps:
| Beginning at Windchill 10.2, PTC has changed the location of the wvs.properties and wvs.properties.xconf files. These files have been moved from the <Windchill>/codebase directory to the <Windchill>/codebase/WEB-INF/conf directory. Be sure to make any necessary changes to your code to reflect this location change. |
1. Log in as an administrator (for example, wcadmin/wcadmin).
2. In the wvs.properties file, confirm that the value "productview.configfromserver=true".
3. As with any change to wvs.properties, you must restart the method server and servlet engine.
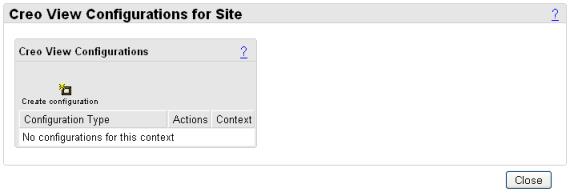
4. Navigate to > and click the Create configuration icon to add the watermark zip file. Create a configuration, for example, ssw_default.
| This process adds the configuration to the current container context, such as a product, project, organization, or site. For example, a configuration added at the product level is used in preference to a configuration added at the organizational level, which in turn is used in preference to a configuration added at the site level. |
When you click the Create configuration icon, you are prompted to enter an optional configuration type. For information about the available configuration types and their use, see the productview.modifyconfig property.
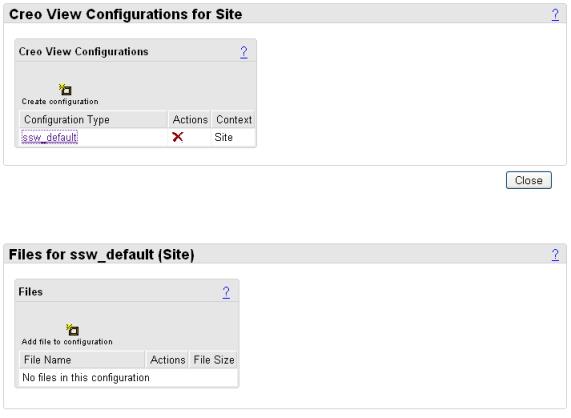
If you do not enter a configuration type and click Create, a default type is created. Click the ssw_default link to display the Files table.
5. Click the Add file to configuration icon. Browse to select the watermark zip file (ssw_default.zip) and add it to the configuration.
You can view the server-side watermarks in any version of Creo View. See the Creo View Help for details on viewing watermarks.
Exporting Watermarks for Creo View
Creo View supports watermarking of 3D drawings, images, and documents. Watermarks are defined in INI files created and edited using the Creo View watermark editor. The administrator who manages watermarks manually transfers the INI files from the watermarks directory onto the Windchill server.
To export the watermark configuration, go to the location where Creo View is installed. Run the wcexport executable file, found in the productview installation directory. The Export Watermark Configuration window appears.
Specify the file name you want to export and click Browse to locate the directory. The wcexport tool creates a ZIP file including the main config.ini file, any watermark INI files referenced by the registry definitions, and any images referenced by any watermark file.
To add the ZIP file to the Creo View configuration for Windchill, click Visualization Configuration Administration on the WindchillUtilities page.
For more information on Creo View configuration, see the Windchill online help for the Creo View Configurations table.