Creating a BOM Attribute Map
To associate design attributes (labels that describe the component data in a BOM) with corresponding attributes in Windchill, you need to create a BOM attribute map and edit its definition.
To create a BOM attribute map:
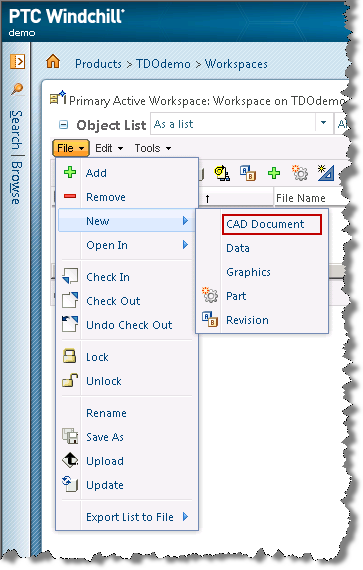
1. From the Windchill Workgroup Manager embedded browser, navigate to the project workspace and select > > .
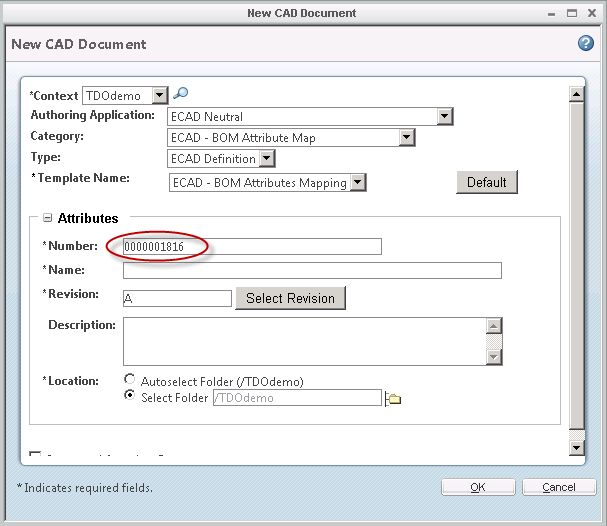
The New CAD Document window opens as shown in the following figure.
2. In the Context field, be sure that the Cadence Team Design Option project is selected.
3. In the Authoring Application field, select ECAD Neutral.
4. In the Category field, select ECAD - BOM Attribute Map.
5. In the Type field, select ECAD Definition.
6. In the Template Name field, select ECAD - BOM Attributes Mapping.
7. In the Attributes panel, do the following:
a. Write down the number displayed in the Number field for the BOM attribute map. You must enter this number later during the project setup in the Enable Team Design wizard.
b. In the Name field, enter a unique name to identify the BOM attribute map document in the workspace folder.
c. Optionally, in the Description field, enter a short description of the BOM attribute map.
8. Click OK.
An attribute map document with the specified name is created and appears in the workspace folder.