Generating a Master BOM
|
|
In order to generate BOMs for a design, your Cadence Team Design Option policy file must be customized to include specifications describing how derived objects are created. See your Cadence Team Design Option project integrator or Windchill administrator for assistance.
|
To generate a master BOM for a design:
1. In the Cadence Team Design Option dashboard, locate the top-level design object (either the schematic or the board) that you want to generate the BOM against, and check it out along with its BOM object child.
|
|
The schematic/board design selection depends on what the Windchill preference Default Part Structure Source is set to at your site. See your Cadence Team Design Option project integrator or Windchill administrator for details.
|
An open padlock icon

appears beside each object in the status column indicating that the design and its BOM object are checked out to you.
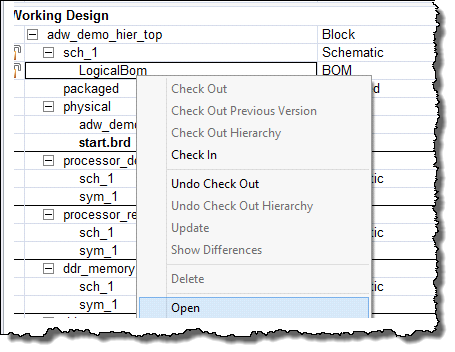
2. Right-click the BOM object and select Open from the actions menu as shown in the following figure.
The Allegro Variant Editor tool opens.
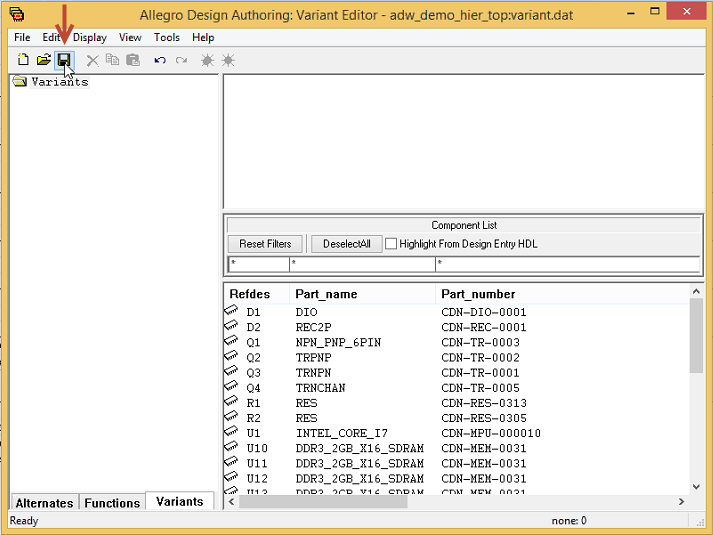
3. In the Variant Editor, click the Save icon in the toolbar as shown in the following figure, then exit the tool.
The master BOM definition is saved in the design.
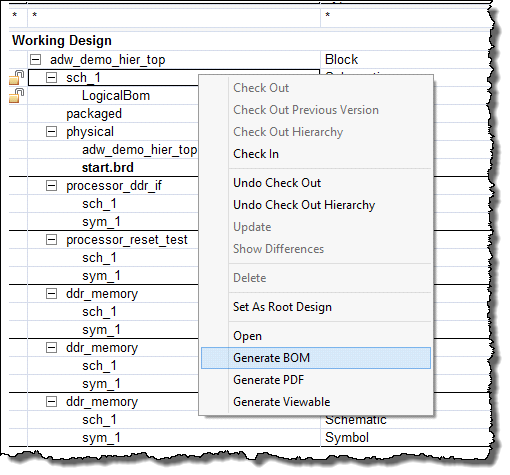
4. In the Cadence Team Design Option dashboard, right-click the top-level design object and select Generate BOM from the actions menu as shown in the following figure.
A Design.rpt file representing the master BOM is generated and saved to the derived_data folder in your design directory.
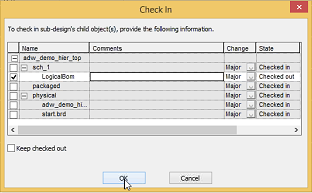
5. In the Cadence Team Design Option dashboard, right-click the top-level design object and select Check In.
The Check In window opens as shown in the following figure.
6. In the Check In window, do the following:
a. Select the top-level design object along with its BOM object for check in.
b. Optionally, select other objects that you want to check in.
c. Optionally, include comments and change information.
d. Click OK.
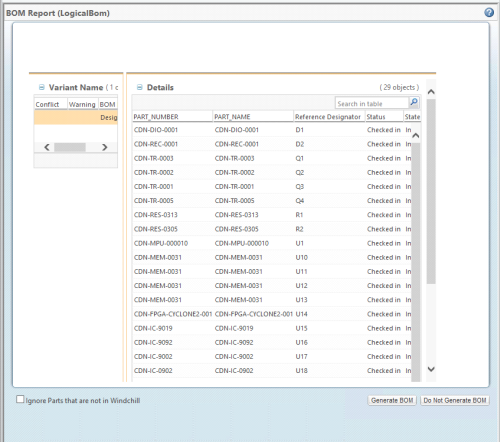
The BOM Report window opens as shown in the following figure. This window enables you to view the details of the master BOM report and confirm the check in.
7. Click Generate BOM at the bottom of the window to proceed with the check in.
The BOM Manager window opens.
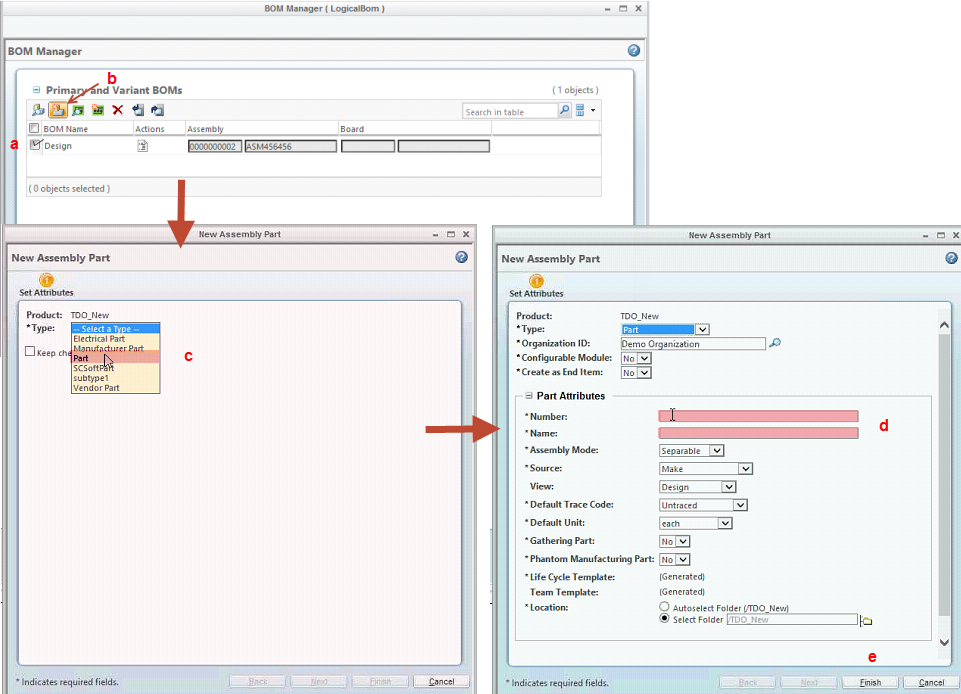
8. Within the BOM Manager and New Assembly Part windows, complete the following steps to create a new assembly part to represent the new master BOM in Windchill.
a. In the BOM Manager window, select Design to choose the master BOM.
b. Click the Create New Assembly Part icon in the toolbar.
The New Assembly Part window opens.
c. In the New Assembly Part window, select Part from the Type drop-down list.
d. In the Part Attributes panel, enter a desired assembly part name and number.
e. Click Finish.
A message appears confirming the successful creation of the Windchill assembly part.
9. Click OK to dismiss the BOM Manager window and resume the check in process.
A progress meter appears and the check in process completes. The design and its master BOM are checked into Windchill.
10. Optionally, you can confirm the existence of the new master BOM assembly part in Windchill by displaying the Related Objects page for the design as shown in the following figure. Note the Owner association for the BOM object and the Image association for the master BOM.