Adding Team Design Roles in Windchill
As the Windchill administrator, you must first create an organization context for the Cadence Team Design project. Contexts are containers for the information stored in Windchill and help to organize the database in a manner that is consistent with the organization of your company. Once the organization context is specified, a product context can be created and Team Design roles added to it. Team Design roles are already defined on the server. However, by default, they are hidden from the view of Windchill users with the exception of administrators. Therefore, your first step is to enable the visibility of the Team Design roles for others who need to manage the project contexts.
|
|
Any user that has product creation rights can add Team Design roles to a product context.
|
To add Team Design roles in Windchill:
1. If not done so already, specify an organization context for the project.
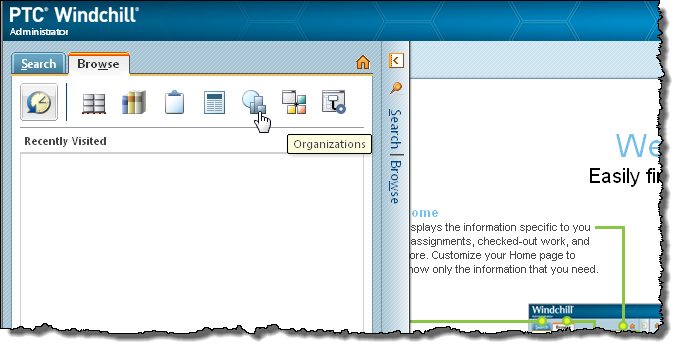
2. On the Windchill navigation panel, click the Browse tab and select the Organizations icon as shown in the following figure.
The Organizations page appears and lists all the organization contexts previously specified.
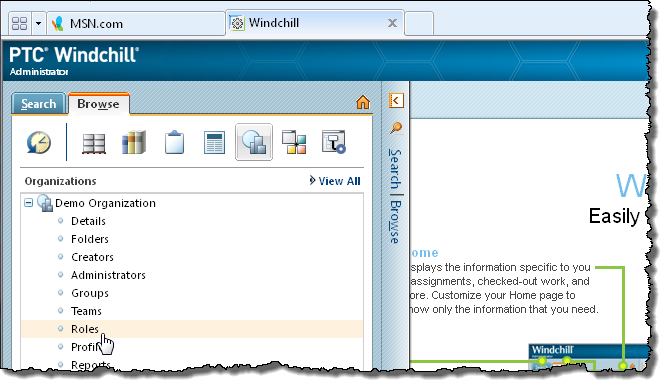
3. Locate and expand your Team Design context, then select the Roles item as shown in the following figure.
The Roles page appears.
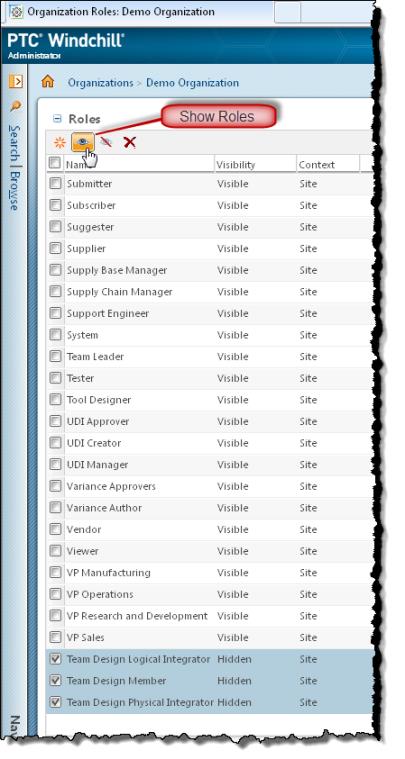
4. On the Roles page, locate the following team design roles:
◦ Team Design Logical Integrator
◦ Team Design Member
◦ Team Design Physical Integrator
| The status of these roles is set to Hidden by default. |
5. Select each role by clicking its check box, then select the Show Roles icon as shown in the following figure.
The status for these roles changes to Visible, enabling other Windchill users to see them.
6. Create a new product context for the project and add these team design roles to it.
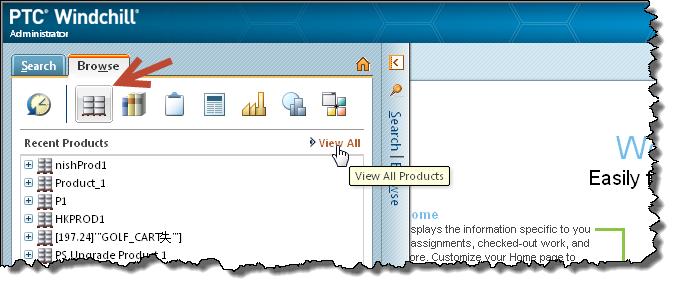
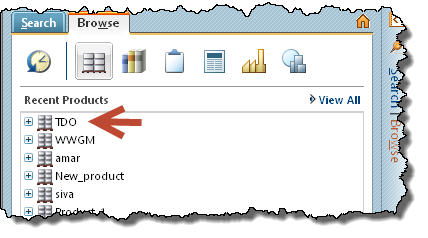
On the Windchill navigation panel, click the Browse tab, select the Recent Products icon, then click View All as shown in the following figure.
The Products page appears and lists all product contexts previously specified.
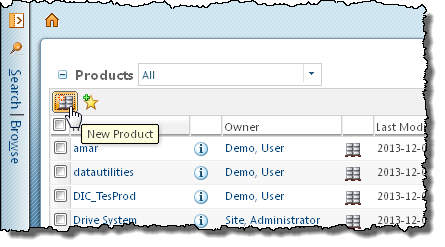
7. At the top of the Products page, select the New Product icon shown in the following figure.
The New Product window appears.
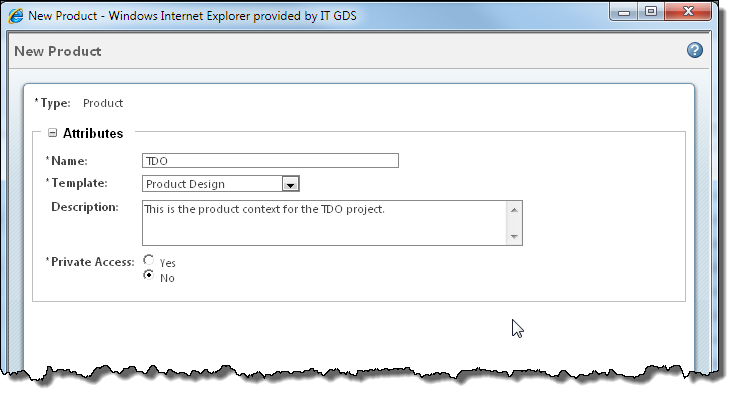
8. In the New Product window, enter a name and set other appropriate properties for your product context, then click OK.
The product context is added to the Recent Products list in the Browse tab, as shown in the following figure.
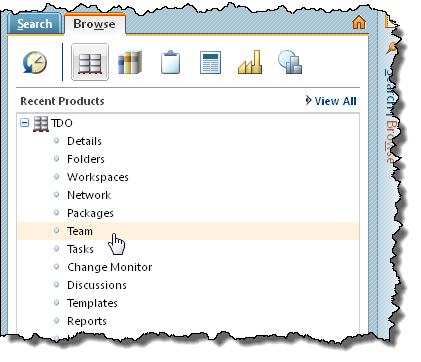
9. Expand the TDO product context in the list and select the Team item as shown in the following figure.
The Team page appears showing the active roles for the product context.
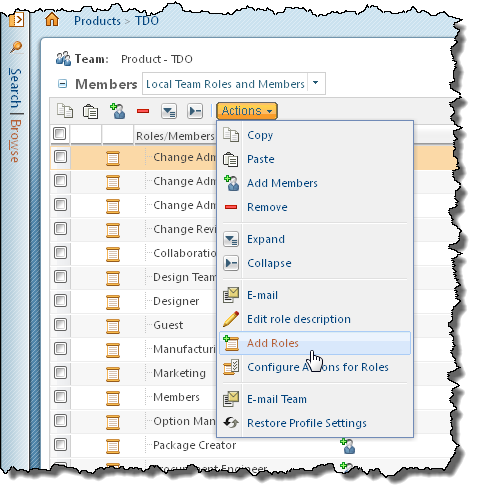
10. At the top of the Team page, select Add Roles from the Actions menu as shown in the following figure.
The Add Roles to Team window appears.
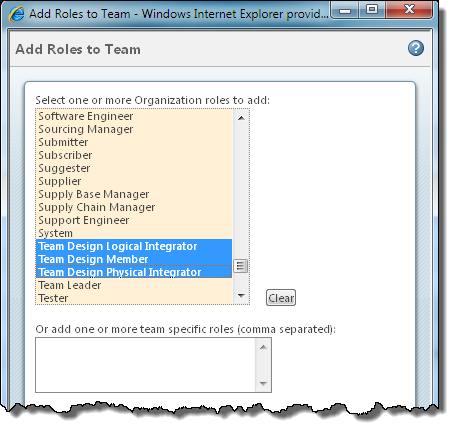
11. In the Add Roles to Team window select the Team Design roles that you want to add as shown in the following figure, then click OK.
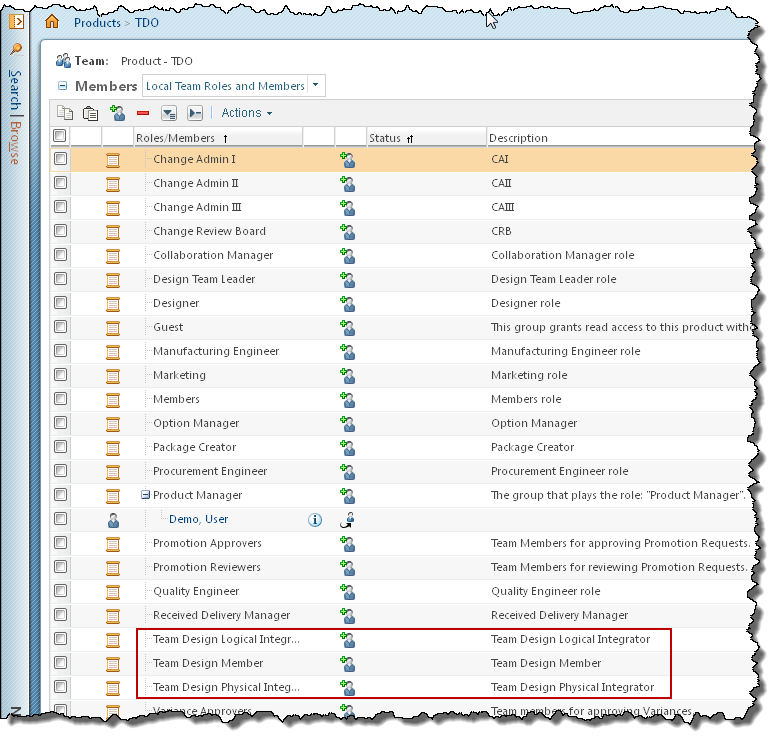
The roles are added to the project context as shown and can now be assigned to team members by the Project Integrator.
For more information, see: