Creating GWT Custom Renderers and Editors
This section provides details on creating GWT custom attribute renderers and editors.
Creating a Custom GWT Attribute Renderer
GWT attribute renderers are used when displaying attribute values in trees and tables.
1. Create a new renderer class that extends com.ptc.cat.gxt.client.widget.grid.CustomCellRenderer<M>.
2. Override the render(M, String, ColumnData, int, int, ListStore<M>, Grid<M>) method to provide the custom rendering logic.
3. Override the getTextValue(M, String, ColumnData, int, int, ListStore<M>, Grid<M>) method to provide a simple text-only value.
4. In the data utility for the attribute, override the getGWTRendererType() method from LogicSeparatedDataUtility and return your custom renderer class name.
5. In the data utility for the attribute, override the getPlainDataValue(String, Object, ModelContext) method and return any information that your renderer needs to consume. Usually this is the value that determines what your renderer will display.
Creating a Custom GWT Attribute Editor
1. Create a new editor class that extends com.ptc.cat.gxt.client.widget.grid.CustomTreeCellEditor.
2. If you want to display your attribute using a custom widget, then add your widget to the field that is passed in to the constructor of your editor, as displayed in the Examples section.
3. Override the startEdit(Element, Object) method to provide any custom logic to be executed when the user clicks on the attribute field.
4. Override the completeEdit(boolean) method to provide any custom logic to be executed before the new value is saved.
5. Override the cancelEdit() method to provide any custom logic to be executed if the edit is cancelled.
6. Override the preProcessValue(Object) method to provide any custom logic to be executed during startEdit(Element, Object) to set the initial value.
7. Override the postProcessValue(Object) method to provide any custom logic to be executed before the value is saved. The value returned by this method is the value that will be saved in the database.
8. Override the UseEditorForAttributeFilterUI() method to return true or false, depending on whether or not you want the editor to be used for this attribute in the Attribute Filter and Advanced Find Criteria windows.
9. Override the shouldRefreshAfterEdit() method to return true if your editor relies on the data utility to provide a user-friendly display value.
Adding Custom Validation for Editability
For client-side validation, override the isEditable(int, int, EditorTreeGridWidget) and isEditable(int, int, EditorGridWidget) methods in your custom editor class. The isEditable(int, int, EditorTreeGridWidget) method handles when you are editing in a tree context, and the isEditable(int, int, EditorGridWidget) method handles when you are editing in a table context. Client-side validation is useful to quickly (without a server-call) validate whether the current object has children, or whether the current object is checked out.
For server-side validation, override the verifyEditablityAsync(int, int, EditorTreeGridWidget, AsyncCallback) and verifyEditablityAsync(int, int, EditorGridWidget, AsyncCallback) methods in your custom editor class. The verifyEditablityAsync(int, int, EditorTreeGridWidget, AsyncCallback) method handles when you are editing in a tree context, and the verifyEditablityAsync(int, int, EditorGridWidget, AsyncCallback) method handles when you are editing in a table context. Server-side validation is slower than the client-side validation (since you are making a server-call), however it is more powerful. In a server-side operation (executed from verifyEditablityAsync()), you can get attribute information that you need for a given object, allowing for more advanced validation use cases. See the customization example below on creating and executing a server-side operation in GWT
When creating your server-side validation operation, ensure to name both the client-side and server-side operations the same, and include them in the same package location with only server and client being different.
Examples
The StructureModel represents a specific usage of an object (usage link ID, version ID, and master ID) and can be passed back and forth between the client and server. All the repeated usages of the same object (with same usage link) are represented by the same StructureModel. For this reason, you must use the TreeModel to get the parent object of a specific row in a tree.
Using StructureModel to Perform Client-Side Validation
• Test whether an object has children:
smodel != null && smodel.isFlagEnabled(StructureModel.F_HAS_CHILDREN)
• Test whether an object is checked out:
structureModel.isFlagEnabled(StructureModel.F_CHECKEDOUT_COPY) &&
structureModel.isFlagEnabled(StructureModel.F_CHECKEDOUT_TO_ME))
• Test whether an object is a module variant:
bomStructureModel.isModuleVariant()
Each row in a tree is represented by a unique TreeModel that exists only on the client. The TreeModel indicates the parent and children for that specific row. It also holds a reference to the StructureModel for the object represented by this row.
• Getting the parent objects:
tm.getParentModel()
• Getting the child objects:
model.getChildModels()
• Getting the structure model:
parent.getStructure()
• Getting the variant specification (pv or productVariant in this example is the variant specification object):
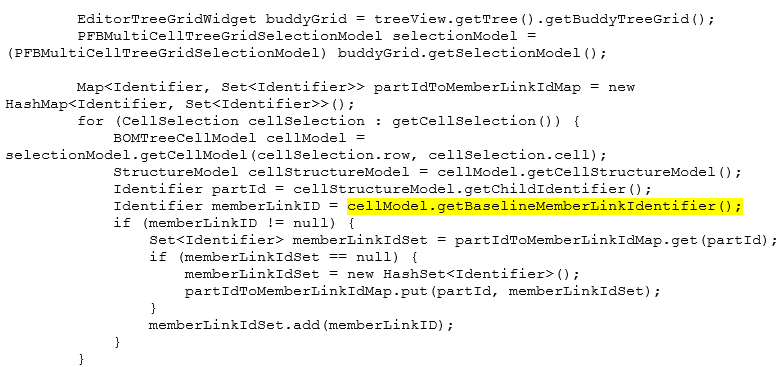
• Getting the variant baseline member link information:
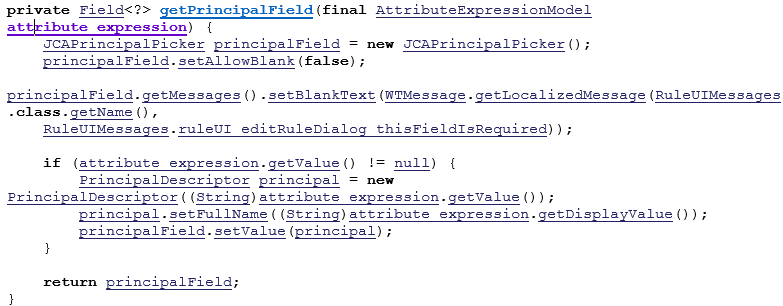
User picker field can be set as the field in your editor’s constructor: