Running the Installation Assistant
Obtaining the Windchill PDM Essentials Media
Windchill PDM Essentials contains everything you need to deploy Windchill. Obtain the media using one of the following methods:
• Order the USB flash drive that contains the media from your PTC partner.
• Using the machine on which you want to install, download the ZIP file that contains the media from the ptc.com/support page, using the download manager option.
Opening the Media Files
Make sure you have at least 50 GB of available space on the server machine, and designate a location for the media files. Depending on whether you obtained the media on a flash drive or in a ZIP file, use one of the following methods to open the media files:
|
Flash Drive
|
ZIP File
|
|
1. Insert the flash drive into the USB port of the machine on which you want to install.
2. In a Windows Explorer window, open the contents of the flash drive.
|
|
If your USB adapter is slow, it may ultimately save you time to copy the media folder to the designated location with at least 50 GB of available space. This may take an hour or more.
|
|
1. In a Windows Explorer window, navigate to the designated location with at least 50 GB of available space and create a folder for the media files.
|
|
Use a meaningful folder name, such as “Windchill PDM Essentials Installer.”
|
2. Be sure you have a ZIP utility that can unzip/unarchive a ZIP file in WinZip format, for example 7–Zip or WinZip.
|
|
To download either 7–Zip or WinZip:
OR
|
3. Locate the downloaded ZIP file, and then right-click and select > .
4. Browse to the location of the folder you created, and then click OK.
|
|
Extraction may take between 5 and 15 minutes depending on the speed of your system.
|
|
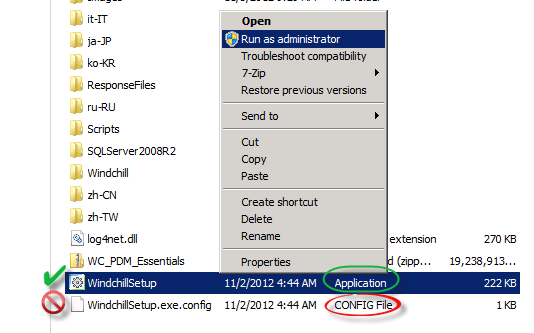
1. After opening the media files, right-click the application file (not the CONFIG File) WindchillSetup and then select Run as administrator.
| Do not select WindchillSetup.exe.config, make sure the file type is Application. |
A User Account Control window appears asking if you want to allow the program to make changes. Click Yes.
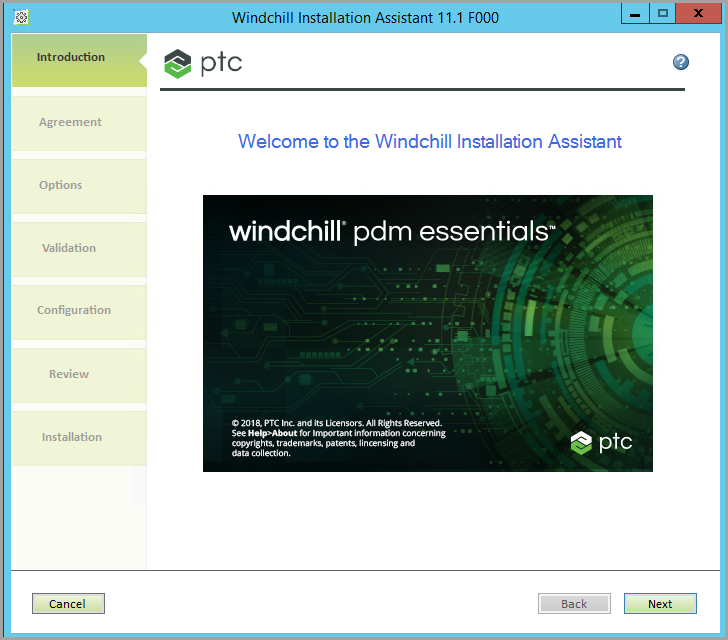
The Windchill Installation Assistant opens on the Introduction page.
To continue, click Next.
2. On the Agreement page, read the license agreement, select I accept the license agreement, and then click Next.
3. On the Options page, select the appropriate installation option:
◦ New Installation—Select to install a new instance of Windchill PDM Essentials.
◦ Installation for Upgrade—Select to install a target instance of Windchill PDM Essentials that you are upgrading from a previous version. Specify the location of your existing instance, and then click Next.
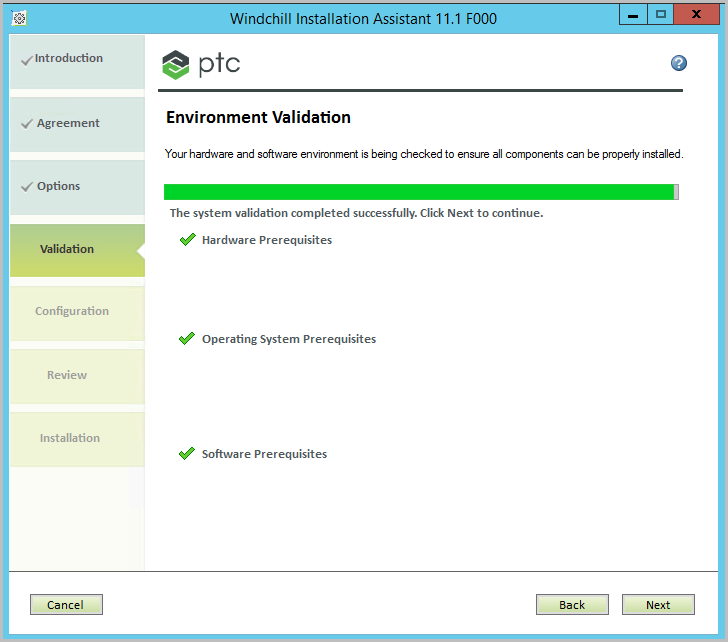
4. On the
Validation page, the installer checks your environment to ensure that
Windchill can be properly deployed. If any system prerequisites are not met, the installer does not continue and you must resolve the issue and restart the installer. For more information, see
Prerequisites.
After the validation is successful, the assistant prompts you to click Next.
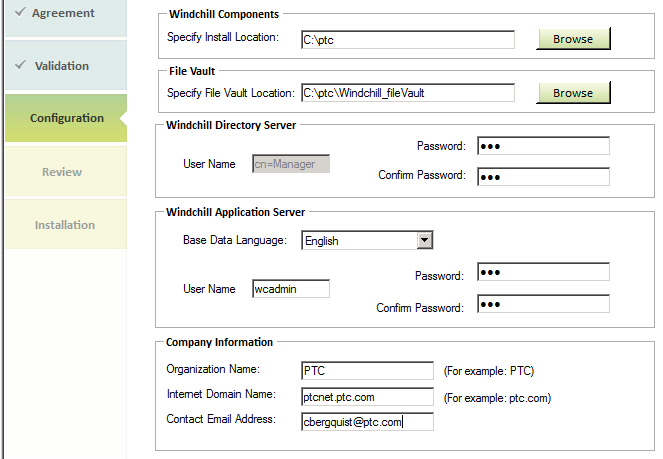
5. On the Configuration page, enter information in the following areas and then click Next.
◦ Windchill Components
▪ Specify Install Location—This file path is the default installation location for Windchill. To specify a location other than the default installation location, type the desired location or click Browse and select the desired location.
| The install location folder must be writable. |
◦ File Vault
▪ Specify File Vault Location—This file path location is where all of your CAD and document files are stored. To specify a location other than the default location, type the desired location or click Browse and select the desired location. If you are upgrading to a new release, this field includes the file vault location of your existing instance and cannot be changed.
◦ Windchill Directory Server—Type credentials for the Windchill Directory Server. Make a secure record of this information for future management.
▪ User Name—This user name is preset to cn=Manager and cannot be changed.
▪ Password
▪ Confirm Password
◦ Windchill Application Server—Type credentials for the Windchill Application Server. This is your initial site administrator account. Make a secure record of this information for future management.
▪ Base Data Language—Select the language you want the system to use when displaying the base data for templates (products, libraries, workflow). For example, if you are installing Windchill on an English server but you want the system to use German language templates, select German. The Windchill client browser always uses the browser language preferences for displaying information on the client.
▪ User Name—The default user name is wcadmin. Accept this default user name or type a new user name.
▪ Password
▪ Confirm Password
◦ Company Information—The installation assistant populates the company information based on your domain information, if possible. Review the information below and change if necessary.
▪ Organization Name—Your company name. This name is used to identify your organization context in Windchill. The installation assistant auto-fills this field based on your internet domain, change if necessary.
▪ Internet Domain Name—The internet domain name for your organization.
▪ Contact Email Address—The contact email address for your organization. This address receives administrative messages and notifications from the server.
| This address is not the address from which users receive Windchill notifications. That address is specified on the next page, see step 5. |
| The organization you specify is intended to represent your company and to contain and organize the data for your company employees. For use within a single company, it is best not to create multiple organizations as this will increase the complexity of managing and understanding the system. |
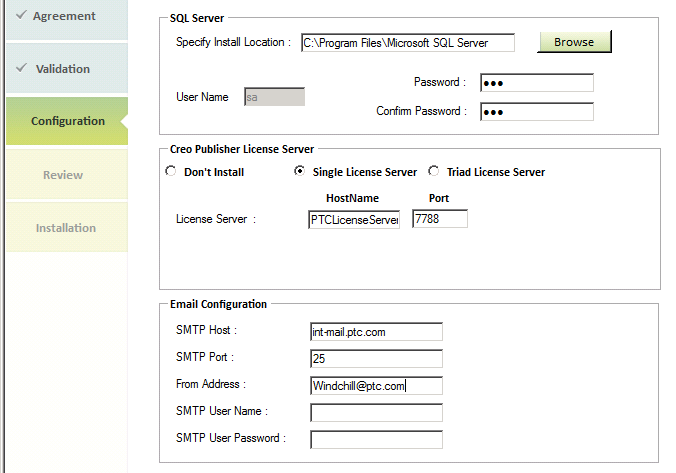
6. On the second Configuration page, enter information in the following areas, and then click Next.
| If you are upgrading to a new release, some of the information on this page is auto-filled and may not be edited. |
◦ SQL Server—Specify an installation location and credentials for the SQL Server. Make a secure record of this information for future management.
▪ Specify Install Location—To specify a location other than the default location, type the desired location or click Browse and select the desired location.
▪ User Name—The SQL Server user name is preset to sa and cannot be changed.
▪ Password
▪ Confirm Password
◦ Creo Publisher License Server—The following license server information is used by Windchill for publishing functionality such as automatically generated 3–D formats for use with Creo View
▪ Specify one of the following license server options.
▪ Don’t Install—Select this option to not install the publisher.
▪ Single License Server—Select this option if you only have one license server. This is the default.
▪ Triad License Server—Select this option if you have backup license servers.
▪ License Server—Type information in one or both of the below license server fields. The system will attempt to communicate with the license server host you specify.
▪ HostName
▪ Port
| A notification appears if the system is unable to reach the server over the port provided. Review your license server host name and port to ensure it is correct before proceeding. |
◦ Email Configuration—Email server information is used for delivering email notifications to your email server, such as Windchill event subscriptions. This functionality is optional. To set up email notifications, enter information in the following fields:
▪ SMTP Host
▪ SMTP Port
▪ From Address—This address is the address the email notifications are identified as being “from” when delivered. This field must use a valid email format: <address>@domain.com
| Use an address that is easily recognizable as being a Windchill notification, such as “Windchill@yourdomain.com.” |
▪ SMTP User Name
▪ SMTP User Password
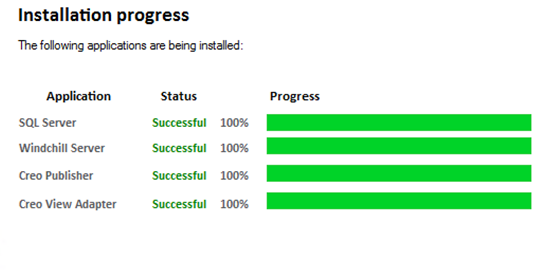
7. On the Review page, review your configuration to ensure everything is correct. To make corrections to a previous page, click Back. After you have reviewed the configuration options and verified that they are correct, click Install.
The installation time is estimated between 1–3 hours; it need not be monitored. During installation, the installer displays the progress of each component.
| The log file from the Windchill Installation Assistant can be found at the following location, where <PDMEssentials_Media> is the location where you opened the Windchill PDM Essentials media files and started the WindchillSetup application file: <PDMEssentials_Media>WC_PDMEssentials.01\logs\SuperInstaller.log. For more information, see the section “ Obtaining the Windchill PDM Essentials Media. |
8. After all components have been successfully installed, click Finish.
The Windchill Installation Assistant closes and a Windows Security window appears, requesting credentials for the server on which the installation has been completed.
9. Type the Windchill Application Server user name and password specified on the second Configuration page, and then click OK.
| Unless you specified a new user name, the default is wcadmin. |
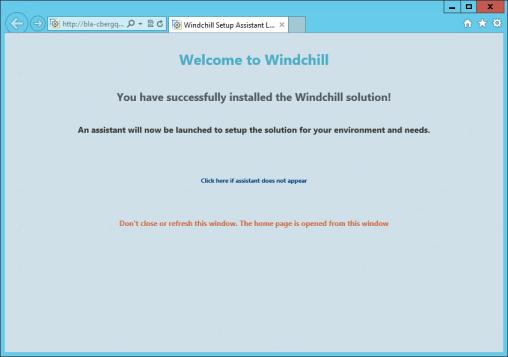
The Windchill Setup Assistant Launcher page opens in your default browser indicating you have successfully installed the Windchill solution.
| If Internet Explorer blocks the Windchill Setup Assistant Launcher page, add it to the list of trusted sites. |
The Windchill Setup Assistant launches automatically. If the Windchill Setup Assistant does not launch after about a minute, click the Click here if assistant does not appear link to manually launch it.
| Even after the Windchill Setup Assistant launches, do not close the Windchill Setup Assistant Launcher page. After the Windchill Setup Assistant is completed, this page automatically launches the WindchillHome page. If the Windchill Setup Assistant Launcher page is closed, however, you can still open the WindchillHome page from your browser favorites or a shortcut on the desktop after the Windchill Setup Assistant is completed. |