Timeline
The timeline appears above the
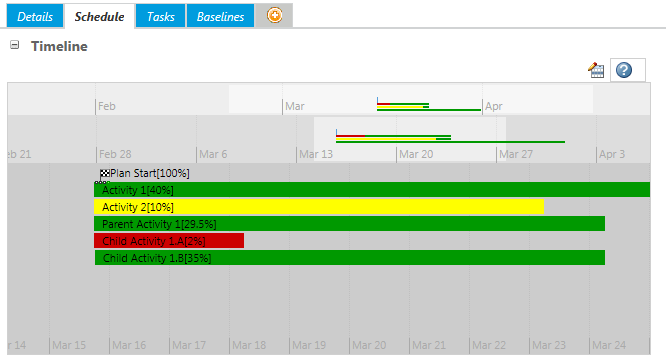
Schedule table and provides a graphical depiction of plan objects. The timeline is formatted according to the
Start and
Finish milestones.
If the timeline is not visible, you might need to click the expand icon

. Click the collapse icon

to hide it.
Otherwise, if the timeline does not appear, this indicates that activities have not yet been added to it. By default, the timeline is empty and only appears once you have added objects to it.
Add Activities to the Timeline
You can add an activity to the timeline from either the
Schedule table or the
Edit Timeline window.
To add an activity to the timeline from the Schedule table:
1. From the Schedule table, select the checkbox next to one or more plan objects you want to add.
2. From the table Actions menu, select Add to Timeline.
To add an activity from the Edit Timeline window:
1. Click the edit timeline icon

located above the timeline.
2. From the
Edit Timeline window, click the add icon

on the table toolbar.
3. In the Find Activity window, enter the appropriate search criteria.
| Click Search without entering any search criteria to return a list of all available plan objects. |
4. Select the activity you want to add to the timeline and click OK.
Remove Activities from the Timeline
To remove a plan object from the timeline:
1. Click the edit timeline icon
located above the timeline.
2. From the
Edit Timeline window, select the objects you want to remove and click the remove icon

.
The plan object is removed from the timeline.
Navigate the Timeline
Click any activity name or icon within the timeline to view additional information about that activity.
In addition to clicking and dragging the timeline to navigate, you can use several mouse and keyboard shortcuts:
Shortcut | Action |
Down arrow key  Right arrow key  Mouse scroll wheel down | Move forwards |
Up arrow key  Left arrow key  Mouse scroll wheel up | Move backwards |
PAGE UP key PAGE DOWN key | Jump forward one screen Jump backward one screen |
HOME key END key | Jump to project Start milestone Jump to project Finish milestone |
Double-click | Double-click to reposition the timeline so that the specified point appears in the center of the timeline. |
The increments at which you navigate depend on which row of the timeline you click. For example, if you click in the bottom row (days), you move forward by daily increments. Clicking a higher row allows you to move through the timeline more quickly.
| Holding down an arrow key is the fastest way to traverse the timeline. |