Creating Multiple Documents
The
New Multiple Documents action allows you to add several documents at once. Once the documents have been created, you can
add attachments to each document individually by editing them.
If creating multiple documents at once from local files, you can also
upload documents from a compressed file.
• Drag and drop one or more documents over the Folder Contents table.
• Click the new multiple documents icon

on the
Folder Contents table toolbar or select > from the table
Actions menu.
• Select > from the right-click actions menu in the Folder Contents, Products, and Libraries tables.
• Select > from the Actions menu on the Details page for a product or library.
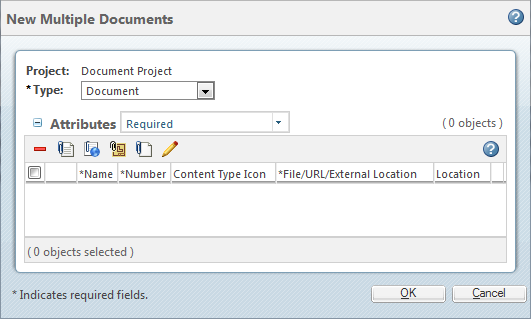
The following window opens:
1. From the Type drop-down menu, select the type of documents you are adding. This is applied to each new document. The options available are specific to your site.
2. If necessary, customize the table view to include additional document attribute fields. If an editable attribute is included in the table view, you can later set that attribute value for multiple documents at once. For information on customizing table views, see
Customizing Table Views.
| • Customize the table view before uploading files or adding document rows. Customizing the table view or selecting a new document type from the Type menu refreshes the table and removes any values you have entered. • The visibility of attributes is dependent upon the document type you have selected. |
3. Click the primary content icons on the Attributes table toolbar to add a table row with additional attribute fields:
Icon | Description |
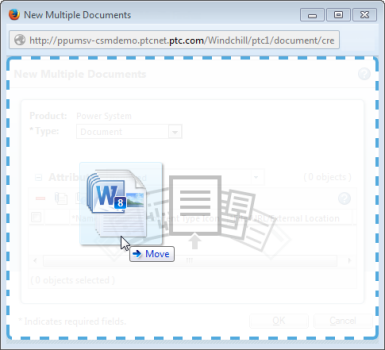
| Upload a local file. Click Browse to select a file on your local machine. You can also drag and drop one or more files to upload them: a. Open a folder browser or resize the Windchill windows so that you can view your desktop. Select the files you want to upload. | To select multiple files, press CTRL as you select files. To select a contiguous block of files, select the first file and press SHIFT when selecting the last file. |
b. Click and drag the files to the Windchill action window and then release. To replace a file, drop the new file directly over the existing file. | The name of the files pre-populate the File Name field. You cannot modify how a file name appears in Windchill without replacing the primary content file. |
|
| Create a link to an external website. A row is added to the Attributes table with the following fields: • File/URL/External Location—The full URL of the website to which you are linking. • Name—A unique name to identify the link. |
| Identify externally stored content. A row is added to the Attributes table with the following fields: • File/URL/External Location—Depending on the nature of the content, you can use this field to provide a description of the object, an address, file cabinet number, and so on. For example, the file cabinet number of the secure files you want to reference, or the location of a storage facility. Enter up to 2000 characters. • Name—A unique name to identify the content. |
| A document without content (for example, a placeholder for future documentation). You must provide a value in the Name field to identify the document. | The availability of this option depends on the Primary Content Enforcement preference. This is set by a site administrator. |
|
4. Depending on your table view and the preferences set at your site, additional attribute columns might appear. If an attribute is editable, you can set its value for multiple documents at once.
a. Select one or more documents in the Attributes table.
b. Click the edit attribute icon

.
c. From the Edit Attribute Value window, select an attribute from the Set menu. The attributes that are available are dependent upon whether they are included in the table view and if they are applicable to the document type.
d. Provide a value and click Apply or OK.
5. Click the remove icon

to remove any documents you do not want to add.
6. Once finished, click OK to create the documents.