Inserting a Windchill Attribute
Windchill Desktop Integration maps Windchill document attributes to Microsoft Office file properties.
You can use these mappings to display Windchill document attributes in your Microsoft Office file as content. For example, you can create a table in a Microsoft Word document and insert the versionInfo property into one table row. This maps to the WindchillVersion attribute. As a result, that table row automatically displays the latest Windchill document version identifier.
For a list of the default custom attributes included in Microsoft Office, see
Mapping Windchill Attributes to Microsoft Office File Properties.
|
|
• Microsoft Office document properties have a 255 character limit. When mapping attributes from Windchill, any additional characters are lost when the document is retrieved in the Microsoft Office application.
|
Inserting Attributes in Microsoft Word
In Microsoft Word, use one of the following methods:
Insert Windchill Attribute Field
1. Place your cursor in the location where you would like to insert the attribute.
2. Perform one of the following actions:
◦ From the
Windchill tab, click the insert attribute icon

.
◦ Select Insert Windchill Attribute Field from the right-click menu.
| If a window does not open when you select Insert Windchill Attribute Field from the right-click actions menu, see CS4447. |
3. A new window opens displaying the Windchill attributes. Select the attribute you want to insert and click OK.
Microsoft Word Quick Parts
1. Open the Windchill document in Microsoft Word.
2. Select the Insert tab in the application ribbon.
3. Select > .
4. Under Field names, select DocProperty.
5. Under Field properties, select the Microsoft Office property that maps to the Windchill attribute you want to display. For example, select wtname to display the Windchill document name attribute.
6. Click OK.
The field is automatically updated with the latest Windchill attribute information each time you open the document. Select > > to manually update the field.
Inserting Windchill Properties into Microsoft Excel
| When inserting a Windchill attribute in to Microsoft Excel, the following rules apply: • Select an empty cell in which to insert the Windchill attribute. If the cell includes any formulas or data, the Windchill attribute overrides those values and they are lost. • If you do not provide a unique name for the cell, the property does not link correctly to the Windchill attribute and cannot refresh. • Use a letter, an underscore character (_), or a backslash (\) as the first character of a name. For the remaining characters in the name, use letters, numbers, periods, and underscore characters. Do not use the uppercase and lowercase characters "C", "c", "R", or "r" as a defined name because these are reserved for use in Microsoft Excel. For more information on naming conventions, see Microsoft Office Help. |
In Microsoft Excel, use one of the following methods:
Insert Windchill Attribute Field
1. Select the empty cell in which you want to insert the Windchill attribute.
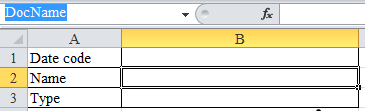
2. Enter a name for the cell in the name box. The name box is located to the left of the formula bar. In the example below, cell B2 is selected and the user has named it “DocName”:
3. Perform one of the following actions:
◦ Select the cell and click the insert icon
under the
Windchill tab.
◦ Right-click the cell and select Insert Windchill Attribute Field.
4. A new window opens displaying the Windchill attributes. Select the attribute you want to insert and click OK.
Microsoft Excel Advanced Properties
1. Select an empty cell in which you want to insert the Windchill attribute
2. Enter a name for the cell in the name box. The name box is located to the left of the formula bar. In the example below, cell B2 is selected and the user has named it “DocName”:
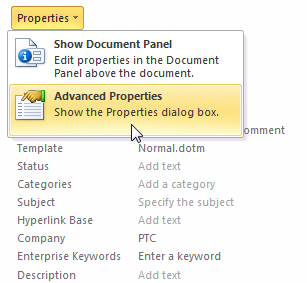
3. With the cell selected, navigate to > .
4. In the right pane, select > :
5. Open the Custom tab to view the Windchill properties.
6. Under Properties, select the Microsoft Office property that maps to the Windchill attribute you want to display. For example, select wtname to display the Windchill document name attribute.
7. With the property highlighted, select the Link to content checkbox.
8. Click Modify.
9. Click OK and then save the workbook.
10. Select > > to view your changes.
The field is automatically updated with the latest Windchill attribute information each time you open the document. Select > > to manually update the field.