呼叫 getPriceAvailability 並使用 serviceInvokeComplete 事件接聽程式
將
getPriceAvailability 服務新增至
Vuforia Studio 後,必須在體驗中呼叫該它,才可操作資料。要這麼做,您必需從
3D-Guided Service Instructions 301 更新編碼。此外,還需要新增新的事件接聽程式至編碼,體驗才能存取此服務中的資料。
|
|
此部份的完整編碼列於 GitHub 的 附錄 1 中。 |
1. 開啟 Home.js。
2. 在 userpick 事件接聽程式中,進行下列變更:
a. 刪除 priceString 變數,現在資料可以在 Vuforia Studio 中從 shoppingThing 存取,而不是從模型中的屬性存取。
b. 建立名為 meta 的物件,並將其設定為應用程式的範圍,以讓指令集中不同的函數都可存取它。變更 partName、instructionName與 partNumber 變數,讓他們變成 meta 物件的內容。
//
// create an object with the properties below that are based on attribute names from Creo Illustrate for this model. Use metadata.get to obtain the data from the JSON properties for this occurrence.
$scope.meta = {
partName : metadata.get(pathId, 'Display Name'),
instructionName : metadata.get(pathId, 'illustration'),
partNumber : metadata.get(pathId, 'partNumber'),
} // $scope.meta end
c. 刪除 price 變數和 priceInfo 應用程式參數,因為它們在 priceString 變數上曾為直接相依物件。
d. 編輯 itemName 的定義與 itemNumber 應用程式參數,讓他們與用來從 meta 物件呼叫 partName 與 partNumber 的新語法一致。然後,建立名為 target 的新變數 (範圍為應用程式),並從 userpick 事件將其設定為 targetName 變數。
//
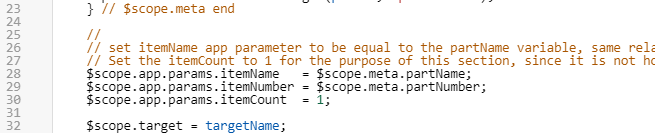
// set itemName app parameter to be equal to the partName variable, same relationship with itemNumber and partNumber and priceInfo and price.
// Set the itemCount to 1 for the purpose of this section, since it is not hooked up to an actual inventory.
$scope.app.params.itemName = $scope.meta.partName;
$scope.app.params.itemNumber = $scope.meta.partNumber;
$scope.app.params.itemCount = 1;
$scope.target = targetName;
e. 新增下列程式碼來觸發 shoppingThing 中的 getPriceAvailability 服務。此編碼遵循 twx.app.fn.triggerDataService 的格式 (「<TWX Entity>」、「<TWX Service>」、「參數」)。triggerDataService 函數會呼叫 ThingWorxVuforia Studio (於此呼叫 ThingWorx 實體與服務時) 提供的服務,以及該服務所採用的任何輸入參數。在我們的案例中,被呼叫的「物件」是 shoppingThing,它具有所有零件資訊、被呼叫的服務 (getPriceAvailability) 以及參數 (pid),此為所選零件之零件編號的參數。使用叫做 serviceInvokeComplete 事件接聽程式的非同步反呼叫來呼叫此服務的輸出。此章節稍後會建立 serviceInvokeComplete 事件接聽程式。
//
// call the getPriceAvailability ThingWorx service based on partNumber
twx.app.fn.triggerDataService('shoppingThing', 'getPriceAvailability', {pid: $scope.meta.partNumber})
f. 下方快顯的 if 語句將會被移出 userpick 事件接聽程式並移入 serviceInvokeComplete 事件接聽程式。複製 PTC 的中繼資料 API 右括號、catch 語句與 userpick 右括號,並將其貼到服務觸發程式之下。請務必將您剛從快顯拆解函數下複製的編碼刪除,否則將會有多餘的括弧。
}) //end brackets for PTC API and .then
//
//catch statement if the promise of having a part with metadata is not met
.catch( (err) => { console.log('metadata extraction failed with reason : ' +err) })
}) //end brackets for userpick function. Will continue to move throughout code
3. 更新 userpick 事件接聽程式後,現在該來建立 serviceInvokeComplete 事件接聽程式了。只有在完成 getPriceAvailability 服務之後,此事件接聽程式才會啟動。
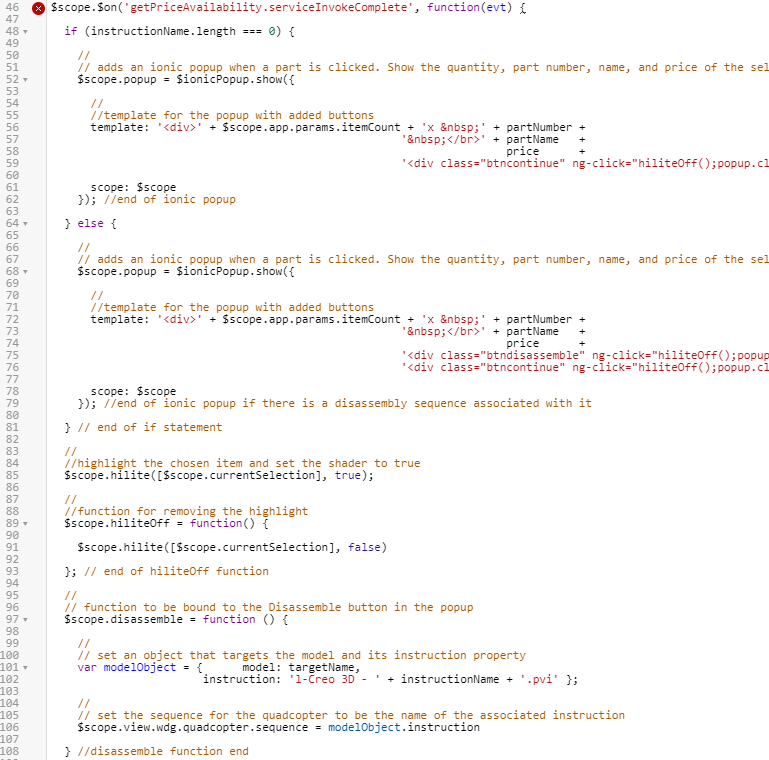
a. 在快顯的 if 語句上方新增下列的事件接聽程式的程式碼。選取從 if 語句開頭到 disassemble 函數結尾的編碼,並將其凸排以正確排列。
| 此行旁邊會有一個紅色圓圈框住的 X,因為它尚未建立它的右括弧。這是預期反應。 |
$scope.$on('getPriceAvailability.serviceInvokeComplete', function(evt) {
b. 現在將從 ThingWorx 動態新增資料,呼叫快顯的流程也會變更。在 serviceInvokeComplete 事件接聽程式下方,建立名為 rowData 的變數,它會呼叫資料負載目前的列,該列是使用 getPriceAvailability 服務建立的。
//
// variable holding all data for the current row in the infotable
var rowData = twx.app.mdl['shoppingThing'].svc['getPriceAvailability'].data.current
c. 接下來,新增指令集來決定所選物件的價格。price 變數會使用 ThingWorx 中的資訊,它會被設定為含有所選列中零件的價格的字串 (前面有 $) 或 ‘UNAVAILABLE’ (如果零件無法使用)。price 變數所使用的資訊是用條件式運算子建立的,它會在檢查零件價格之前驗證零件是否可用。這也可以使用具有相同條件的 if 語句來完成。類似的邏輯可用來建立 priceInfo 應用程式參數,它是用來在購物車中新增價格的。
//
// price is going to be the variable that is referenced in the popup, while the app parameter priceInfo will be used for adding the total in the cart
var price = rowData.avail === true ? '$' + rowData.price
: 'UNAVAILABLE';
$scope.app.params.priceInfo = rowData.avail === true ? parseFloat(rowData.price)
: undefined ;
d. 建立名為 meta 的變數,會用其來將 $scope.meta 物件 (作為本地物件) 帶入事件接聽程式,以讓您輕鬆存取其值。
//
// create a variable to bring the $scope.meta object into this event listener as a local object
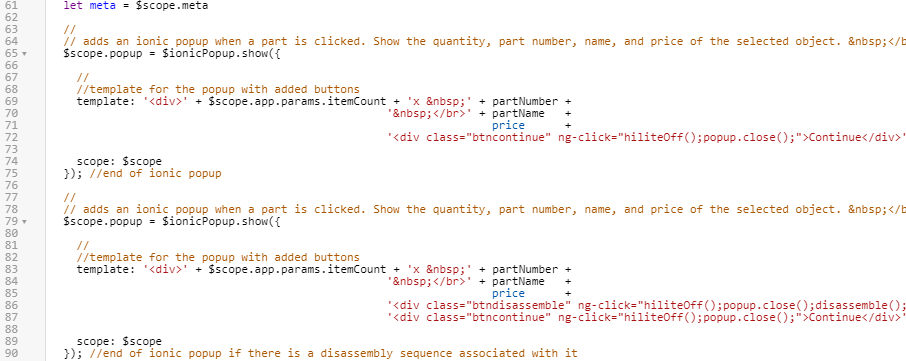
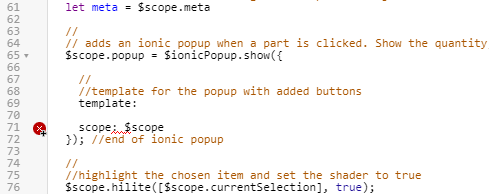
let meta = $scope.meta
e. 由於會將其他資訊新增至快顯視窗,以根據 shoppingThing 中的資訊來決定零件是否可用,現在要使用稍後會在活動中建立的函數來設定快顯的範本。因此現在,請刪除您之前建立的 if 語句的條件與右括弧,並將編碼凸排,以呼叫快顯。
f. 刪除快顯的編碼,這之前會是 if 語句的 else 案例。此外,刪除 template 屬性的值,它將在下一個步驟中被取代。這些編碼行旁邊會出現錯誤指標,但在填入範本值時就會解決這些問題。
g. template 屬性應該有一個值,它會呼叫 setTemplate 函數 (稍後會建立) 及 meta 物件的輸入和所選零件的 price 變數 。呼叫快顯的編碼現在應該和下方所提供的編碼相符。
//
// adds an ionic popup when a part is clicked
$scope.popup = $ionicPopup.show({
//
//call the function for setting the template
template: $scope.setTemplate(meta, price),
//
// set the scope for the popup
scope: $scope
}); //end of ionic popup
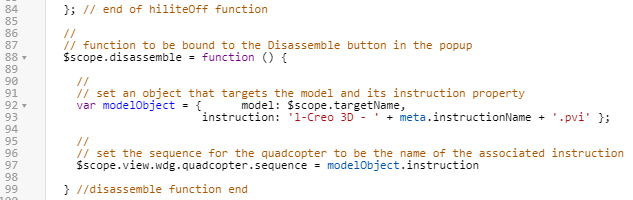
h. 針對 disassemble 功能,需要更新 modelObject 中設定模型的動畫序列的 model 與 instruction 屬性。這是存取先前建立的 $scope.target 變數之處,且 instructionName 會在 meta 物件中,與其新位置一起更新。
//
// function to be bound to the Disassemble button in the popup
$scope.disassemble = function () {
//
// set an object that targets the model and its instruction property
var modelObject = { model: $scope.targetName,
instruction: 'l-Creo 3D - ' + meta.instructionName + '.pvi' };
//
// set the sequence for the quadcopter to be the name of the associated instruction
$scope.view.wdg.quadcopter.sequence = modelObject.instruction
} //disassemble function end
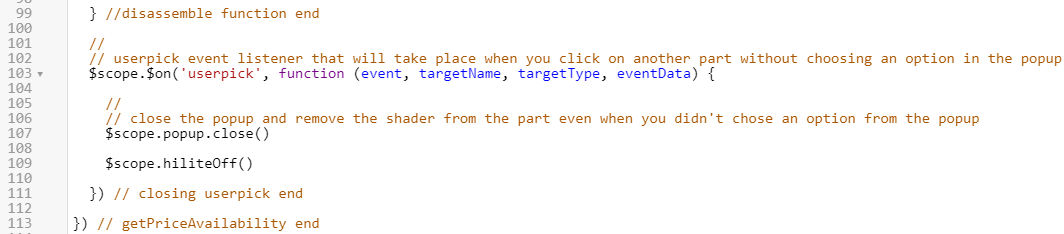
i. 新增一個右括號與括弧以完成 getPriceAvailability 服務呼叫。
}) // getPriceAvailability end
4. 為了簡化在體驗中使用 Ionic 快顯視窗的流程,必須新增另一個 userpick 事件接聽程式。此事件接聽程式會在您按一下其他零件關閉前,先關閉尚未關閉的快顯視窗。此事件接聽程式被觸發時,會在下一個選取零件中的新快顯視窗及陰影開啟前,先關閉您首先點選之零件的快顯視窗,並移除其顯影程式。
//
// userpick event listener that will take place when you click on another part without choosing an option in the popup
$scope.$on('userpick', function (event, targetName, targetType, eventData) {
//
// close the popup and remove the shader from the part even when you didn't chose an option from the popup
$scope.popup.close()
$scope.hiliteOff()
}) // closing userpick end
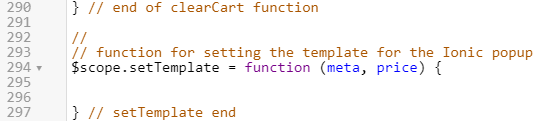
5. 更新您體驗的最後一步是建立之前描述的 setTemplate 的函數。會用此函數來設定將在快顯中使用的 template 變數,會以它判定零件可用的資訊。這包括用來判定的邏輯,要判定零件是否有關聯的拆解序列,以及它在 shoppingThing 中是否可用的。
a. 在 clearCart 函數下方,用 meta 和 price 的輸入建立名為 setTemplate 的函數。
//
// function for setting the template for the Ionic popup
$scope.setTemplate = function (meta, price) {
} // setTemplate end
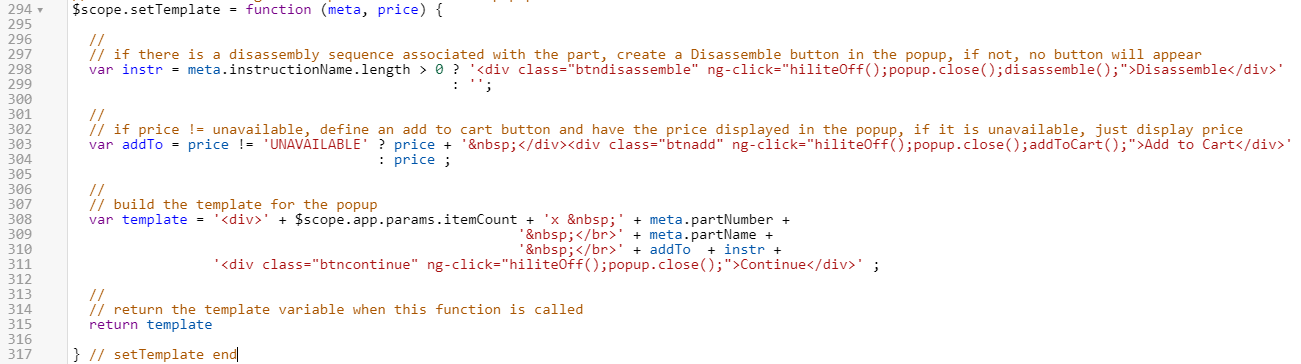
b. 首先,您要將邏輯新增至函數,以確定所選零件是否有與其相關聯的拆解序列。instr 變數使用條件運算子來查看是否已填入 meta 的 instructionName 屬性,它會取代您之前有的 if 語句。如果有相關聯的序列,則會隨之建立一個按鈕,可按一下它來觸發 disassemble 函數、關閉顯影程式和關閉快顯。如果沒有相關聯的序列,instr 就會變成空白字串。
//
// if there is a disassembly sequence associated with the part, create a Disassemble button in the popup, if not, no button will appear
var instr = meta.instructionName.length > 0 ? '<div class="btndisassemble" ng-click="hiliteOff();popup.close();disassemble();">Disassemble</div>'
: '';
c. 此外,您必須新增邏輯來確定零件是否可用。以條件運算子的結果建立 addTo 變數,以根據 shoppingThing 中的資訊,來確定零件是否有與其相關聯的價格。如果有,快顯中會同時顯示價格會跟可按式 Add to Cart 按鈕,此按鈕可觸發 addToCart 函數。若否,那麼僅將價格新增至快顯。
//
// if price != unavailable, define an add to cart button and have the price displayed in the popup, if it is unavailable, just display price
var addTo = price != 'UNAVAILABLE' ? price + ' </div><div class="btnadd" ng-click="hiliteOff();popup.close();addToCart();">Add to Cart</div>'
: price ;
d. 在決定快顯的可用按鈕之後,就會建立 template 變數,就像您為之前的快顯視窗所建立的一樣。快顯將會顯示所選零件的數量、零件編號、零件名稱與價格,以及套用至零件的按鈕。會再次新增 Continue 按鈕以關閉快顯。會為 template 變數新增一個傳回語句,這樣在執行時函數才會將其輸出。這樣就完成了 setTemplate 函數
//
// build the template for the popup
var template = '<div>' + $scope.app.params.itemCount + 'x ' + meta.partNumber +
' </br>' + meta.partName +
' </br>' + addTo + instr +
'<div class="btncontinue" ng-click="hiliteOff();popup.close();">Continue</div>' ;
//
// return the template variable when this function is called
return template
。
6. 按一下「預覽」。
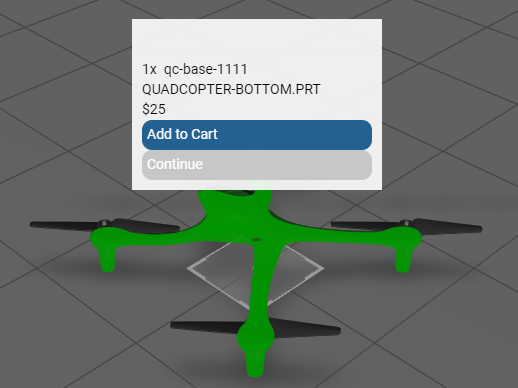
a. 按一下 quadcopter 的基底以查看快顯選項,其中包括可用的零件,但其沒有相關聯的拆解序列。按一下「Continue」以關閉快顯視窗。
| 如果在點擊其他零件前未按下「Continue」按鈕,則快顯視窗會堆疊在彼此之上,而不是疊開在第一個關閉的前面。 |
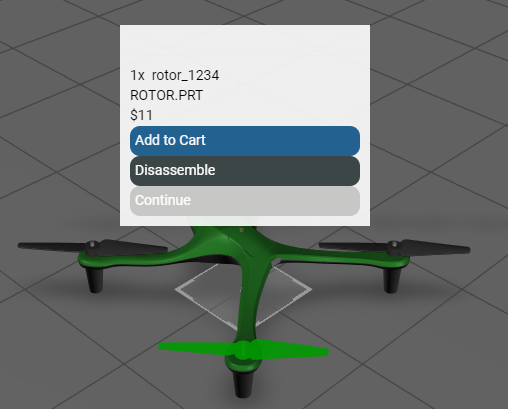
b. 選取任一軸輪來查看快顯,其會顯示有可用關聯拆解序列之零件。
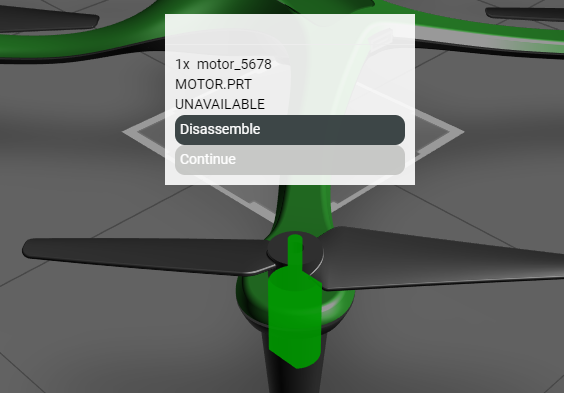
c. 選取 quadcopter 的頂部查看快顯,其會顯示無關聯拆解序列之零件 (且不可用)。
選取任一馬達來查看快顯,其會顯示有關聯的拆解序列 (但不可用) 之零件。
在此使用案例的最後一節中,您將
使用 ThingWorx 建立持續購物車。