尋找零件
除了能夠按一下零件來檢視其中繼資料以外,您還可以將搜尋列新增至體驗。如果您有零件編號,但不知道要在模型上尋找的確切零件,您可以搜尋零件編號,且零件將會反白。這可以透過建立名為 findMeta 的函數來完成,此函數可讓您輸入零件編號,然後將它與 quadcopter 的模型資料進行比較。然後具有該零件編號的零件會反白。
|
|
如果您要比較您的進度與此部份的完整編碼,您可以在 GitHub 的 附錄 1 中找到它。 |
1. 從「首頁」檢視中,開啟「2D」畫布。
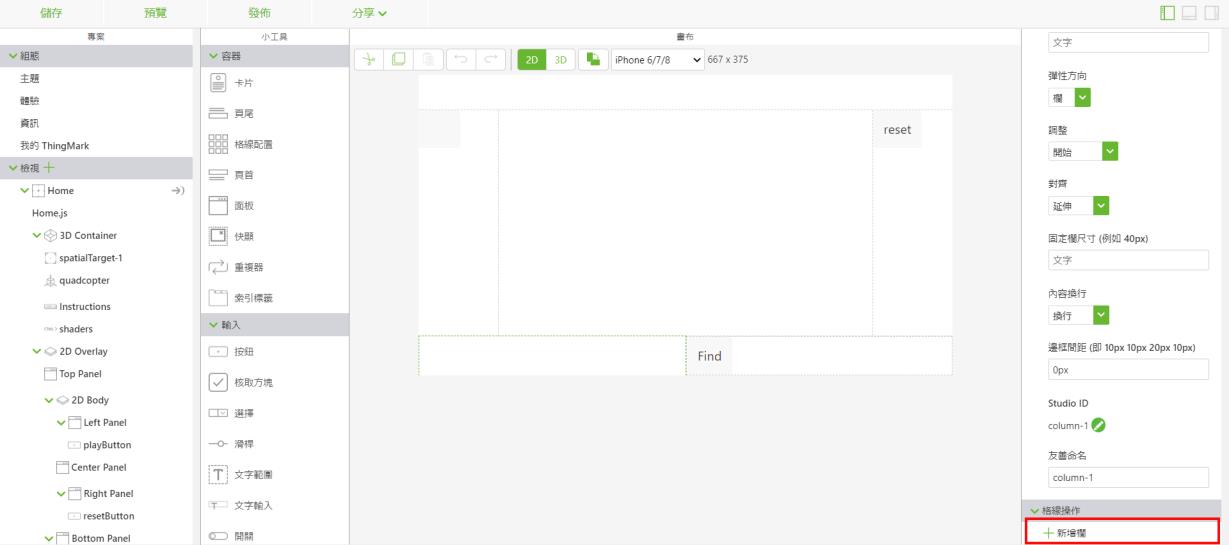
2. 拖放「格線配置」小工具至畫布底端的面板上。在螢幕左側的「檢視」樹中,按一下 「column-1」。在 「格線操作」 下選取 「新增欄」 ,將底部的面板分割成兩欄。
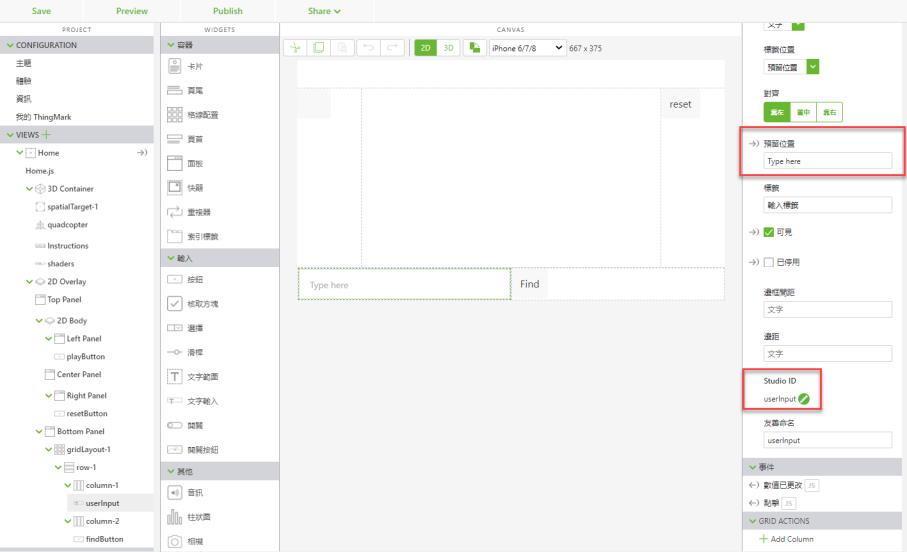
3. 將「文字輸入」小工具拖放至底部面板上的「欄-1」。文字輸入會用來輸入要搜尋零件名稱或編號的文字。在「預留位置」欄位中輸入「Type here」。將「Studio ID」設定為「userInput」。
4. 在「欄-2」中,新增「按鈕」小工具。在「文字」欄位中輸入「Find」。將「Studio ID」變更為「findButton」。在「按一下」事件的「JS」區段中,鍵入「findMeta()」。此函數將在 Home.js 標籤中建立。
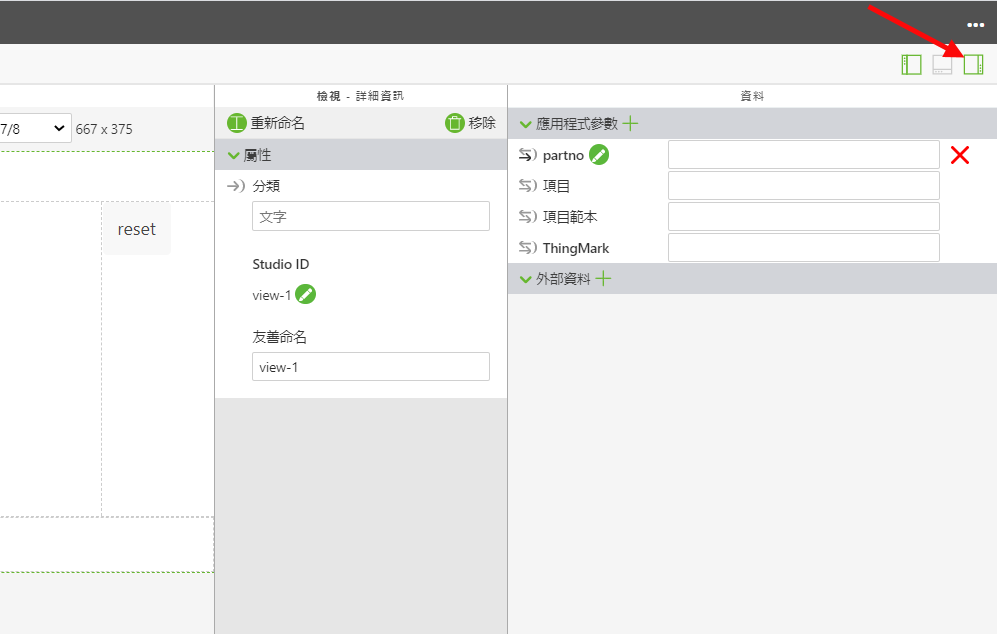
5. 按一下

(如下所示)。必須建立應用程式參數,才能將輸入至
userInput 小工具的文字連接至模型屬性。
a. 選取 「應用程式參數」旁邊綠色的 + 圖示來建立新的應用程式參數。將應用程式參數命名為「partno」,然後按一下「新增」。
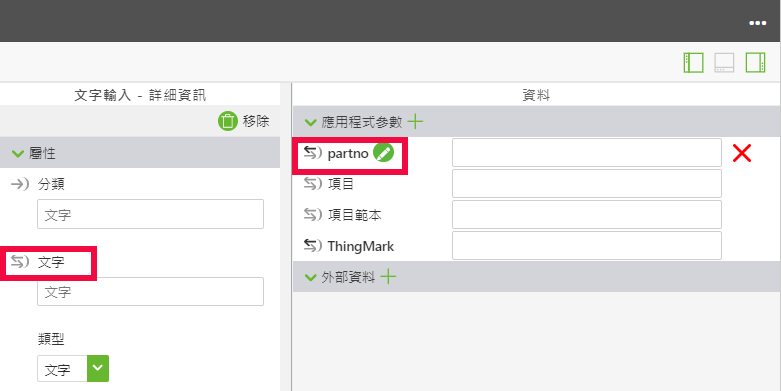
b. 開啟 userInput「文字輸入」小工具。將 userInput 小工具的文字屬性拖放到 partno 應用程式參數上。這會將輸入 userInput 方塊中的文字與 partno 變數繫結。當兩個繫結的物件旁邊的箭頭以黑色填充時,即表示已成功建立繫結。
6. 在
「檢視」樹中按一下
Home.js。 必須建立新的函數,才能使用搜尋列來尋找具有特定零件編號的零件。此功能會將採用輸入到
userInput 方塊中的文字,並將其設定為名為
searchNum 的變數。然後,此值的變數會與 quadcopter 模型中所有可用的零件編號進行比較。如果有零件編號與輸入文字相符的話,則該零件會使用先前
3D-導件服務指示 201 部份中的顯影程式來反白,如果有多個相同零件編號的例證,則這些零件都會反白。零件會反白3秒。將此函數放置在
userpick 函數的結尾,且在
playit 函數之前。
a. 建立名為 findMeta 的函數,用來尋找包含在 userInput 文字方塊中輸入之訊息的零件中繼資料。此函數中的第一個步驟是從播放按鈕中移除文字,並將模型與任何序列取消關聯。接下來,必須建立一個變數,使其值等於根據已建立的應用程式參數在 userInput 文字方塊中輸入的任何文字。
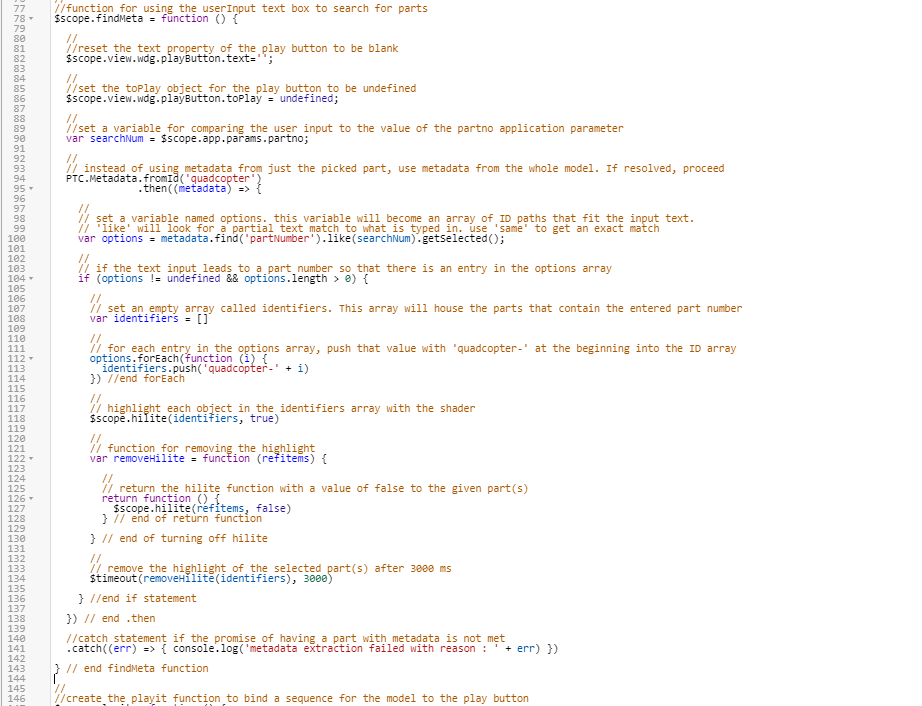
//function for using the userInput text box to search for parts
$scope.findMeta = function () {
//reset the text property of the play button to be blank
$scope.view.wdg.playButton.text='';
//
//set the toPlay object for the play button to be undefined
$scope.view.wdg.playButton.toPlay = undefined;
//
//set a variable for comparing the user input to the value of the partno application parameter
var searchNum = $scope.app.params.partno;
//
// instead of using metadata from just the picked part, use metadata from the whole model. If resolved, proceed
PTC.Metadata.fromId('quadcopter')
.then ( (metadata) => {
b. 函數的下一個部分會取得已輸入 userInput 的資料,並將其與模型的 Part Number 屬性進行比較。options變數會建立為 ID 路徑陣列,其中包含與所輸入文字對應的資料。這可透過使用 .find 和 .like 等方法一起來完成。當使用者在 userInput 方塊中輸文字時,文字會因為文字輸入與參數之間的繫結而被輸入至 partno 應用程式參數。因此,變數 searchNum 會設定為 partno 應用程式參數的值。然後,searchNum 變數會與使用 .find 方法找到的任何現有 partNumber 值進行比較。接著會使用 .like 方法來尋找與輸入方塊的文字部份或完全符合的所有零件編號。然後,這些結果會因為 getSelected 而儲存為 options 變數的值清單。
//
//set a variable for comparing the user input to the value of the partno application parameter
var searchNum = $scope.app.params.partno;
//
// instead of using metadata from just the picked part, use metadata from the whole model. If resolved, proceed
PTC.Metadata.fromId('quadcopter')
.then((metadata) => {
//
// set a variable named options. this variable will become an array of ID paths that fit the input text.
// 'like' will look for a partial text match to what is typed in. use 'same' to get an exact match
var options = metadata.find('partNumber').like(searchNum).getSelected();
//
// if the text input leads to a part number so that there is an entry in the options array
if (options != undefined && options.length > 0) {
//
// set an empty array called ID. This array will house the parts that contain the entered part number
var identifiers = []
//
// for each entry in the options array, push that value with 'quadcopter-' at the beginning into the ID array
options.forEach(function (i) {
identifiers.push('quadcopter-' + i)
}) //end forEach
//
// highlight each object in the identifiers array with the shader
$scope.hilite(identifiers, true)
//
// function for removing the highlight
var removeHilite = function (refitems) {
//
// return the hilite function with a value of false to the given part(s)
return function () {
$scope.hilite(refitems, false)
} // end of return function
} // end of turning off hilite
//
// remove the highlight of the selected part(s) after 3000 ms
$timeout(removeHilite(identifiers), 3000)
} //end if statement
}) // end .then
//catch statement if the promise of having a part with metadata is not met
.catch((err) => { console.log('metadata extraction failed with reason : ' + err) })
} // end findMeta function
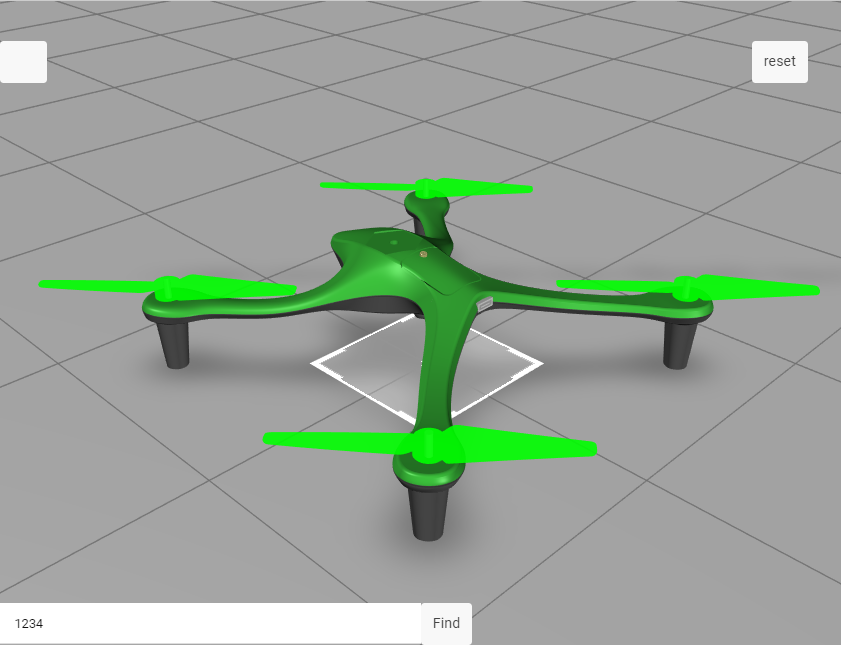
7. 按一下「預覽」。在「userInput」方塊中,輸入「1234」,然後按一下「尋找」。如果所有軸輪都以綠色反白,然後消失,則此步驟已成功完成。
可在 GitHub 的
3D-導件服務指示 202 中找到此部份的完整編碼。
繼續前往 3D-導件服務指示 301,您可以在此將
定價資料與購物車新增至模型。