反白零件
此體驗使用動態結構來選取模型上的零件。在 Vuforia Studio 的情境中,這表示模型的零件可以自行選取,而不需要靠「模型項目」來分隔零件。使用以 WebGL 為基礎的 Vuforia Studio 轉譯器 tml3DRenderer 以及出現位置資料,為使用者提供一組使用節點 ID 來變更 3D 元件的服務,根據使用者所選取的零件來進行動態變更。
這讓模型更具互動性,而不需要在體驗中新增小工具。在選取零件時,不僅會有一個 Ionic 快顯視窗來顯示零件資訊,零件也會反白。使用 JavaScript 程式碼與 TML 文字小工具來建立顯影程式;本節會說明如何執行此操作。
|
|
如果您想要比較您的進度與此部份的完整編碼,您可以在 GitHub 中的 附錄 7 中找到它。此部份的已完成專案檔案也會在 GitHub 中的 3D-導件服務指示 201 資料夾中提供。 |
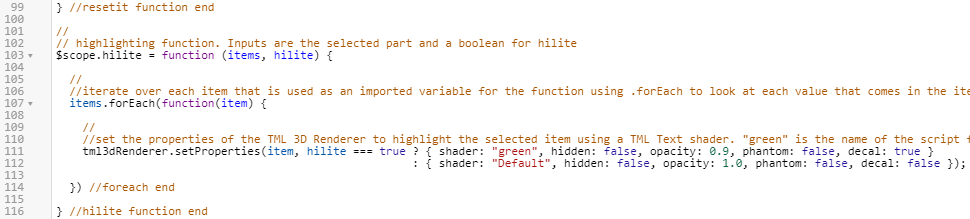
1. 首先必須在 Home.js 中,建立反白零件的新函數 hilite。此函數會有來自所選零件的 items 輸入,以及決定零件是否需要反白的布林值 hilite。在函數內,tml3DRenderer 物件會受到編輯,並會對應將在下一個步驟中新增的「TML 文字」小工具。
tml3DRenderer 物件會呼叫 .setProperties 服務來設定物件的內容。此服務會取得要反白的項目,然後檢查已輸入函數的布林值 hilite 是否為真 (true)。? 條件運算子會評估 hilite 是真 (true) 或假 (false),然後根據其真或假來傳回一組物件內容。如果 hilite 為真,則會為物件設定下列內容:{ shader:"green", hidden:false, opacity:0.9, phantom:false, decal:true }。在此情況下,「TML 文字」小工具的名稱會是 green,並會在下一個步驟新增,且這一行編碼會呼叫「TML 文字」小工具來啟動。若 hilite 為假,則物件內容會設定為 {shader:"", hidden:false, opacity:1.0, phantom:false, decal:false},以將零件的信號設為保留其預設檢視。函數的這個部份是使用 WebGL 編輯 Vuforia Studio 的圖形介面。此編碼在「TML 文字」小工具新增之前,不會反白所選零件。
//
// highlighting function. Inputs are the selected part and a boolean for hilite
$scope.hilite = function (items, hilite) {
//
//iterate over each item that is used as an imported variable for the function using .forEach to look at each value that comes in the items input
items.forEach(function(item) {
//
//set the properties of the TML 3D Renderer to highlight the selected item using a TML Text shader. "green" is the name of the script for the TML Text.
tml3dRenderer.setProperties(item, hilite === true ? { shader: "green", hidden: false, opacity: 0.9, phantom: false, decal: true }
: { shader: "", hidden: false, opacity: 1.0, phantom: false, decal: false });
}) //foreach end
} //hilite function end
2. 於「專案」窗格中返回「首頁」以檢視 3D 畫布。將「TML 文字」小工具拖放到畫布上,並將小工具的「Studio ID」變更為「shaders」。
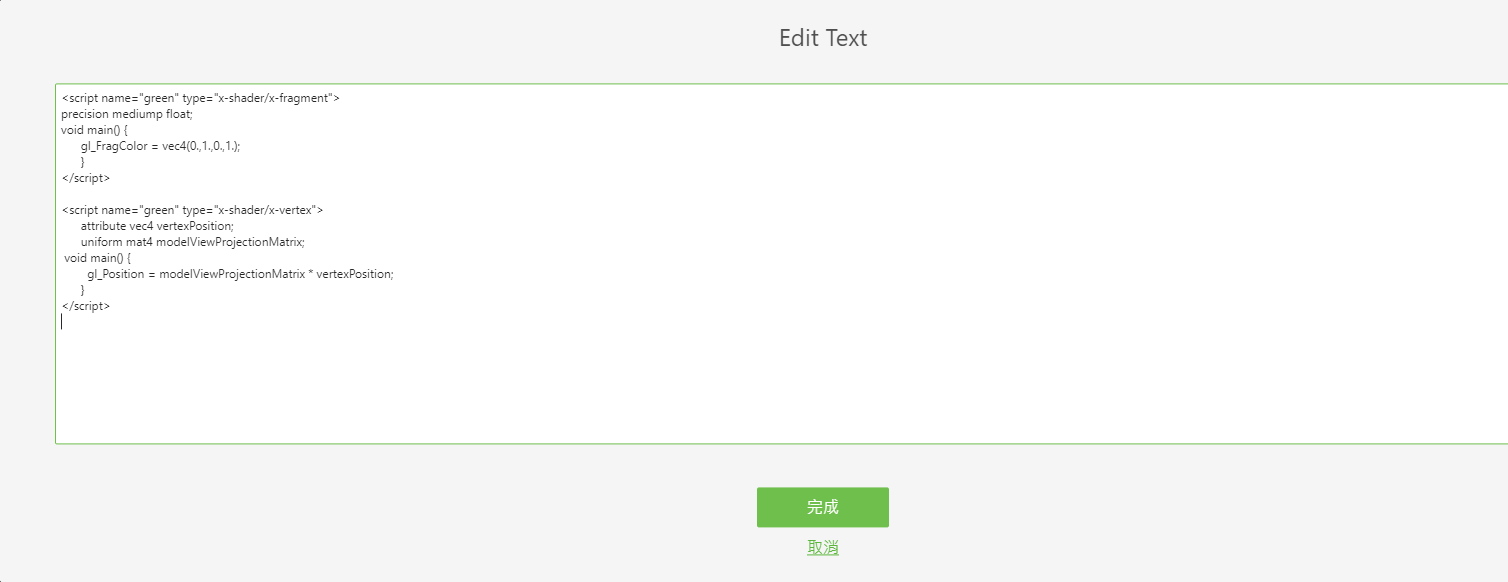
3. 按一下「文字」內容旁邊的綠色編輯圖示來開啟「編輯文字」方塊,並僅輸入以下編碼,而非註解。請勿輸入註解。完成後,按一下「完成」。
當指令集呼叫函數時,此編碼會允許套用顯影程式。
| 註解僅用於說明此情境中的編碼。如果編碼中包含註解,則它們會顯示在螢幕上。 |
//name of the shader is green, the type is setting the color.
//
<script name="green" type="x-shader/x-fragment">
//
// setting the precision of the shader. medium is fine for this application.
precision mediump float;
//
// function to set the color of the shader. Syntax is vec4(R, G, B, A) format and the values are on a 0.0-1.0 scale
void main() {
gl_FragColor = vec4(0.,1.,0.,1.);
}
</script>
// name of the shader is green, this time the type sets the position
<script name="green" type="x-shader/x-vertex">
attribute vec4 vertexPosition;
uniform mat4 modelViewProjectionMatrix;
//
// sets the position of the vertex
void main() {
gl_Position = modelViewProjectionMatrix * vertexPosition;
}
</script>
4. 現在函數已經設定完成,可以將它新增至按一下零件會呼叫的編碼中。在快顯視窗後的 userpick 函數中,新增以下編碼。
這編碼會使用先前建立的 currentSelection 變數,透過在模型中輸入與所選零件出現位置一起選取的模型名稱,來決定已被按一下的零件,以決定要反白的部份。例如,如果選取了左前的軸輪,則 [$scope.currentSelection] 會變成 [quadcopter + “-“ + /0/18/0/0],或是在字串寫出時變成 quadcopter-/0/18/0/0。True 會將布林值設定為 true,以套用反白顯影程式。
//
//highlight the chosen item and set the shader to true
$scope.hilite([$scope.currentSelection], true);
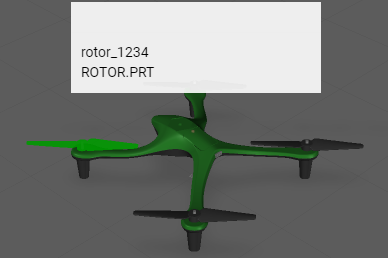
5. 按一下「預覽」以確定顯影程式正常運作。如果按一下會使某零件變為綠色,則表示已成功新增顯影程式。
6. 請注意,快顯視窗消失後,顯影程式不會消失。為了使顯影程式消失,refitems 必須作為輸入值新增至 closePopup 函數,以確定要移除顯影程式的零件。然後,closePopup 函數內會使用輸入的布林值 false 以及 refitems 來呼叫hilite 函數,以將所選零件的顯影程式關閉。這也會新增至 Home.js 中的編碼,以使相同函數中的顯影程式消失。
| 請確保 refitems 是作為一個新輸入來新增至 closePopup 函數中。否則體驗將不會如預期般運作。 |
將其他編碼新增至現有 closePopup 函數:
//
// create a function to close the popup and turn off shading. popup is the popup, refitems is the input for the part(s) that is being highlighted
var closePopup = function (popup, refitems) {
//
//The function returns a method for removing the popup from the screen and turns off the shader
return function () {
//
//using the input parts, set the hilite function to be false, removing the shading
$scope.hilite(refitems, false)
//
//apply the .close method, which removes a certain section of a selected object, to the popup variable
popup.close()
//
//change the Text property of the playButton to the instructionName variable, which was created from the JSON data of the model
$scope.view.wdg.playButton.text = instructionName;
//
// create an object for the playButton called toPlay. This object will have properties of model, which will be the name of the object that
//is clicked on and instruction, which will add the proper syntax for calling a sequence, based off the instructionName variable, into Studio
$scope.view.wdg.playButton.toPlay = { model: targetName,
instruction: 'l-Creo 3D - ' + instructionName + '.pvi' };
} //return end
} // closepopup function end
7. 將 closePopup 函數的目標更新為所選零件。
$timeout(closePopup(popup, [$scope.currentSelection]), 3000);
8. 按一下「預覽」以再次檢視體驗。如果在快顯視窗消失時,顯影程式也消失,則此步驟已成功完成。
9. 請務必儲存專案,以便可再次使用它來完成下列 3D-導件服務指示 202 部份。