添加应用程序参数并使用 If Else 语句编辑弹出窗口
除了重复使用 3D-Guided Service Instructions 200 体验中的大部分代码外,您还将在代码的开头添加一些新的应用程序参数和变量。
1. 在添加新 JavaScript 之前,需要创建新的应用程序参数。这些应用程序参数将用于将四轴飞行器模型的属性与 Vuforia Studio 中可用于数据绑定的参数进行绑定。
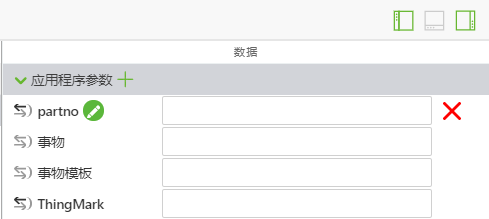
a. 打开屏幕右侧的“数据”窗格,展开“应用程序参数”列表。
b. 使用“应用程序参数”旁边的绿色 + 添加以下应用程序参数:
▪ itemCount——用于显示处于选定状态的给定零件的数量
▪ itemName——用于存储选定零件的名称
▪ itemNumber——零件号
▪ priceInfo——零件的价格
请勿在这些参数旁边的方框中输入任何数据;数据将从模型的属性中添加。在随后的操作中,这些数据将从外部源检索。
2. 在 Home.js 中的 partName、instructionName和 partNumber 变量的下方,添加两个新变量:
◦ priceString——使用 metadata.get 从模型检索 listPrice 属性。
◦ price——使用条件运算符将 priceString 从字符串数据类型更改为浮点型,这样如果存在与零件关联的价格,该变量可注册为数字,如果不存在,则其变为空字符串。
var priceString = metadata.get(pathId, 'listPrice');
//
//listPrice is obtained as a string. If there is a price for the part, then use parseFloat to turn the string into a float. If there is not a defined price, set price to ""
var price = priceString != undefined ? ' </br>$' + parseFloat(priceString)
: "";
3. 接下来,在新变量的下方,初始化在本节“步骤 1”中创建的应用程序参数,使其等于您刚创建的某些变量。将零件添加到购物车(在后续章节中创建)时会用到这些应用程序参数。
对于项目的这一部分,每个零件的库存 itemCount 均为 1,因为其未附加任何外部数据。priceInfo 与价格稍有不同,由于它用于稍后添加购物车中的物品总数,因而没有像 price 那样添加有 $。
//
// set itemName app parameter to be equal to the partName variable, same relationship with itemNumber and partNumber and priceInfo and price.
// Set the itemCount to 1 for the purpose of this section, since it is not hooked up to an actual inventory.
$scope.app.params.itemName = partName;
$scope.app.params.itemNumber = partNumber;
$scope.app.params.priceInfo = parseFloat(priceString);
$scope.app.params.itemCount = 1;
4. 现在所有初始变量和应用程序参数均已创建。