부품 강조 표시
이 경험에서는 모델에서 부품을 선택하는 데 동적 구조를 사용합니다. Vuforia Studio 컨텍스트에서 이는 모델 항목에서 부품을 분리할 필요 없이 모델의 부품을 자체적으로 선택할 수 있음을 의미합니다. WebGL 기반 Vuforia Studio 렌더러인 tml3DRenderer와 발생 데이터를 사용하여 사용자에게 노드 ID를 기반으로 3D 컴포넌트를 변경하는 서비스 세트를 제공하므로 사용자가 선택한 부품에 따라 동적으로 변경할 수 있습니다.
따라서 경험에 위젯을 추가하지 않고도 모델을 더 대화식으로 사용할 수 있습니다. 부품을 선택하면 부품 정보와 함께 Ionic 팝업이 나타날 뿐만 아니라 강조표시되어야 합니다. JavaScript 코드 및 TML 텍스트 위젯을 사용하여 셰이더를 생성합니다. 이 섹션에서는 이러한 작업을 수행하는 방법에 대해 설명합니다.
1. Home.js에서 부품 강조표시를 위한 hilite라는 새로운 함수를 만들어야 합니다. 이 함수에는 선택되는 부품이 될 items의 입력과 부품을 강조표시해야 하는지 여부를 결정하는 부울인 hilite가 포함됩니다. 함수 내에서 tml3DRenderer 객체가 편집되며, 이는 다음 단계에서 추가될 TML 텍스트 위젯에 해당합니다.
tml3DRenderer 객체가 .setProperties 서비스를 호출하여 객체의 속성을 설정합니다. 이 서비스는 강조표시되어야 하는 항목을 받아 함수에 입력된 부울 값 hilite가 true인지 아닌지 확인합니다. ? 조건부 연산자는 hilite가 true인지 false인지를 평가한 다음 그 여부에 따라 객체 속성 세트를 반환합니다. hilite가 true인 경우 객체에 대해 다음 속성이 설정됩니다. { shader:"green", hidden:false, opacity:0.9, phantom:false, decal:true } 이 경우 green은 다음 단계에 추가될 TML 텍스트 위젯에 부여된 이름이므로 이 코드 라인은 활성화를 위해 TML 텍스트 위젯을 호출합니다. hilite가 false인 경우 {shader:"", hidden:false, opacity:1.0, phantom:false, decal:false} 속성으로 설정되어 기본 보기를 유지하도록 부품에 신호를 보냅니다. 함수의 이 부분에서는 WebGL을 사용하여 Vuforia Studio의 그래픽 인터페이스를 편집합니다. 이 코드는 TML 텍스트 위젯이 추가될 때까지 선택한 부품을 강조표시하지 않습니다.
//
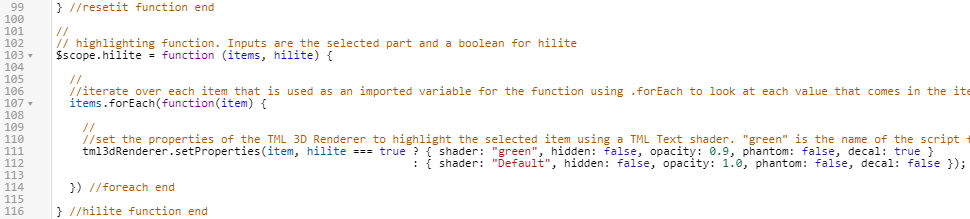
// highlighting function. Inputs are the selected part and a boolean for hilite
$scope.hilite = function (items, hilite) {
//
//iterate over each item that is used as an imported variable for the function using .forEach to look at each value that comes in the items input
items.forEach(function(item) {
//
//set the properties of the TML 3D Renderer to highlight the selected item using a TML Text shader. "green" is the name of the script for the TML Text.
tml3dRenderer.setProperties(item, hilite === true ? { shader: "green", hidden: false, opacity: 0.9, phantom: false, decal: true }
: { shader: "", hidden: false, opacity: 1.0, phantom: false, decal: false });
}) //foreach end
} //hilite function end
2. 3D 캔버스를 보려면 프로젝트 창의 홈으로 이동합니다. TML 텍스트 위젯을 캔버스로 끌어서 놓고 위젯의 Studio ID를 shaders로 변경합니다.
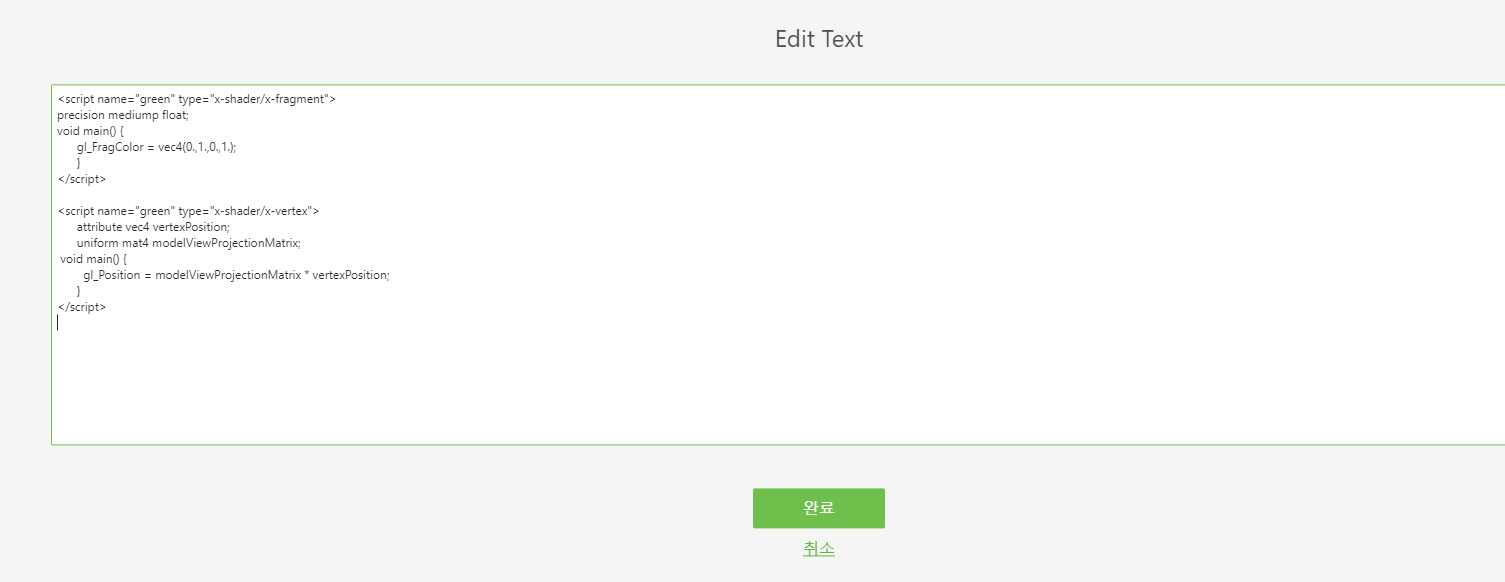
3. 텍스트 속성 옆에 있는 녹색 편집 아이콘을 클릭하여 텍스트 편집 상자를 열고 아래 코드만 입력합니다. 설명은 입력하지 않습니다. 작업을 마치면 완료를 클릭합니다.
이 코드를 사용하면 스크립트에서 함수가 호출될 때마다 셰이더를 적용할 수 있습니다.
| 설명은 이 컨텍스트에서 코드를 설명하기 위한 용도입니다. 코드가 포함된 경우 설명이 화면에 표시됩니다. |
//name of the shader is green, the type is setting the color.
//
<script name="green" type="x-shader/x-fragment">
//
// setting the precision of the shader. medium is fine for this application.
precision mediump float;
//
// function to set the color of the shader. Syntax is vec4(R, G, B, A) format and the values are on a 0.0-1.0 scale
void main() {
gl_FragColor = vec4(0.,1.,0.,1.);
}
</script>
// name of the shader is green, this time the type sets the position
<script name="green" type="x-shader/x-vertex">
attribute vec4 vertexPosition;
uniform mat4 modelViewProjectionMatrix;
//
// sets the position of the vertex
void main() {
gl_Position = modelViewProjectionMatrix * vertexPosition;
}
</script>
4. 함수가 설정되었으므로 부품을 클릭할 때 호출되는 코드에 함수를 추가합니다. 팝업이 열린 후 userpick 함수에서 아래 코드를 추가합니다.
이 코드는 이전에 작성된 currentSelection 변수를 사용하여 강조표시된 부분을 정의하기 위해 모델에서 선택한 부품과 함께 선택한 모델의 이름을 입력하여 어떤 부품을 클릭했는지 정의합니다. 예를 들어, 전면 왼쪽 로터가 선택되면 [$scope.currentSelection]는 [quadcopter + “-“ + /0/18/0/0]이 되거나 문자열이 기록되면 quadcopter-/0/18/0/0이 됩니다. True는 하이라이트 셰이더가 적용되도록 부울을 true로 설정합니다.
//
//highlight the chosen item and set the shader to true
$scope.hilite([$scope.currentSelection], true);
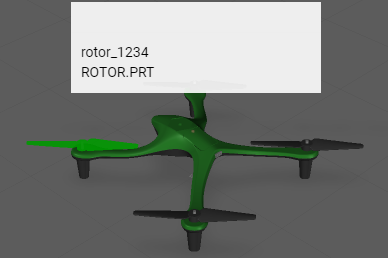
5. 미리 보기를 클릭하여 셰이더가 제대로 작동하는지 확인합니다. 클릭했을 때 부품이 녹색으로 바뀌면 셰이더가 성공적으로 추가된 것입니다.
6. 팝업이 사라질 때 셰이더가 사라지지 않음에 주의하십시오. 셰이더가 사라지게 하려면 refitems를 셰이더가 어떤 부품에서 제거되는지 정의하는 closePopup 함수에 대한 입력으로 추가해야 합니다. 그러면 hilite 함수가 refitems 입력과 함께 false의 부울 입력을 사용하여 closePopup 함수 내에서 호출되어 선택한 부품의 셰이더를 끕니다. 이는 동일한 함수에서 셰이더가 사라질 수 있도록 Home.js의 코드에도 추가됩니다.
| refitems를 closePopup 함수에 대한 새 입력으로 추가해야 합니다. 그렇지 않으면 경험이 의도한 대로 작동하지 않습니다. |
기존 closePopup 함수에 추가 코드를 추가합니다.
//
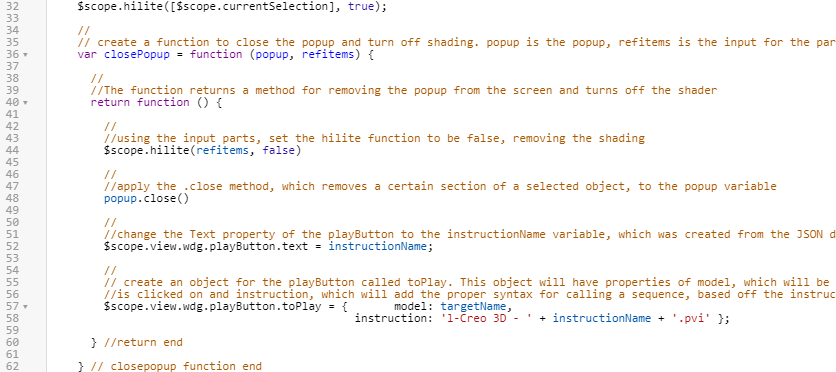
// create a function to close the popup and turn off shading. popup is the popup, refitems is the input for the part(s) that is being highlighted
var closePopup = function (popup, refitems) {
//
//The function returns a method for removing the popup from the screen and turns off the shader
return function () {
//
//using the input parts, set the hilite function to be false, removing the shading
$scope.hilite(refitems, false)
//
//apply the .close method, which removes a certain section of a selected object, to the popup variable
popup.close()
//
//change the Text property of the playButton to the instructionName variable, which was created from the JSON data of the model
$scope.view.wdg.playButton.text = instructionName;
//
// create an object for the playButton called toPlay. This object will have properties of model, which will be the name of the object that
//is clicked on and instruction, which will add the proper syntax for calling a sequence, based off the instructionName variable, into Studio
$scope.view.wdg.playButton.toPlay = { model: targetName,
instruction: 'l-Creo 3D - ' + instructionName + '.pvi' };
} //return end
} // closepopup function end
7. closePopup 함수의 대상을 선택한 부품이 되도록 업데이트합니다.
$timeout(closePopup(popup, [$scope.currentSelection]), 3000);
8. 미리 보기를 클릭하여 경험을 다시 확인합니다. 팝업이 사라질 때 셰이더가 사라지면 이 단계가 성공적으로 완료된 것입니다.
9. 다음 3D-Guided Service Instructions 202 섹션을 완료할 때 다시 사용할 수 있도록 프로젝트를 저장하십시오.