Map the Experience with the IRS
The IRS allows you to create configurations in a way that is scalable for multiple configurations of a model template that maps to an experience. These mappings are created using cURL to connect your command line interface (CLI) with your Experience Service. This section walks you through the process for mapping your experience.
1. Make sure that your experience is published and has a ThingMark associated to it.
2. Download the following
.bat files from
GitHub and add them to the same folder where you stored the
curl.exe file:
◦ mappings.bat
◦ resolve.bat
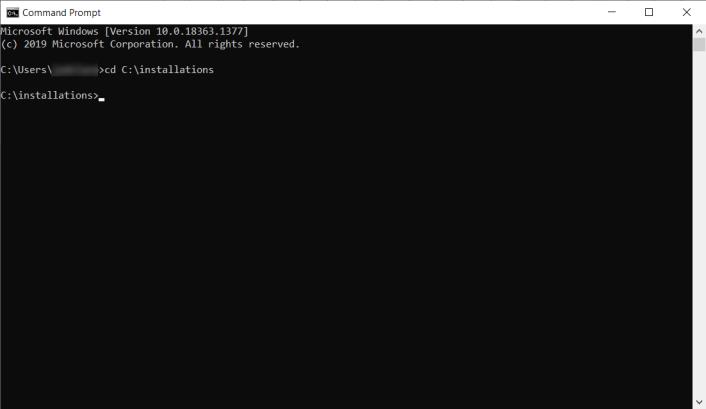
3. Open your CLI of choice. For this use case, we’ve used Command Prompt. Navigate to the directory that you saved the curl.exe file to. For example, C:\installations.
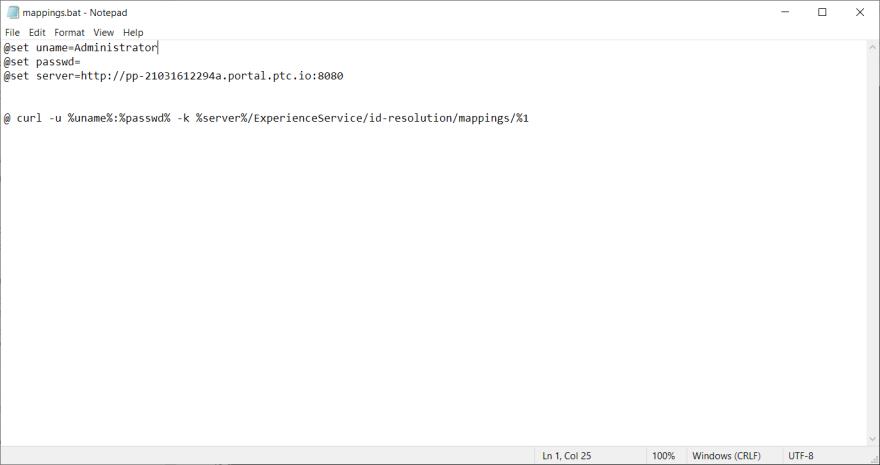
4. In the CLI, type mappings. This runs the mappings.bat file that sets the log in credentials for your username, password, and Experience Service.
| Our password has been hidden in the image below for security purposes. |
It then uses cURL to access your Experience Service to find all experiences that are associated with the Experience Service. You should see all of the experiences that you’ve published in the list.
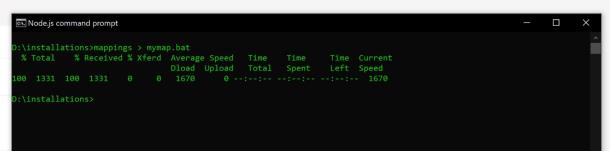
5. Next, save the results of running mappings to your own .bat file so you can edit the properties that were created when publishing from Vuforia Studio. Use the following command to create a new .bat file:
mappings > mymap.bat
This new file will be saved in your current directory, and will be used to create a template for the experience that can be configured.
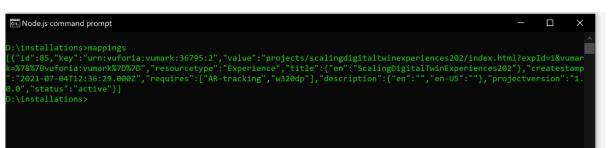
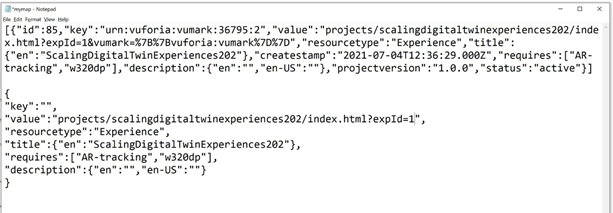
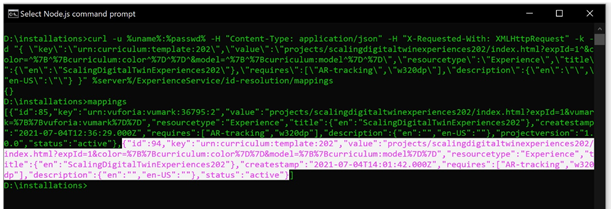
6. Open the mymap.bat file that you just created. You should see the results from mapping your experiences.
Find the project that you just created; it will most likely be at the end of the file. You should be able to find the mapping for the experience that you published by looking at the value property of the mappings and finding which one says:
"projects/scalingdigitaltwinexperiences202/index.html?expId=1&vumark=%7B%7Bvuforia:vumark%7D%7D"
7. Each property of the mapping is listed in the table below:
Property | Description |
id | The ID number for the mapping. |
key | The ThingMark that you associated with the experience. |
value | The URL of the experience. The format of the URL is: path/page.html?parameters. The path/page.html portion is the experience name. The parameters are mapped with their values. In this case, expId is its own parameter that has a value of 1, and vumark is its own parameter with a value of %7B%7Bvuforia:vumark%7D%7D. These parameters will be updated as other configurations are created. |
resourcetype | The type of resource the experience is associated with. |
title | The title of the experience that you entered in the Info section in Vuforia Studio. |
createstamp | The timestamp for the mapping being created. |
requires | Sets the tracking requirements. |
description | Description of the project if you created one. |
projectversion | Version of the project. |
8. The first edit you need to make to the .bat file is to remove parameters from it. Remove the following properties from the file completely:
◦ id
◦ createstamp
◦ status
◦ projectversion
9. Then, remove the entire value for the key property and remove everything after projects/myproject/index.html?expId=1 in the value property.
| Ultimately, you will need to keep this code as a single line of text, but the formatting of the JSON in the .bat file below has been edited for better readability. |
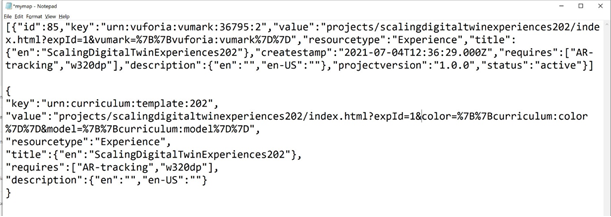
10. Next, you will need to add new parameters to your value property. These parameters will be the same ones that you created in the previous section for the color and the model of the quadcopter model, and they will be used to configure the experience. For this use case, we will name the new template curriculum, but you can name it something different if you choose. Change the value property to include the following code:
"value":"projects/scalingdigitaltwinexperiences202/index.html?expId=1&color=%7B%7Bcurriculum:color%7D%7D&model=%7B%7Bcurriculum:model%7D%7D",
If you look at the text that you just added, you’ll notice this pattern:
&color=%7B%7Bcurriculum:color%7D%7D
This pattern is a url-encoded query parameter with a format of &name=value. In the example above, name is color, and value is {{curriculum.color}}. The double braces indicate that the value inside is to be evaluated; in this case, we are looking for the value of (urn.)curriculum.color, which will be added to the IRS.
11. A key must be created for the experience to map to. Add the key below that maps to the curriculum template.
"key":"urn:curriculum:template:202"
This step completes your template.
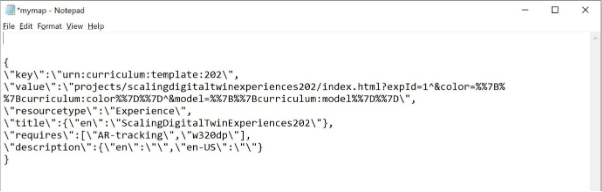
12. Now, you’ll need to turn this .bat file into a command that can run against the IRS.
There are some characters that can be misinterpreted by the command interpreter, so you’ll need to replace them to ensure the information is interpreted correctly. Open an editor, like Notepad, and do a search and replace for the following characters.
Replace This... | With This... |
“ | \” |
% | %% |
& | ^& |
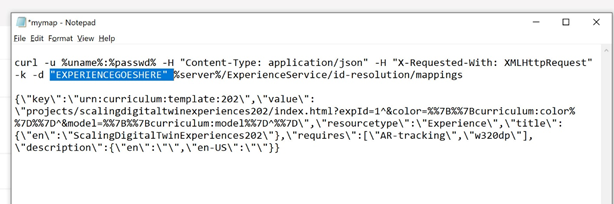
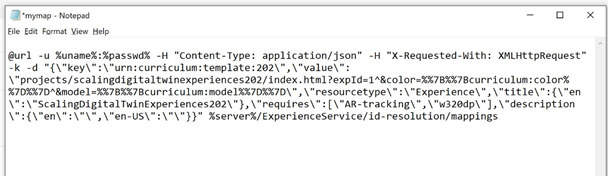
13. Add the following to the file:
curl -u %uname%:%passwd% -H "Content-Type: application/json" -H "X-Requested-With: XMLHttpRequest" -k -d "EXPRIENCEGOESHERE" %server%/ExperienceService/id-resolution/mappings
Then, replace EXPERIENCEGIESHERE with the block of text you edited above.
14. You can now run this .bat file at the command prompt.
C:\installations> mybat.bat
15. You can also copy and paste the following:
curl -u %uname%:%passwd% -H "Content-Type: application/json" -H "X-Requested-With: XMLHttpRequest" -k -d "{ \"key\":\" urn:curriculum:template:202\", \"value\":\"projects/scalingdigitaltwinexperiences202/index.html?expId=1^&color=^%7B^%7Bcurriculum:color^%7D^%7D^&model=^%7B^%7Bcurriculum:model^%7D^%7D\", \"resourcetype\":\"Experience\",\"title\" : { \"en\":\"ScalingDigitalTwinExperiences202\" }, \"requires\" : [ \"AR-tracking\",\"w320dp\" ], \"description\":{ \"en\":\"Curriculum demo\" } }" %server%/ExperienceService/id-resolution/mappings
16. Run the mappings command to make sure that a new mapping has been added to the Experience Service template. You should see the new mapping at the end of the mappings list.
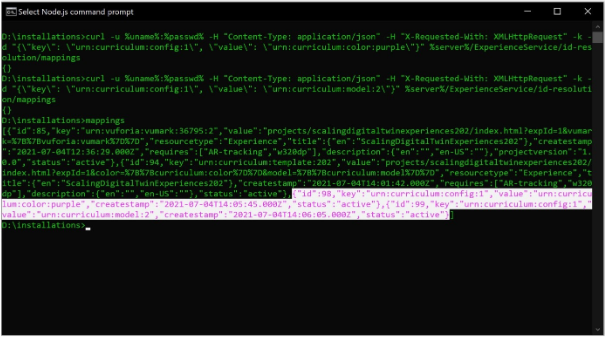
17. Once the template is mapped to the experience, you must map configurations to specific properties. These properties will be used to configure the parameters of the template that you created for the model and color of the quadcopter. The first configuration will be named config 1.
a. Use the code below to set the first configuration parameter—the color parameter. The color parameter will interact with the application parameter that you previously created in Vuforia Studio, so any of the colors that you created in the first step will be available as parameter inputs. For this example, we’ve set the color of the model to be purple.
curl -u %uname%:%passwd% -H "Content-Type: application/json" -H "X-Requested-With: XMLHttpRequest" -k -d "{\"key\": \"urn:curriculum:config:1\", \"value\": \"urn:curriculum:color:purple\"}" %server%/ExperienceService/id-resolution/mappings
b. Next, you’ll map the model parameter the same way that you mapped the color parameter. This time, you’ll use 2 as the model parameter, which maps to the second quadcopter model option. With the two mappings, the urn:curriculum:config:1 key will now map to both of the following values:
▪ urn:curriculum:color:purple
▪ urn:curriculum:model:2
curl -u %uname%:%passwd% -H "Content-Type: application/json" -H "X-Requested-With: XMLHttpRequest" -k -d "{\"key\": \"urn:curriculum:config:1\", \"value\": \"urn:curriculum:model:2\"}" %server%/ExperienceService/id-resolution/mappings
c. If you run mappings again, you’ll see that the configuration mappings have been added to the IRS.
18. Once the configuration and its parameters have been created, the configuration must be mapped back to the template. Previously we mapped urn:curriculum:template:202 to the experience as its template. Now, we will map urn:curriculum:config:1 back to urn:curriculum:template:202.
curl -u %uname%:%passwd% -H "Content-Type: application/json" -H "X-Requested-With: XMLHttpRequest" -k -d "{\"key\": \"urn:curriculum:config:1\", \"value\": \"urn:curriculum:template:202\"}" %server%/ExperienceService/id-resolution/mappings
19. The last step for mapping the configurations is to map your ThingMark to the configuration that you created. Whenever you scan this specific ThingMark, this unique configuration of the model will appear.
| You have to input your specific ThingMark instance where applicable. |
curl -u %uname%:%passwd% -H "Content-Type: application/json" -H "X-Requested-With: XMLHttpRequest" -k -d "{\"key\": \"urn:vuforia:vumark:YOURTHINGMARK\", \"value\": \"urn:curriculum:config:1\"}" %server%/ExperienceService/id-resolution/mappings
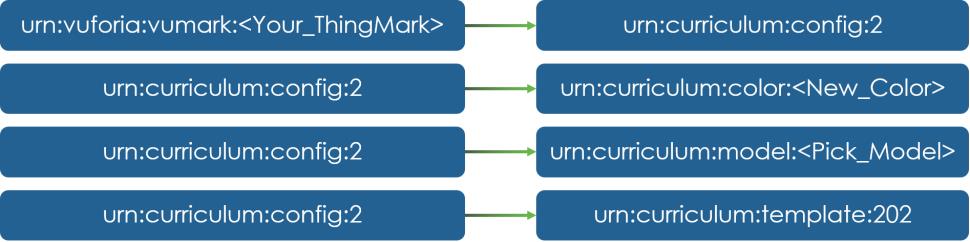
20. Run mappings one more time. You should see all of the mappings that you’ve created throughout this section listed.
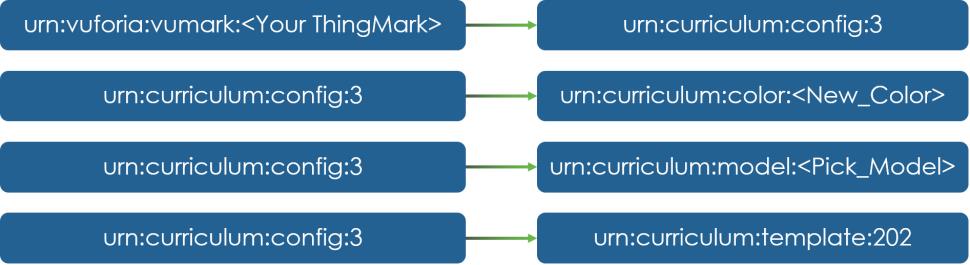
21. For reference, the mappings that you’ve created in this section are shown in the image below.
Test the Mappings
1. Run the following command in your CLI:
resolve urn:vuforia:vumark:<Your_ThingMark>
This takes all of the resolutions assigned to that ThingMark and puts them into text form. If you see color=purple&model=2 instead of color=^%7B^%7Bcurriculum:color^%7D^%7D^&model=^%7B^%7Bcurriculum:model^%7D^%7D, then this mapping has been added successfully. The model parameters should have replaced the placeholder variables that were originally in the URL.
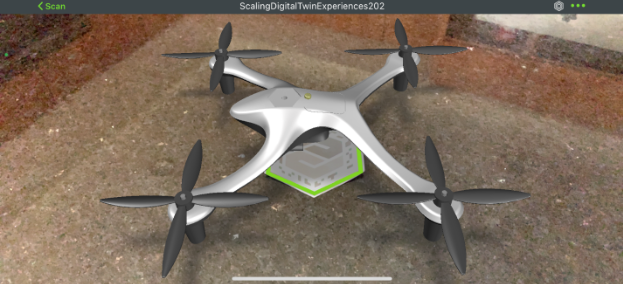
2. Next, open Vuforia View and scan the ThingMark that you assigned to urn:curriculum:config:1. If you see the configuration of the quadcopter that you created, you have successfully added your first configuration using the IRS.
3. Now that you’ve successfully created one configuration, try to create two more configurations named config:2 and config:3 on your own using the curriculum template that you created. Configurations can be added to either the same ThingMark or a different one. Try creating the following mappings on your own:
4. Use Vuforia View to see your newly created configurations.
A semi-completed
.bat file named
ScalingDigitalTwinExperiences202.bat is available in GitHub. This
.bat can be run to execute all the mappings in steps 11-17 for three different configurations.
mappings.bat and
resolve.bat files are also available in GitHub. You will need to add your username, password, server, ThingMark numbers, and edit the project name (if applicable) before the file can be run. Run the file by typing
ScalingDigitalTwinExperiences202 into the CLI while in the directory where you have saved your other files.
The final result is 3 configurations. A thingmark (1) maps to the configuration, which (2) gathers various properties/values on the pathway to the template (3) which replaces variables (color, model) with the values collected. The result is an experience with the variable inputs resolved – in this example, the thingmark maps to configuration 2, which is a red model1 item. The final experience shows a red quadcopter.
Let’s continue to
Digital Twin 301 and start working with configurations in
ThingWorx and the IRS.