Single Sign-On (SSO)
Before You Begin
If you are a commercial customer, you can enable Security Assertion Markup Language (SAML) authentication. Vuforia Chalk supports identity providers that implement the SAML 2.0 protocol.
Examples of identity providers known to implement SAML 2.0 are:
• PingFederate
• Okta
• Microsoft Active Directory Federation Services (ADFS)
You will need to work with your IT department to configure SSO for Chalk. You can configure your Identity Provider for use with Chalk by using the provided SAML POST URL and SP ID found on the Identity Provider Settings step of SSO setup in the Chalk Admin Center.
You will also need to obtain the SAML metadata file from your IdP’s configuration page. Refer to the documentation from your IdP vendor for specific instructions on retrieving this file.
Things to Keep in Mind
Here are a few things to keep in mind when using ADFS as an IdP.
• The log in session must be initiated from Chalk, not the IdP.
• You must add a user in the Chalk Admin Center for every SSO user.
• The email address of the user in the Chalk Admin Center must match the email address returned in the SAML response exactly. The case of the email address matters.
Enable SSO for Vuforia Chalk
2. Click My Account.
3. Scroll down to the Single Sign-on (SSO) section, and click Configure.
4. On your IdP’s configuration page, you’ll need to provide the SAML POST/Redirect Binding URL and The urn / Audience URI / SP Entity ID found on the Identity Provider Settings step.
5. Navigate back to Single Sign-on (SSO) Setup for Chalk and click Next.
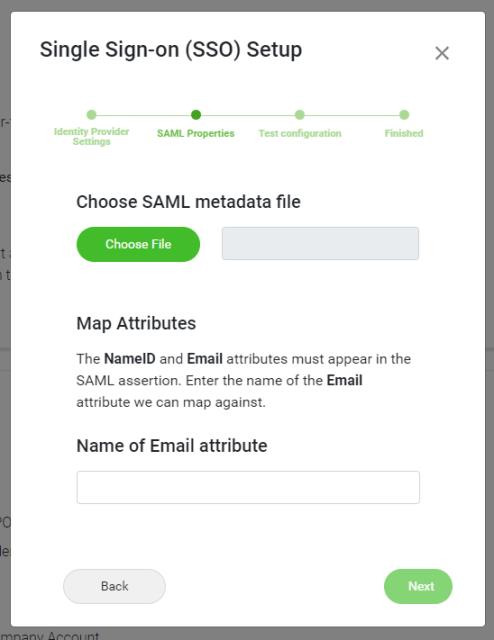
6. Under Choose SAML metadata file, click Choose File, and navigate to the SAML XML file that you downloaded from your IdP’s configuration page.
| Refer to the documentation from your IdP vendor for specific instructions on retrieving the SAML metadata file. |
Then, under Name of Email attribute, enter your IdP’s email attribute. Click Next.
7. Click Test Configuration. The log in page for your IdP appears.
8. Enter the appropriate username and password.
| The username used to verify the connection to the IdP must be the same as the username that is logged into the Chalk Admin Center. If they do not match, an error will occur. |
9. If the test is successful, log out of the Chalk Admin Center, and then log back in for the SSO changes to go into effect. These changes will also be propagated to the Chalk app and Chalk for Desktop.
| Once SSO has been successfully configured, a user must be created in the Chalk Admin Center for each SSO user. |
Active Directory Federation Services (ADFS) as an Identity Provider
| The email address of the user in the Chalk Admin Center must match the email address returned in the SAML response exactly. The case of the email address matters. ADFS has macros available to transpose the claims, and one of them will convert to lower case. |

