Customizing the Mashup Builder Workspace
The Mashup Builder enables you to customize the design interface to meet your needs. You can rearrange the interface as desired to create a custom workspace and then save that workspace for future sessions. Workspace customization is based on the two dock parts of the interface and the sections and panels in those docks.
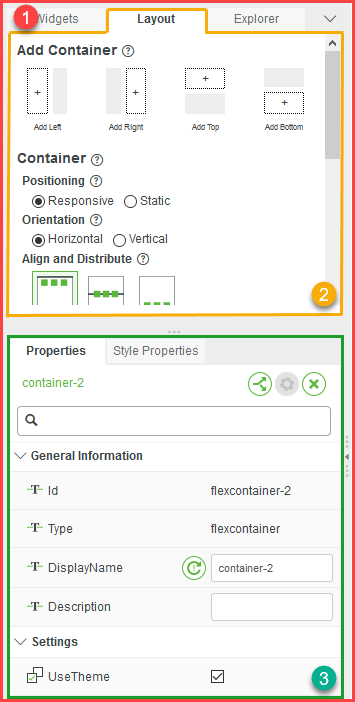
The left and right sides of the interface contain docks. Each dock can contain up to three sections. These sections can have any number of panels, represented by tabs on the section. For example:

1. Dock
2. Panel
3. Section
When a section contains more panels than can be displayed, the  option displays to the right of the section tabs. Click this option to see the hidden panels.
You can close a dock by either clicking and dragging the inside border of the dock or by clicking the arrow on the border.
When a dock is closed, the sections in the dock appear as icons:
When you click one of the icons, the associated section is overlaid on the interface. Click the arrow on the border of a closed dock to open it.
You can customize the workspace in the following ways:
• Resize a dock.
Click and drag the inside border of a dock to make it smaller. If a section in the resized dock contains more panels than can be displayed, the  option displays to the right of the panel tabs. Click this option to see the hidden sections.
• Resize sections in a dock.
Click and drag the top or bottom border of a section to resize it.
• Close one or both of the docks.
Click the arrow on the inside border of a dock to close it. The dock closes, and the panels in the dock appear as a list of icons.
• Drag a panel from a section in a dock to a different section.
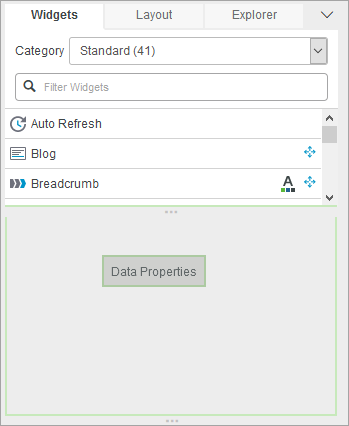
Click on a panel tab and drag it to the top of a different section. If you can drop the panel on that section, the panel tabs are outlined in green:

Drop the panel, and it is added to the other section. If there are no more panels in the section from which you dragged the panel, that section disappears.
• Drag a panel from a section in a dock to create a new section in a dock.
Click on a panel tab and drag it to the bottom of a different section. If you can drop the panel on that dock, the bottom of the section is outlined in green:

Drop the panel, and it is added to a new section. A dock can have a total of three section. If there are no more panels in the section from which you dragged the panel, that section disappears.
The view of your workspace is controlled by the Workspace option:

When you modify the workspace, the setting changes from Default to Custom:

You can always return to the default workspace by selecting Default from the list.
To save a custom workspace to use in future sessions:
1. Arrange the Mashup Builder workspace as desired.
2. Select Create New in the Workspace option.
The New Workspace window opens.
3. In the New Workspace window, enter the name for your custom workspace in the Workspace Name option and click Done.
The name for your new workspace appears in the Workspace option.
 This will be available in future sessions.
Click  next to the option to delete a saved workspace.