Dynamics 365 CRM Triggers
You can set a trigger for a specific workflow by selecting events from the trigger list.
Using Dynamics 365 CRM Triggers
To use this trigger in your workflow, you need to create a new event for the Dynamics 365 CRM trigger, and then connect it to the flow. To create a new event, do the following:
1. Place the pointer on the start icon  , and then click
  or double-click . A list of triggers appears.
, and then click or double-click . A list of triggers appears.2. Select the Dynamics 365 CRM trigger. The Dynamics 365 CRM trigger configuration window opens.
• If a trigger is already created, select an existing trigger, and then click SAVE. • To create a new trigger, click Create a new event for Dynamics 365 CRM, and then proceed with the steps further. |
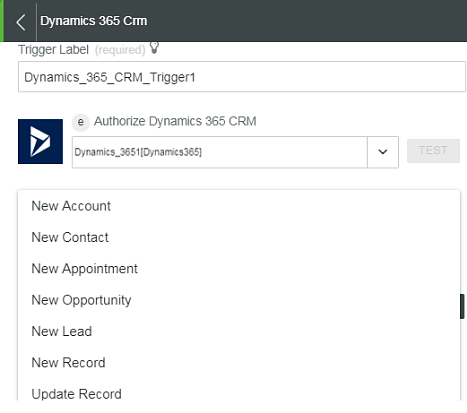
3. Edit the trigger label, if needed.
4. To add a new authorization, refer to the Authorize Dynamics 365 CRM section in the Dynamics 365 CRM connector topic.
If you previously added a Dynamics 365 CRM authorization, select an authorization from the list. |
5. In the Select Trigger field, select a trigger. A list of triggers with a description of what initiates each trigger follows:
◦ New Account—Account is created.
◦ New Contact—Contact is created.
◦ New Appointment—Appointment is created.
◦ New Opportunity—Opportunity is created.
◦ New Lead—Lead is created.
◦ New Record—Record is created for the specified entity.
Entity Name—Entity name is selected or specified.
◦ Update Record—Record is updated for the specified entity.
Entity Name—Entity name is selected or specified.
6. In the Custom Filters section, click ADD, and then enter the following details:
a. Input
b. Expected—The expected output.
c. Condition—Condition to apply on the filters such as equals, greater than, less than, contains, does not contain, matches, and so on.
Click ADD to set multiple custom filtering criteria.
7. Click SAVE.
For more information on custom filters, refer to the topic Adding Custom Filters.