Azure SQL Single Instance Installation
Database Setup for Single Instance
Prerequisites
Using Azure Portal, create the following resources. If using existing resources, skip and move to the next section.
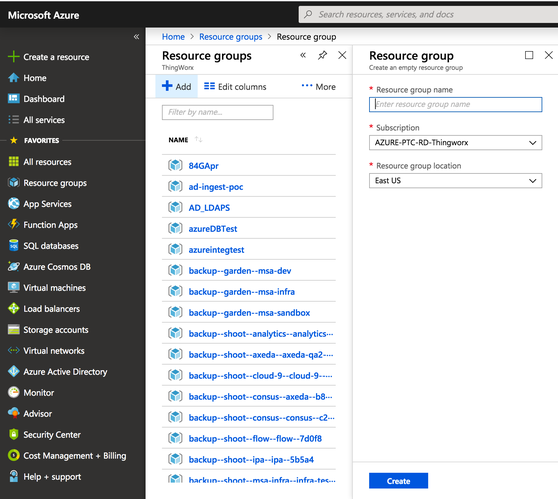
1. Resource Group: Create a new Resource Group (or use existing) for your database and other resources. To create a new resource group, go to Azure Portal → Resource groups → Add .
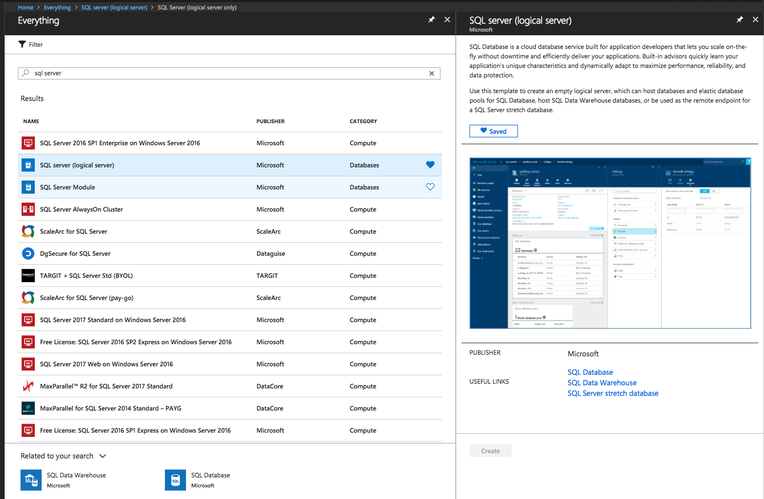
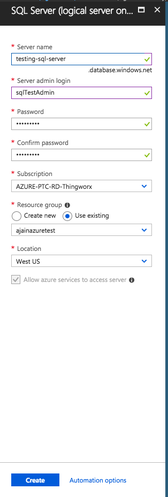
2. SQL Server (logical server): Create a new SQL server (logical server) for your ThingWorx database using Azure Portal → Create a resource → Search → SQL server (logical server) → create.
Open the required ports on the SQL server logical server's firewall so ThingWorx and CLI can access the Azure Resources for running scripts to create ThingWorx database and schema - https://docs.microsoft.com/en-us/azure/sql-database/sql-database-get-started-portal-firewall
Setting up ThingWorx Database and Schema for Single Instance
Using Azure CLI, execute the following scripts to create ThingWorx database and ThingWorx schema. These scripts are packaged with ThingWorx release artifacts.
To display various script parameters and their descriptions, run help on any script as follows: • For *.sh files (run in terminal): *.sh --help • For *.ps1 files (run in powershell) - Get-Help .\*.ps1 |
In the examples below, the following resource names are used: • Resource group name – testresourcegroup • SQL server (logical server) name – testing-sql-server • SQL server (logical server) admin name |
1. Run the following script to create a ThingWorx database in your SQL server (logical server) and resource group:
◦ Linux:
./thingworxAzureSingleInstanceDBSetup.sh -h [SQL server (logical server) name] -d thingworx -g [Resource group name]
For this example, the command is: ./thingworxAzureSingleInstanceDBSetup.sh -h testing-sql-server -d thingworx -g testresourcegroup |
◦ Windows:
.\thingworxAzureSingleInstanceDBSetup.ps1 -h [SQL server (logical server) name] -d thingworx -g [Resource group name]
For this example, the command is: .\thingworxAzureSingleInstanceDBSetup.ps1 -h testing-sql-server -d thingworx -g testresourcegroup |
• When prompted about what subscription to use, either type in one of the names listed, or press ENTER to use the subscription that was last set • To verify the newly-created ThingWorx database in your SQL server logical server, use the following command to list all databases: - az sql db list --resource-group [resource group name] --server [SQL server (logical server) name] |
2. Run the following script to create the ThingWorx Schema (model, property, and data) in the ThingWorx database created above:
◦ Linux:
./thingworxAzureSingleInstanceSchemaSetup.sh -d thingworx -l [SQL server (logical server) admin name] -u twadmin -h [SQL server resource to store the DB in]
For this example, the command is: ./thingworxAzureSingleInstanceSchemaSetup.sh -d thingworx -l sqlTestAdmin -u twadmin -h testing-sql-server.database.windows.net |
◦ Windows:
.\thingworxAzureSingleInstanceSchemaSetup.ps1 -d thingworx -l [SQL server (logical server) admin name] -u twadmin -h [SQL server resource to store the DB in]
In this example, the command is: .\thingworxAzureSingleInstanceSchemaSetup.ps1 -d thingworx -l sqlTestAdmin -u twadmin -h testing-sql-server.database.windows.net |
• -l is the SQL Server login user and -u is the ThingWorx database user that will be created and used for ThingWorx. • When prompted for a password, enter the password for the SQL server (logical server) admin’s password • To view the details of your ThingWorx database, use following Azure CLI command: - az sql db show --resource-group [resource group name] --server [logical server name] --name Thingworx |
Executing the Database Cleanup Script for Single Instance
Run the following script to drop the ThingWorx database:
• Linux:
./thingworxAzureSingleInstanceCleanup.sh -n thingworx -g [resource group name] -h [SQL server (logical server) name]
• Windows:
.\thingworxAzureSingleInstanceCleanup.ps1 -n thingworx -g [resource group name]-h [SQL server (logical server) name]
For next steps, go to Configuring ThingWorx with Azure SQL.