Create Security Entities in ThingWorx for a Connector and for Remote Access
When you are installing an eMessage Connector, you need to create security entities in ThingWorx Composer for the Connector. These entities are
1. A non-administrative ThingWorx User. For example, eMessageConnectorUser.
2. A ThingWorx User Group. For example, eMessageConnectorUserGroup. Add the non-admin user to this group.
3. A ThingWorx Organization, to which you add the User Group you created in Step 2. For example, the organization could be named eMessageConnectorOrg and you would add to it the eMessageConnectorUserGroup.
4. An application key that is assigned to the non-administrator user you created in Step 1. The Connector uses this application key when connecting to the ThingWorx Platform.
To set up security for remote access, you also need to create at least one each of the first three entities:
• Non-admin User
• User Group and add non-admin User(s) to the group.
• Organization and add the User Group(s) to the organization.
For example, you might create a non-admin user called raUser, a user group called raGroup, and an organization called raOrg. Using services, you can grant permissions and visibility to an organization or user group for remote access. Remote access permissions and visibility are automatically assigned by the services to specified a Thing or Thing Template. Once you have created the security entities, refer to Security for Remote Sessions for details about these services.
The following sections explain how to create these entities using ThingWorx Composer.
Creating Security Entities for a Connector
The services that grant visibility and permissions to a Connector require that you specify a User, User Group, and Organization. You need to create these entities, using ThingWorx Composer:
1. Log in to ThingWorx Composer, and use the navigation panel on the left to expand Security and then select Users.
2. In the Users page, select New, and enter the following information for the Connector User:
◦ Name — For example, eMessageConnectorUser.
◦ Description — For example, user account for the Connector.
◦ Make sure the check box next to Enabled is checked.
3. Click Save.
4. From the navigation panel, click  to go back to the Browse list, and under Security, select User Groups.
to go back to the Browse list, and under Security, select User Groups.5. In the User Groups page, click New.
6. In the General Information page, type a Name for the group. For example, eMessageConnectorUserGroup, and click Save.
7. Click Manage Members, and under Available Members on the Manage Members page, select the check box next to the name of the user you just created. Using the example, you would select the eMessageConnectorUser. Then, click the right-facing arrow to add this user to the eMessageConnectorUserGroup. The end result should look similar to the following screen:
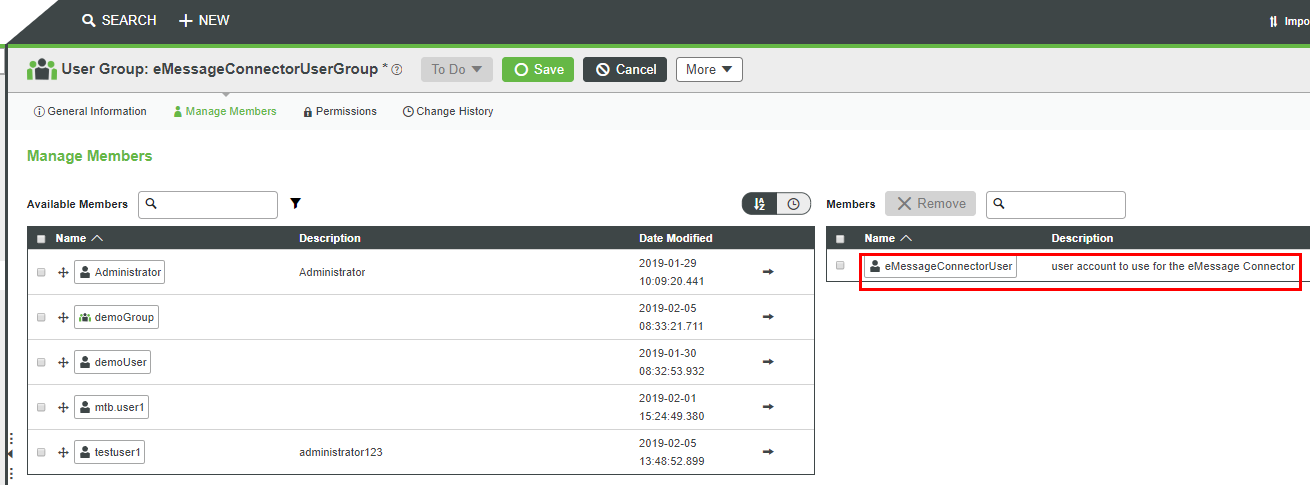
8. Click Save.
9. To create a user group for remote sessions, repeat Steps 5 through 8 for that user group and assign the users who should be able to perform remote sessions to that group.
10. From the navigation panel, click  to go back to the Browse list, and under Security, select Organizations.
to go back to the Browse list, and under Security, select Organizations.11. In the Organizations page, click New.
12. In the General Information page, type a Name for the organization. For example, eMessageConnectorOrg, and click Save.
13. Click Organization and in the Organization page, click Unit1.
14. In the Unit 1 page, go to the Members field and click the plus icon to display a list of user groups and users that you can add to the organization. For example:
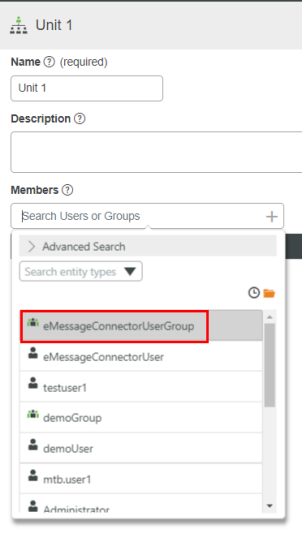
15. Select the user group that you created for the Connector. In the example above, it is the eMessageConnectorUserGroup. The list of Members displays your addition.
16. To save, click the  icon. The Unit screen closes and returns you to the Organization page.
icon. The Unit screen closes and returns you to the Organization page.17. To create a separate organization for remote sessions user groups, repeat Steps 11 through 16 now.
Now that you have created the Security Entities for the Connector, continue to the next section to create an application key for the Connector.
Configuring an Application Key
Follow these steps to configure an application key and a Thing for an Axeda eMessage asset in ThingWorx Composer:
1. Select > , and click New.
2. Enter the appropriate values:
a. Name — A name for the application key. For example, eMsgappkey23
b. User Name Reference — The name of a user account to associate with the application key. You can select from a list by clicking the plus icon in this field. Here is what appears:
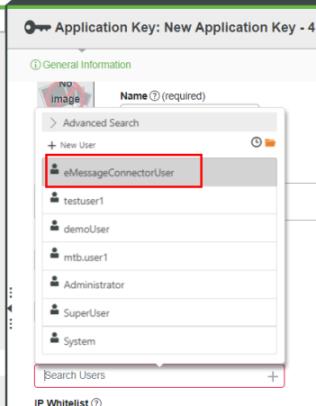
In the example above, the eMessageConnectorUser is selected. The permissions and visibility assigned to this user account affect what the eMessage Connector can do on the platform. For example, write new values to remote properties.
c. Expiration Date — A date in the future for the application key to expire, based on your company policies. The default value is one day. Use the calendar widget to select a date and the time widget to select a time.
3. Click Save.
Now that you have an application key for your eMessage Connector, you can create a Thing for an Axeda asset in ThingWorx Composer.
Creating a Thing for an Axeda Asset in ThingWorx
To create a Thing for an Axeda Agent asset in ThingWorx, follow these steps:
1. Create a new Thing in ThingWorx for the asset that is running the Axeda Agent:
2. Choose one of the following Thing Templates or a Thing Template that implements any of the following Thing Templates:
◦ AxedaEMessageGatewayModel — Use for assets running the Axeda Gateway Agent.
◦ AxedaManagedModel — Use for devices that the Axeda Gateway is managing.
◦ AxedaStandaloneModel — Use for assets that are running the Axeda Connector Agent.
3. If you want to use ThingWorx Software Content Management (SCM), assign the TW.RSM.SFW.ThingShape.UpdateableWithInstructions and the PTC.Resource.Asset.SCMResourceThingShape to your Thing.
The Thing Shape needed to use ThingWorx Remote Access are already applied to each Axeda Thing by the AxedaBaseModel Thing Template. You do not need to apply it. |
4. Click Save.
You are ready to install and configure your Connector. Continue to .Installing the eMessage Connector.