Send Query
Use the Send Query action to process a natural language query and retrieve structured, actionable data as its result.
Prerequisite
Before using the Send Query action in your workflow, ensure that you create your Dialogflow agent.
Complete the following steps to use the Send Query action in your workflow:
1. Drag the Send Query action under Dialogflow to the canvas, place the pointer on the action, and then click  or double-click the action. The Send Query window opens.
2. Edit the Label, if needed. By default, the label name is the same as the action name.
3. To add a Dialogflow connector type, refer to Supported Dialogflow Connector Type.
If you previously added a connector type, select the appropriate Connector Type, and under Connector Name, select the connector.
4. Click TEST to validate the connector.
5. Click MAP CONNECTOR to execute the action using a connector that is different from the one that you are using to populate the input fields. In the Runtime Connector field, provide a valid Dialogflow connector name. For more information about MAP CONNECTOR, see Using Map Connector.
6. In the Agent list, select an agent from your Dialogflow account.
7. In the Session ID field, provide the ID of the session that this query is sent to. This is a string token (up to 36 symbols long) that identifies the client and manages the session parameters, including contexts per client.
8. In the Query Input list, select the correct option, and perform its respective task:
Query Input | Task |
|---|---|
Text | a. In the Text field, provide the natural language text to be processed in the UTF-8 format. b. In the Language code list, select the correct language. |
Audio | a. In the Input Audio field, map the output of a previous action to provide the natural language speech audio to be processed in base64 format. A single request can contain up to 1 minute of speech audio data. b. Select the Audio Encoding type. c. In the Sample Rate field, provide the sample rate (in Hertz) of the audio. d. In the Language code list, select the correct language. e. In the Enable Word Info list, select true if you want information about the recognized speech words; otherwise, select false. f. In the Model field, provide the speech model that must be selected for the given request. If a model is not specified, a model is auto-selected based on the input. g. In the Model Variant list, select the variant of the speech model that must be used. |
9. In the Time Zone field, provide the correct time zone, such as America/New York, Europe/Paris, and so on.
10. Provide your Latitude and Longitude.
11. Under the Session Entity Types section, provide additional session entity types to replace or extend developer entity types. The entity synonyms apply to all languages and persist for this query session.
Select Form to provide inputs for individual input fields listed in the form, or select Assign JSON to specify a single JSON with all required inputs.
If you chose Form |
|---|
a. Under the Session Entity Types section, click Add. b. In the Name field, provide the unique identifier of this session entity type in the projects/<Project ID>/agent/sessions/<Session ID>/entityTypes/<Entity type display name> format, where <Entity type display name> could be the display name of an existing entity type in the same agent that will be overridden or supplemented, or a new entity type valid for this session only. c. In the Entity Override Mode list, select one of the following: ◦ Override—Session entity overrides the custom entity type definition. ◦ Supplement—Session entity supplements the custom entity type definition. d. Under Entities, click Add to add a collection of entities to be associated with the entity type: a. In the Value field, provide the value of the entry. b. In the Synonym field, provide a synonym for the specified value. Click Add to add multiple synonyms. Click c. Click Add to add multiple value-synonyms pairs. Click d. Click Add to add multiple session entity types. Click |
OR
If you chose Assign JSON |
|---|
In the Session Entity Types field, provide all required inputs in the [{"name":"string", "entityOverrideMode":"string", "entities":[{"value":"string", "synonyms":[{}]}]}] format. |
12. Under the Contexts section, provide the contexts that must be activated before executing the query.
Select Form to provide inputs for individual input fields listed in the form, or select Assign JSON to specify a single JSON with all required inputs.
If you chose Form |
|---|
a. Under the Contexts section, click Add. b. In the Name field, provide the context name in the projects/<Project ID>/agent/sessions/<Session ID>/contexts/<Context ID> or projects/<Project ID>/agent/environments/<Environment ID>/users/<User ID>/sessions/<Session ID>/contexts/<Context ID> format. c. In the Lifespan Count field, provide the number of conversational query requests after which the context expires. The default is 0. If set to 0, the context expires immediately. If there are no matching queries, contexts expire automatically after 20 minutes. Click Add to add multiple contexts. Click |
OR
If you chose Assign JSON |
|---|
In the Contexts field, provide all required inputs in the [{"name":"string", "lifespanCount":0}] format. |
13. In the Reset Contexts field, select true to delete all contexts in the current session before new contexts are set; otherwise, select false.
14. In the Analyze Query Text Sentiment list, select true to perform sentiment analysis on the query text; otherwise, select false.
15. Click Done.
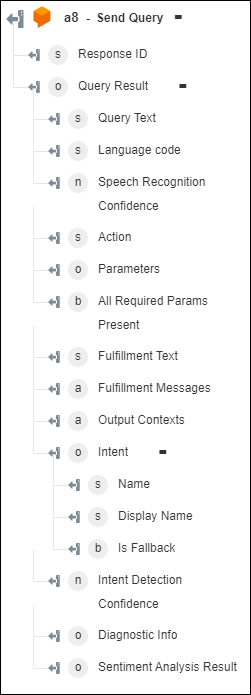
Output schema
