Create an Application Key for EMS
When connecting to a ThingWorx Platform, the EMS needs to present an application key for authentication. This application key needs to be associated with a non-admin user. The sections below explain how to create the non-admin user for an EMS and how to configure the application key.
|
|
To be able to create a non-admin user or an application key, you must log in as an Administrator of ThingWorx Platform or as a member of a user group that has permissions and visibility to these security entities.
|
Creating a Non-Admin User in ThingWorx Composer
Follow these steps to create a non-admin user for the EMS application key:
1. Log in to ThingWorx Composer.
2. In the left navigation panel, select > > . A list of users currently defined in the platform appears in the right pane.
3. In the bar just above the list, click New.
4. In the General Information page, enter a name for the EMS user account, for example, resumers, and provide a password.
5. If desired, enter a Description for this user.
6. Check to make sure that the Enabled check box is selected, and click Save.
Follow these steps to configure an application key and a Thing for the EMS asset in ThingWorx Composer:
1. From > , and click New.
2. Enter the appropriate values:
a. Name — A unique identifier for the application key. For example, wsemsappkey23
b. User Name Reference — The name of a user account to associate with the application key. You can select from a list by clicking the plus icon in this field. A list from which you can select a user for the key appears:
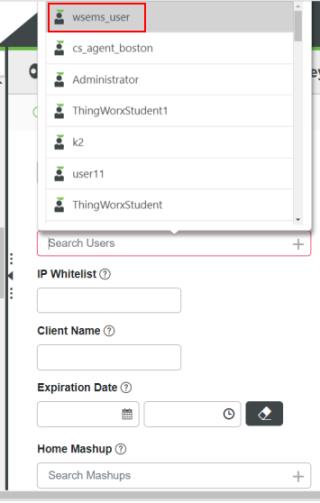
In the example above, the wsems_user is selected. The permissions and visibility assigned to this user account affect what the EMS can do on the platform. For example, write new values to remote properties.
c. Expiration Date — A date in the future for the application key to expire, based on your company policies. The default value is one day. Use the calendar widget to select a date and the time widget to select a time.
3. Click Save.
4. Create a Thing in ThingWorx for the asset that is running the EMS. Depending on the features you want to use, choose one of the following Thing Templates or a Thing Template that implements any of the following Thing Templates:
◦ RemoteThingWithTunnelsAndFileTransfer — Use for assets for which you want file transfers, SCM, and remote access capabilities.
◦ RemoteThingWithFileTransfer — Use for assets for which you want file transfers (upload and download) and/or SCM capabilities, but not remote access capabilities.
◦ RemoteThingWithTunnels — Use for assets for which you want to use remote access capabilities but not file transfers or SCM.
5. Once you have an application key, follow the instructions for configuring your EMS with an application key in Configuring the EMS.