Create a New Task from Scratch for ThingWorx Navigate
Creating a custom task requires the prerequisite knowledge mentioned in the topic
Before You Customize.
Building Blocks of a Task
Your task is made up of several basic parts:
• Mashup—The user interface of the task.
• ThingWorx Navigate Services—Java or Java script that performs the actions. The services are on ptc-windchill-OData-connector.
• Windchill—The source of your data.
• Windchill REST Services, also known as WRS.
|
|
• ThingWorx Navigate 8.5 introduces reusable components, which are new elements available for building ThingWorx mashups. These components are released as BETA with limited documentation and are available for testing. It is not recommended to use them in a production environment.
• Earlier versions of ThingWorx Navigate used RestEasy services to access data from Windchill. RestEasy services are legacy services and will be deprecated in future releases. This example uses OData-based Windchill Rest Services (WRS) and you are recommended to use the same. For information on how to use WRS and to how add custom services, please refer the customization section of your Windchill installation.
|
Overview
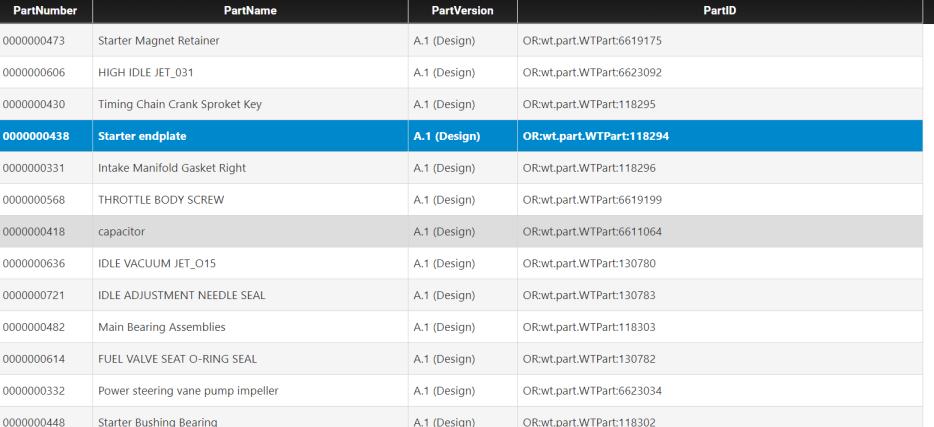
We’ll use an example to show how to combine the building blocks of a task into a working mashup. This example displays a list of Windchill parts and their attributes. Here’s how it will look when we’re done:
It’s helpful to plan the functionality and layout of your task before you start. Then you’ll know how the data will be presented in the UI, the panels you’ll need for presenting this data, and the services that will be used with the panels.
Many end points such as
getPart (/ProdMgmt/Parts GET) and
createPartinParts (/ProdMgmt/Parts POST) are already available in WRS domains. We will leverage these services in this example. If you need more information on creating your own services, start with the ThingWorx Help topic:
Thing Services. You can also find steps for some commonly used services in the in the Windchill Extension Guide.
Create the mashup in theThingWorx Composer
In the ThingWorx Composer, create the user interface for displaying the data.
1. Create a new mashup.
2. Configure the layout of the mashup to match the image shown in the Introduction.
3. Add the necessary widgets.
Setup an OData Connector instance to talk to the ProdMgmt Service
Once the mashup is designed, you need to provide the source of the information to be displayed.
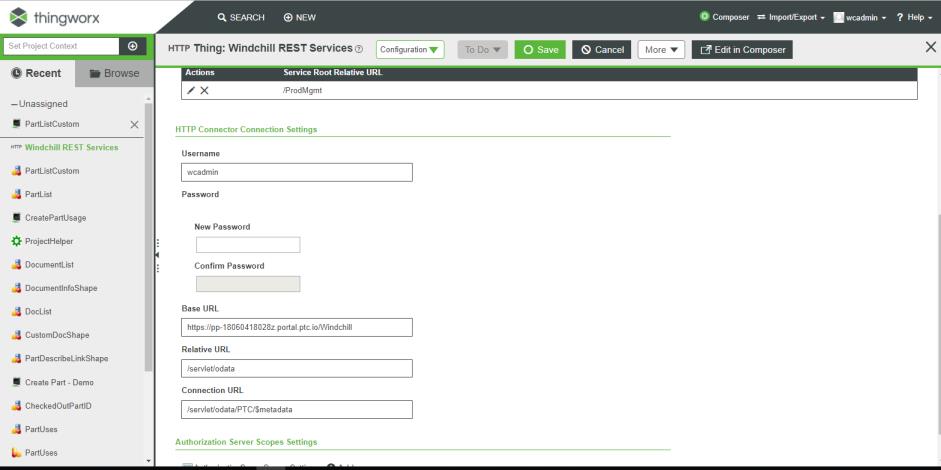
1. Create a new Thing in ThingWorx named Windchill REST Services. Under Base Thing Template select ODataConnector.
2. Go to the
Configuration tab of the Thing and fill the Base URLs, Relative URLs and Connection URL. The Base URL and Relative URL together will form the complete URL to connect to the server. Connection URL is used to check the connectivity between systems. Click
Save.
3. Create the required Data Shape in ThingWorx. A Data Shape is used to describe the data parts of your model. This example displays attributes such as PartNumber, PartName, PartVersion and PartID. In order to represent these attributes, create the data shape PartList and add these field definitions.
Identify the endpoint that provides a list of parts and configure a route service
In this step, we will add the route services to make the mashup work. Before selecting the endpoint in
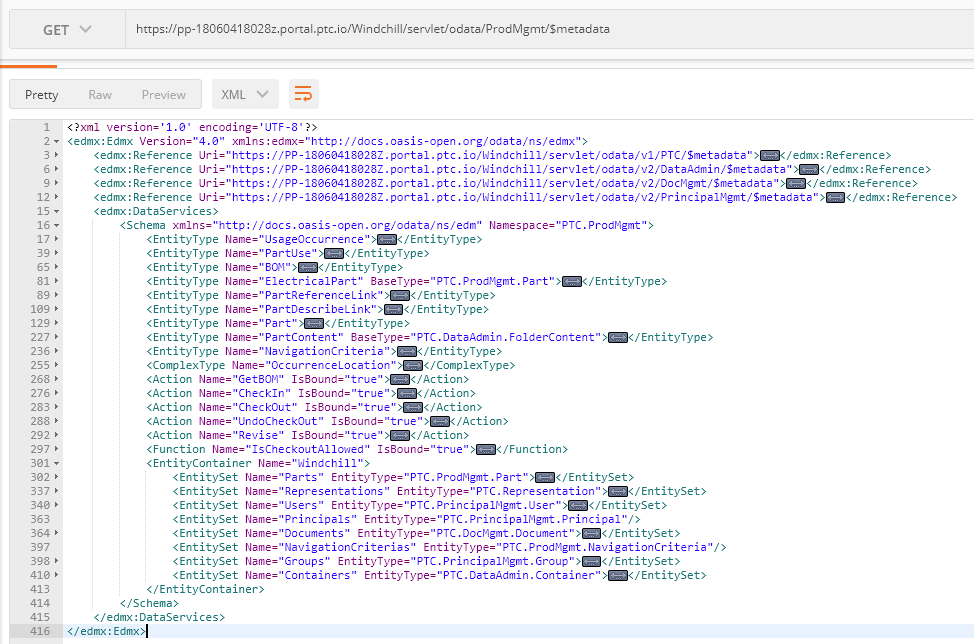
ThingWorx, it is advisable to understand the relationships exposed by the service in Entity data model. Below is a sample of the description of the types, properties, and relationships exposed by the service in the Product Management domain. As shown in the figure, we have entity set
Parts whose entity type is
Part. We can access all the properties of
Parts by accessing this entity set through the path defined in OData services. See the WRS documentation for more details on this.
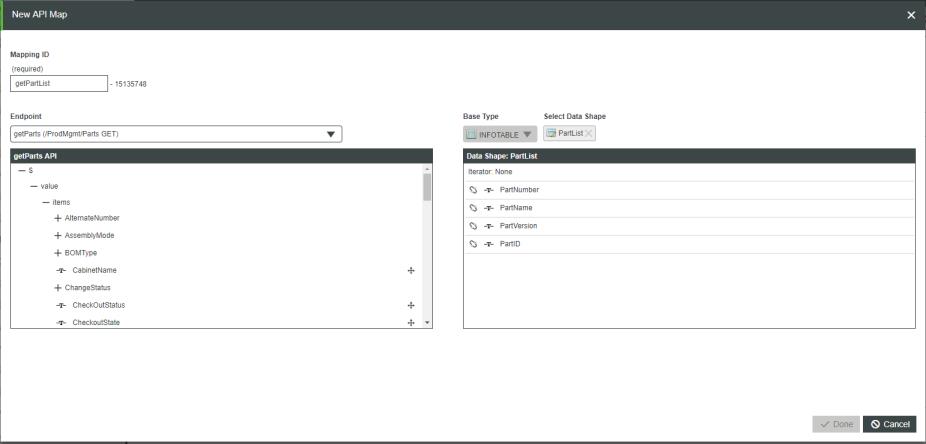
1. Search for endpoint getParts (/ProdMgmt/Parts GET) in the route info. Create a new API map by selecting getParts endpoint.
2. Select the Data Shape PartList to map the attributes that you want to display in the mashup.
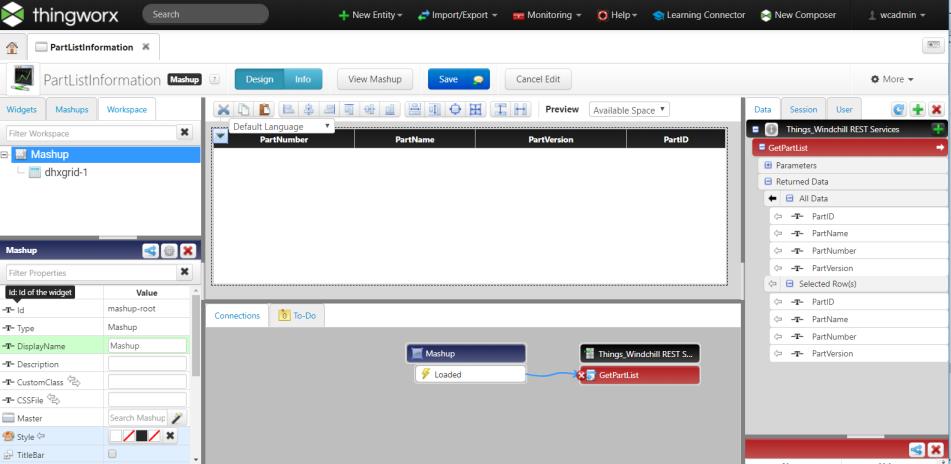
Call the service from the mashup to load the list of parts in the grid
Now that we have created new route services, we need to connect these services to the mashup. In this step, we’ll add the data source and the services that we need to make the mashup work.
1. Go to your mashup and click on the Design tab.
2. Add a new data source by clicking

in the
Data tab.
3. Select the service
getPartList to display the list of parts in the mashup. Select the
Mashup Loaded? checkbox to display the data as soon as it is loaded.
View the new task
1. Click View Mashup. Your new task opens. Congratulations!