To Manage Restricted Projects
To restrict permissions to specific principals to a project hierarchy:
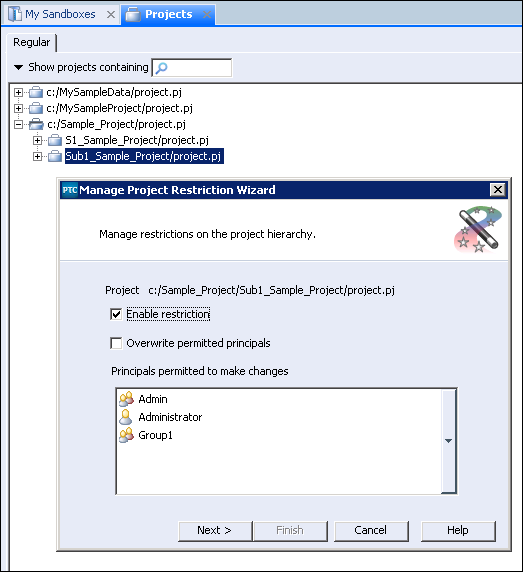
1. In Integrity Lifecycle Manager client, click > . You can also select Manage Restrictions in the right-click menu of a particular project for which you want to manage restrictions.
The Manage Project Restriction Wizard opens.
2. Select Enable restriction.
3. Select the required principals for which you want to allow to modify permissions for the selected project, in the selection box for Principals permitted to make changes.
The principals selected can perform allowed changes to the restricted project.
4. Select Overwrite permitted principals if you want to change the existing list of permitted principals.
5. If you do not want to add any exception to the permitted principals, click Finish.
6. If you want to add any exception to the permitted principals, click Next.
7. Select the required principals in the Exception to permitted principals.
The principals selected are exception to the permitted principals.
8. Click Finish.
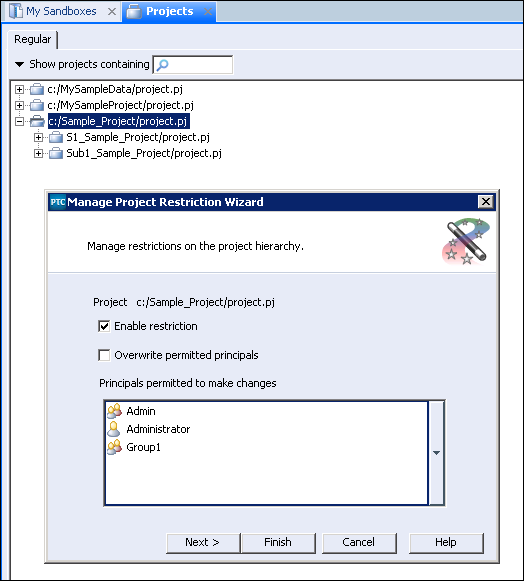
Sample_Project/project.pj is the parent project. It has two subprojects — S1_Sample_Project/project.pj and Sub1_Sample_Project/project.pj. Principals allowed to Sample_Project are:
• Admin
• Administrator
• Group1
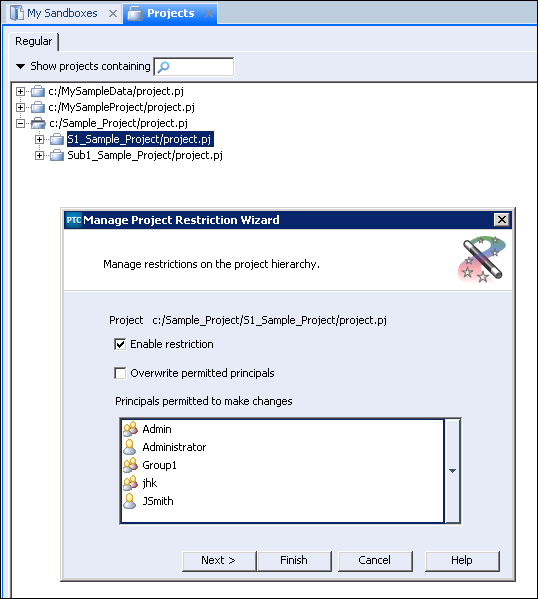
Principals at the S1_Sample_Project subproject are:
• Admin
• Administrator
• Group1
• jhk
• JSmith
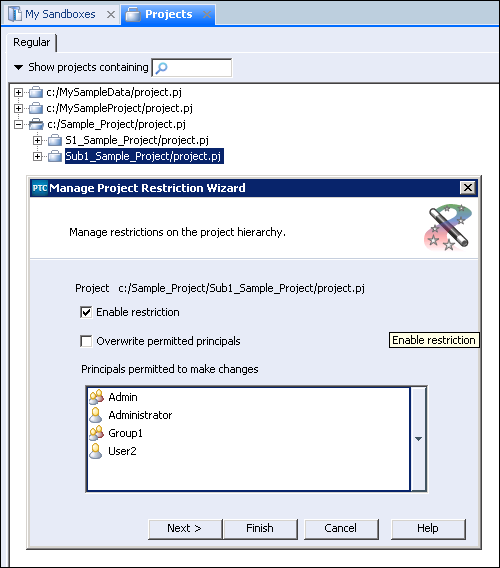
Principals at the Sub1_Sample_Project subproject are:
• Admin
• Administrator
• Group1
• User2
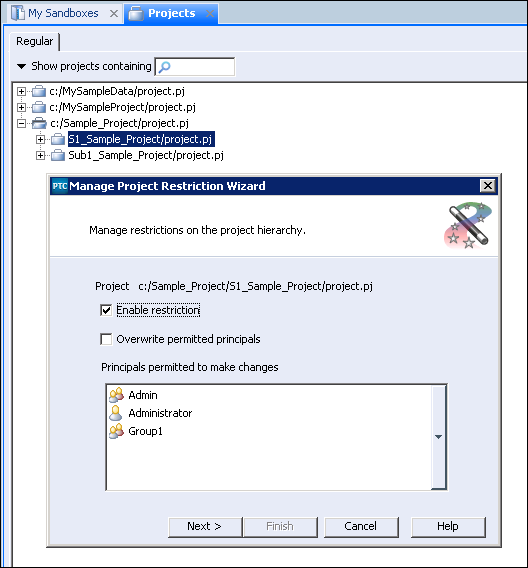
If the Overwrite permitted principals option is selected at the Sample_Project project level, the principals at the S1_Sample_Project and Sub1_Sample_Project subprojects are overwritten by the principals at the Sample_Project parent project.
Principals at the S1_Sample_Project project, after overwriting principals from the Sample_Project project are:
• Admin
• Administrator
• Group1
Principals at the Sub1_Sample_Project project, after overwriting principals from the Sample_Project project are:
• Admin
• Administrator
• Group1
