Creating Capping Surfaces
A capping surface is a plane that slices your model and trims either the top or bottom away. You can only define one capping surface for your model.
You can use the capping surface to get a better understanding of the analysis results inside a model.
1. Click
View >
 New
New. The
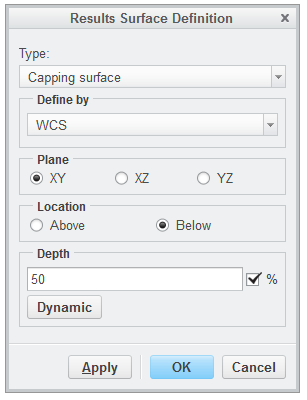
Results Surface Definition dialog box opens.
2. In the Type box, select Capping surface.
3. Set Location to Below and click Apply.
4. Click Dynamic.
5. Click in Window2 and drag the pointer to change the position of the section.
6. Right-click to exit dynamic dragging.
7. Click OK to close the Results Surface Definition dialog box.
 New. The Results Surface Definition dialog box opens.
 New. The Results Surface Definition dialog box opens.
 New. The Results Surface Definition dialog box opens.