Crankshaft Assembly Drawing
1. Click
 New
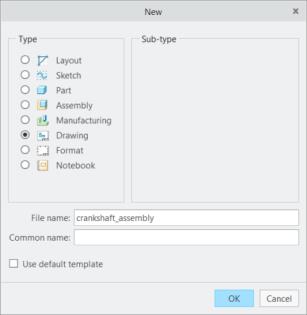
New. The
New dialog box opens.
a. Under Type click Drawing.
b. In the Name box, type crankshaft_assembly.
c. Clear the Use default template check box.
d. Click OK. The New Drawing dialog box opens.
2. In the New Drawing dialog box, do the following:
a. Under Default Model, do the following:
a. Click Browse. The Open dialog box opens.
b. Select crankshaft_assembly.asm.
c. Click Open.
b. Under Specify Template, select Empty with format.
c. Under Format, do the following:
a. Click Browse. The Open dialog box opens.
b. Click Working Directory under Common Folders.
c. Select a2_assembly.frm and click Open.
d. Click OK.
3. In the graphics window, right-click, and click
 General View
. The
Select Combined State dialog box opens.
4. Ensure that No Combined State is selected and click OK.
5. Click in the graphics window to define the center point of the new drawing view. The Drawing View dialog box opens.
6. In the Drawing View dialog box, do the following:
a. Under View Type category, do the following:
a. Under View orientation, select EXPLODE from the Model view names list box.
b. Click Apply.
b. Click View States under Categories and do the following:
a. Under Explode view, click Explode components in view.
b. Select EXPLODED from the Assembly explode state list.
c. Click Apply.
c. Click Scale under Categories and do the following:
a. Click Custom scale, edit the value to 0.6, and press ENTER.
b. Click OK.
The assembly appears in the drawing sheet as shown in the following figure.
7. On the
Table tab, click
 Table from File
 from the
Table group. The
Open dialog box opens.
8. Select assembly_bom.tbl and click Open.
9. Place the table on the drawing sheet.
10. On the
Table tab, click the arrow next to
 Create Balloons
, and click
Create Balloons - By Component, from the
Balloons group. The
Select menu opens.
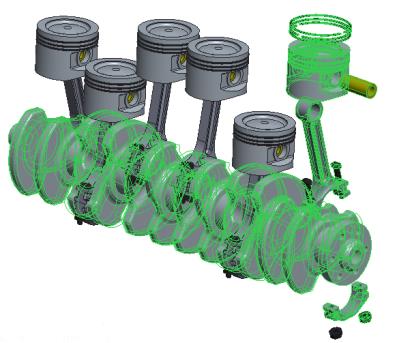
11. Press CTRL and select the parts as shown in the following figure.
12. Click OK.
Congratulations! You have completed this exercise.
From the Quick Access Toolbar, click
 Save
Save and then click
 Close
Close for all active windows.
 New. The New dialog box opens.
 New. The New dialog box opens.
 New. The New dialog box opens.
 General View. The Select Combined State dialog box opens.
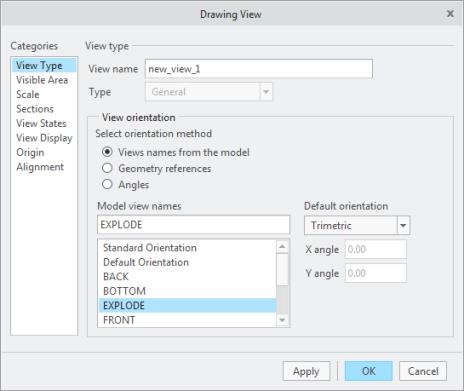
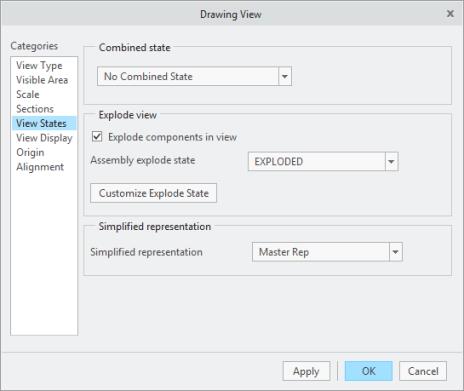
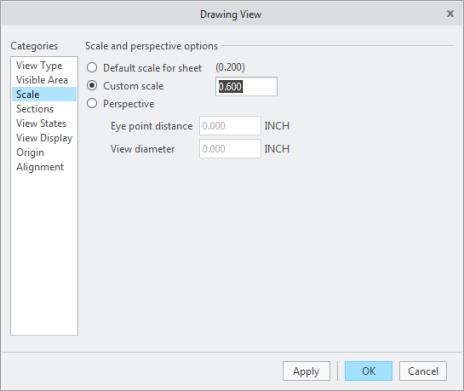
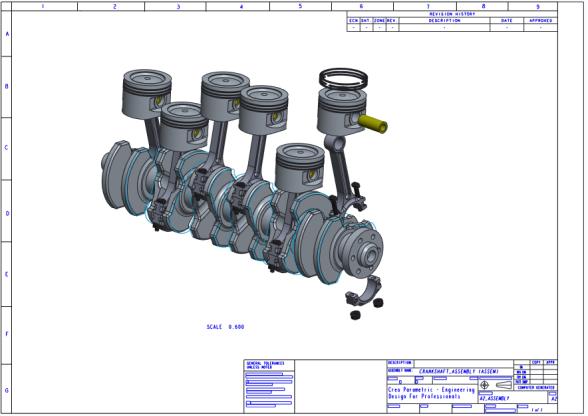
 Table from File from the Table group. The Open dialog box opens.
 Create Balloons, and click Create Balloons - By Component, from the Balloons group. The Select menu opens.

 Save and then click
  Close for all active windows.