Creating and Patterning Holes
1. On the
Model tab, click
 Hole
Hole from the
Engineering group. The
Hole tab opens.
2. Click the Placement tab and do the following:
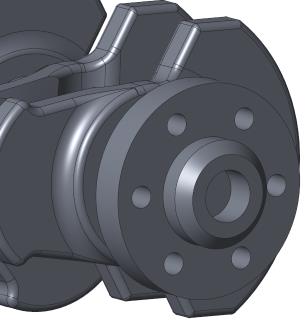
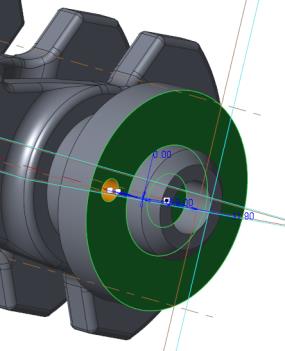
a. Click in the Placement box and select the surface as shown in the following figure.
b. Click in the Offset References box, press CTRL, and select datum planes TOP and FRONT.
c. Edit the offset reference dimensions for datum plane TOP to 0 and for datum plane FRONT to 31.9.
3. On the Hole tab, edit the hole diameter value to 9 and press ENTER.
4. Click the arrow next to

and click

.
5. Click

.
6. In the Model Tree, right-click Hole 1, and click
 Pattern
. The
Pattern tab opens.
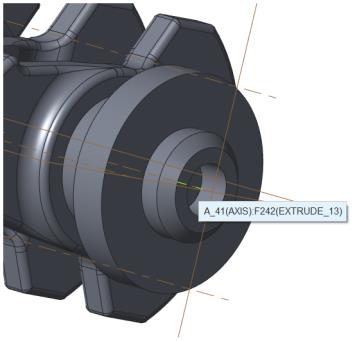
7. Click the arrow next to Dimension and click Axis.
8. Select Axis A_41 as shown in the following figure.
9. Edit the number of members to 6 and press ENTER.
10. Edit the angular dimension to 60 and press ENTER.
11. Click
.
Congratulations! You have completed this exercise.
On the Quick Access toolbar, click
 Save
Save and then click
 Close
Close for all active windows.