Creating Rough and Rest Rough Sequences Using Multiple Orientations
Watch the
video that shows you how to work with Rough and Rest Rough parameters in multiple orientations. This tutorial is a step-by-step guide on how to create HSM Rough and Rest Rough sequences in multiple orientations.
Creating a HSM Rough Sequence Using the Mill Window 1
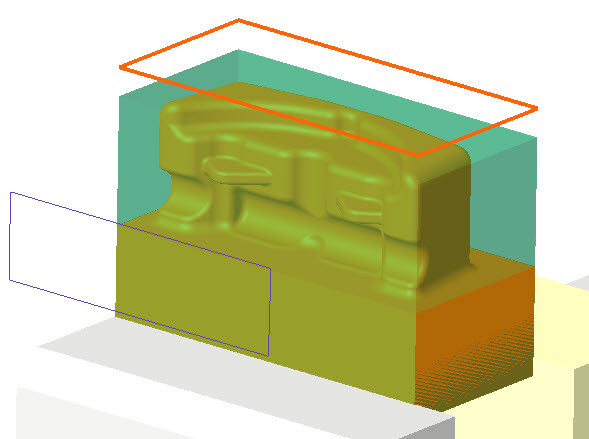
1. Open the FUEL_TANK_P30.ASM assembly with a default coordinate system NC. The default retract plane for operation OP010 is R.
2. On the Model Tree, click
1ST_ORIENTATION_ROUGH. The
 HSM Rough
 tab opens.
3. Click

and select
SF16_R2_ISO50 tool.
4. On the References tab, click the Mill window collector and on the Model Tree, select Mill Window 1.
5. On the Parameters tab, the parameters are populated automatically, based on the tool diameter. To optimize the toolpath, set values as shown for the following parameters:
◦ FEED_UNITS = MMPM
◦ STEP_OVER = 12
◦ ROUGH_STOCK_ALLOW = 1
◦ MAX_STEP_DEPTH = 2
◦ SCAN_TYPE = CONSTANT_LOAD
◦ CUT_TYPE = CLIMB
6. Click the arrow next to

and then click

. The
Material Removal tab opens.
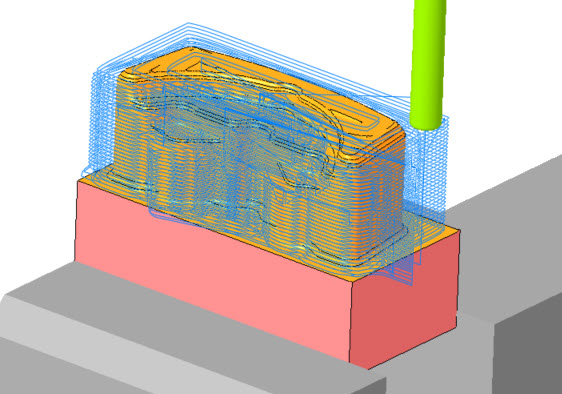
7. Click
to open the
Play Simulation dialog box.
8. Click

to play simulation.
9. On the Material Removal tab, click Stock Model > Save STL to save the processed stock. The Save as STL dialog box opens.
10. In the File Name box, type 1st_rough.stl and click Save. This file will be used for the toolpath calculation of subsequent rest roughing sequence.
11. On the Material Removal tab, click Stock Model > Save In-Process Stock to open Save current stock dialog box.
12. In the File Name box, type 1st_rough.bin and click Save. This bin file will be used in the subsequent rest roughing material removal simulation.
13. On the
Material Removal tab, click

and then on the
HSM Rough tab, click
OK to complete the sequence.
Creating a HSM Rest Rough Sequence Using the Mill Window 2
1. On the Model Tree, click
2ND_ORIENTATION_REST_ROUGH. The
HSM Rest Rough tab opens.
2. Click
and select the
SF12_R2_ISO50 tool.
3. On the
References tab, in the
Rough Stock File collector, click

to import the rough stock file. The
Open dialog box opens.
4. Select 1st_rough.stl and click Open.
5. Click the coordinate system collector next to

and on the Model Tree, select
ACS1 to change the default coordinate system.
6. On the Clearance tab, click the Reference collector and select the ADTM3 plane on the Model Tree.
7. On the References tab, click the Mill window collector and on the Model Tree, select Mill Window 2.
8. On the
Parameters tab, click

. The
Select Step dialog box opens. The
1ST_ORIENTATION_ROUGH sequence is selected.
9. Click OK to copy the parameters from the previous sequence.
10. Set values as shown for the following parameters:
◦ STEP_OVER = 8
◦ MAX_STEP_DEPTH = 1
11. Click the arrow next to
and then click
. The
Material Removal tab opens.
12. On the Material Removal tab, click Stock Model > Open In-Process Stock. The Load stock dialog box opens.
13. Select 1st_rough.bin and click Open.
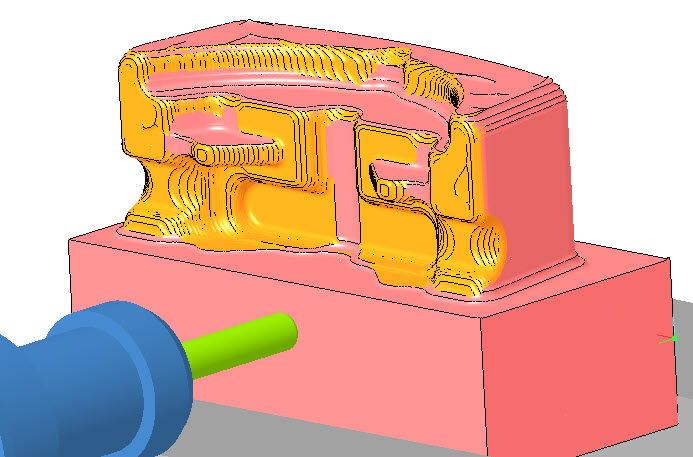
14. Click
to open the
Play Simulation dialog box.
15. Click
to play simulation.
16. On the
Material Removal tab, click
and then on the
HSM Rest Rough tab, click
OK to complete the sequence.