To Insert a Fitting
You can insert a fitting at a pipe end, at a fitting type corner of a pipeline, and along a straight segment of a pipeline. When inserting a fitting, keep in mind the following:
• You must place fittings using special techniques. You can assemble fittings as components and route up to them as for other equipment. However, fitting-specific functionality will not apply.
• Once you have inserted a fitting in a pipeline, it becomes associated with this pipeline. You can use only two of a fitting’s entry ports to insert the fitting in a pipeline. If there are more than two entry ports (as in a tee fitting, for example), you must twist the fitting to the desired orientation and then route a pipe segment to the third entry port.
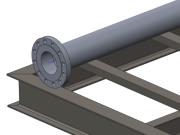
Pipe End Fitting |
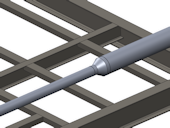
Straight Break |
1. Click
 Insert Fitting
.
2. Using the INSERT TYPE menu, do one of the following:
◦ To insert a fitting at a pipe end, click End. Select a pipe end at which to attach the fitting, an entry port on the fitting from which you want the pipe to come, and a point on the fitting to align with the pipe end.
◦ To insert a fitting at a corner, click Corner. Select a fitting-type pipe corner, and go to Step 5.
◦ To insert a fitting that breaks the pipeline at a point on a straight segment of pipe, such as a valve, click Straight Brk. Select or create a point on a pipe segment.
This changes the number of solids required for the pipeline.
◦ To insert a fitting that does not break the pipe at a point on a straight segment of pipe, such as a support, click StraightCont. Select or create a point on a pipe segment.
3. Select a fitting from the Open dialog box. The CHOOSE PNT menu appears.
4. Select or create a point on the pipe centerline.
5. The fitting appears in the Component Window. You are prompted to select a point.
6. Select the point and the system places the fitting. Adjust the orientation using commands in the REDEF FITT menu.
7. When you have placed the fitting properly, click Done.


 Insert Fitting.