Optimizing the Design
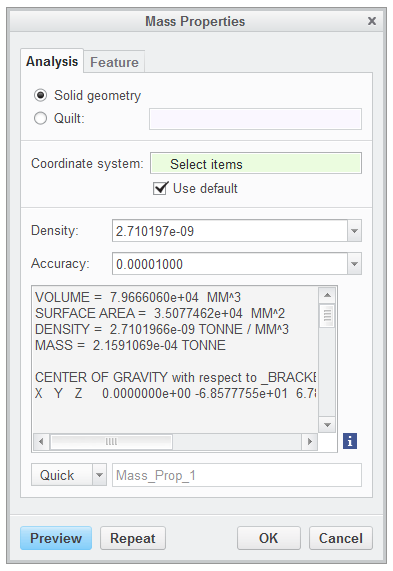
1. Click Analysis > Mass Properties. The Mass Properties dialog box opens.
2. Click Preview.
|
|
 Note the total mass of the model as displayed in the Mass Properties dialog box. |
3. Click OK in the Mass Properties dialog box.
4. In the Model Tree expand
 Group LOCAL_GROUP_2
.
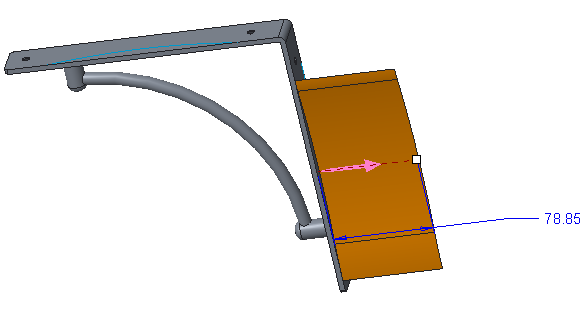
5. Select Sketch 2.
6. Click
Model >
 Extrude
 to open the
Extrude tab and perform the following actions:
a. Click
 Extrude as solid
.
b. Click

to change depth direction of the extrude.
c. Click
 Remove Material
.
d. In the
Options tab change the depth option from
 Blind
Blind to
 To Next
.
e. Click

to apply and save any changes you have made in the Extrude tool.
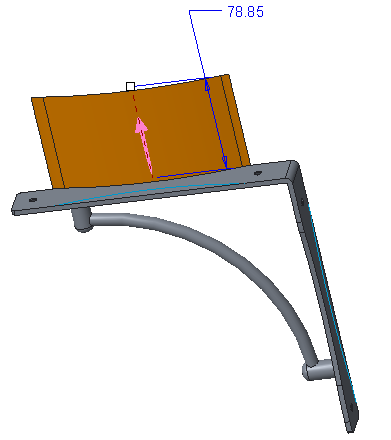
7. In the Model Tree select Sketch 3.
8. Click
Model >
 Extrude
 to open the
Extrude tab and perform the following actions:
a. Click
 Extrude as solid
.
b. Click

to change depth direction of extrude to other side of sketch.
c. Click
 Remove Material
.
d. In the
Options tab change the depth option from
 Blind
Blind to
 To Next
.
e. Click

to apply and save any changes you have made in the Extrude tool.
9. Select Extrude 4 and 5 in the Model Tree. Press CTRL for multiple selections.
10. Click
Model >
 Mirror
. The
Mirror tab opens.
11. Select
 RIGHT
RIGHT as the mirror reference.
12. Click

to apply and save any changes you have made in the Mirror tool.
13. In the
Model Tree expand
 Sweep 1
.
14. Click
Section 1, right-click, and select

from the shortcut menu.
15. Change the diameter from 10 to 13.5.
16. Click
 Regenerate
 in the Quick Access Toolbar.
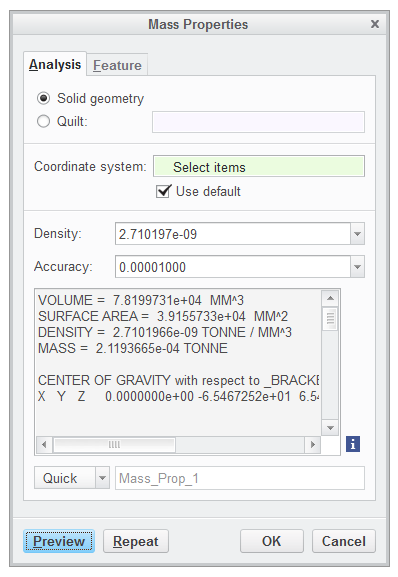
17. Click Analysis > Mass Properties. The Mass Properties dialog box opens.
18. Click Preview. Notice that the total mass of the model has increased.
19. Click OK.
 Group LOCAL_GROUP_2.
 Extrude to open the Extrude tab and perform the following actions:
 Extrude as solid.
 to change depth direction of the extrude.
 Remove Material.
 Blind to
  To Next.
 to apply and save any changes you have made in the Extrude tool.
 Extrude to open the Extrude tab and perform the following actions:
 Extrude as solid.
 to change depth direction of extrude to other side of sketch.
 Remove Material.
 Blind to
  To Next.
 to apply and save any changes you have made in the Extrude tool.
 Mirror. The Mirror tab opens.
 RIGHT as the mirror reference.
 to apply and save any changes you have made in the Mirror tool.
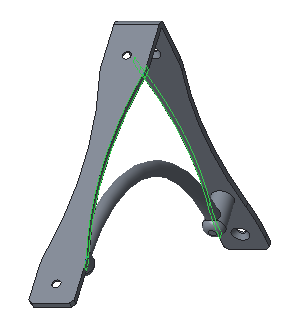
 Sweep 1.
 from the shortcut menu.
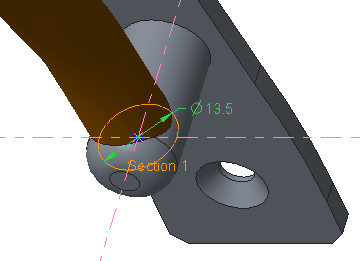
 Regenerate in the Quick Access Toolbar.