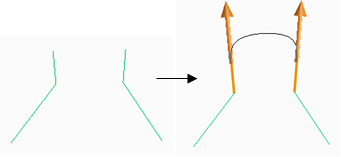
You can create a bridge curve between two 3D curves, in a new part or an existing empty or wire part.
To create a bridge curve between 3D curves,
1. Click 3D Geometry and then, in the 3D Curve group, click More.
2. Click 3D Bridge Curve. The Bridge Curve dialog box opens.
3. Select the first 3D curve in the viewport. By default, Creo Elements Direct/Modeling selects an existing empty part or a wire part for the bridge curve. You can also type a new part name in the Part box to create a new part for the bridge curve.
Set the following for the first 3D curve:
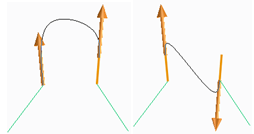
◦ Flip Dir1: Flip (invert) the direction of the 3D dragger (polestar) on the first 3D curve to change the orientation of the bridge curve.
Creo Elements/Direct Modeling suggests the best direction of the draggers (polestars) to avoid overlap of the bridge curve with the selected 3D curve.
◦ Continuity1
▪ Tangent: Specify the tangential connect condition for the first 3D curve.
▪ Curvature: Specify the curvature continuous connect condition for the first 3D curve.
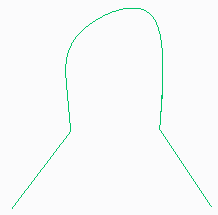
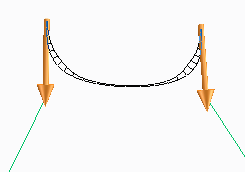
4. Click the Snap Ends check box to connect the bridge curve only to the end points of the selected 3D curves as shown in the following image.
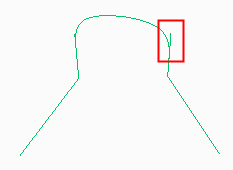
Clear the Snap Ends check box to connect the bridge curve to any point on the selected 3D curves. The bridge curve connects to the first point which you select on the 3D curve as shown in the following image.
5. Select the second 3D curve to create a bridge curve between the two 3D curves.
Set the following for the second 3D curve:
◦ Flip Dir2: Flip (invert) the direction of the 3D dragger (polestar) on the second 3D curve to change the orientation of the bridge curve.
Creo Elements/Direct Modeling suggests the best direction of the draggers (polestars) to avoid overlap of the bridge curve with the selected 3D curve.
◦ Continuity2
▪ Tangent: Specify the tangential connect condition for the second 3D curve.
▪ Curvature: Specify the curvature continuous connect condition for the second 3D curve.
 3D Bridge Curve. The Bridge Curve dialog box opens.
 to complete the operation.